⛄ Happy "Christmas Week" Creative Friends 🎄
To start first pop over to my two previous blog posts for the step-by-step tutorials on how to cut and assemble the Majestic Bow and the Poinsettias you will be need to decorate your Wreath today!
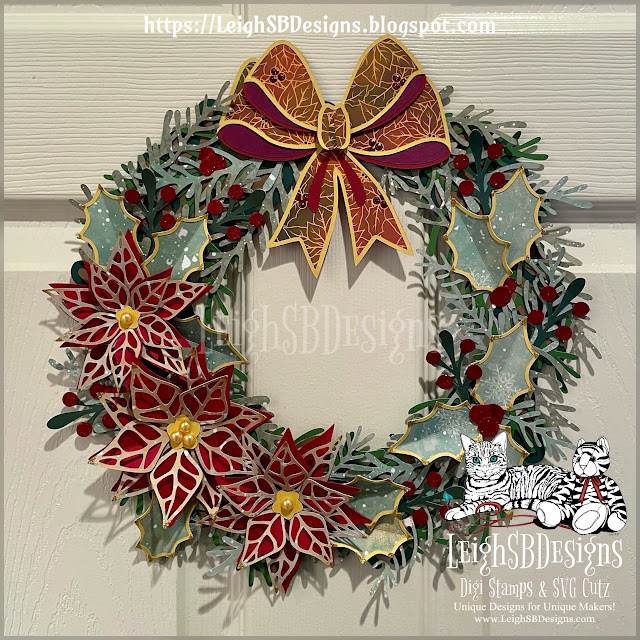
Welcome to Christmas Week Crafting with Leigh, let's make a Christmas Wreath using SVG Cutz sets today! Follow along with my step-by-step tutorial and also use my assembly guide video as reference too!
Let the fun begin😁
Don't forget the 35% off in LeighSBDesigns December Sale with code LeighSBDesignsDec23 ends Dec 31st so pop over and grab today's SVG Cutz you'll need to make your very own festive Christmas Wreath!
⛄ 🎄⛄ 🎄 ⛄ 🎄 ⛄ 🎄 ⛄ 🎄 ⛄ 🎄 ⛄ 🎄 ⛄ 🎄 ⛄ 🎄 ⛄
Christmas Wreath
SVG Cutz Tutorial
with Leigh
You will need these SVG Cutz sets for electronic cutting machines from my new Poinsettia and Holly Christmas Collection and the Spring Wildflowers ~ Make-a-Wreath ~ SVG Cutz Mega Kit to make this wonderful Christmas themed Wreath. You could also make a more New Year themed one which will be perfect for your New Year's Eve celebrations! I will also have a Winter themed Wreath to share with you in January that you can enjoy all winter long so do pop in and get crafty with us in the New Year too!
For the Poinsettias and Greenery you need the Poinsettia and Holly Botanicals and Bow "Colourize It" SVG Cutz set.
You need the Majestic Bow Make-a-Bow "Colourize It" SVG Cutz set and the Poinsettia and Holly Festive Metals Decorative Digi Paper pack to make the Majestic Bow.
Now let's make a Christmas Wreath!
Below are step-by-step instructions as well as a "Christmas Wreath SVG Cutz Tutorial Guide" video you can use as a quick reference while making your own festive Wreaths too!
First some Pro Tips to get you started!
Pre-cut Prep and Resizing
Do a mock-up of the Wreath in your electronic cutting machine's software to decide how big you want your Wreath, Poinsettia and Greenery to be and get an idea of how many of each element you need to cut out. To resize the pieces that layer together, center
all the cut elements on your on-screen cut area and enlarge or reduce
them all together as a group to ensure each piece is resized equally!
Glue
For layer assembly I
recommend using wet glue that's not super grabby to get some extra time to wiggle layers into place.
My
Wreath is just under 12 inches and cut on a 12 inch cutting mat. You can still make a large Wreath even if you have a Letter/A4 machine by resizing your Wreath foundation so that half of it fits your entire cutting mat then cut out both sides separately and glue them together - the joins will be hidden under all the greenery!
Step 1
Resize the Twig Wreath included in the Spring Wildflowers ~ Make-a-Wreath ~ SVG Cutz Mega Kit to fit a 12 inch cut mat and cut it out of brown cardstock. Depending on how thick your cardstock is you can make your twig wreath chunkier by cutting 2 or more pieces and adhering them together.
Step 2
Cut the matching Twig Wreath shadow layer from dark green cardstock.
Step 3
Adhere the Twig Wreath and the shadow layer together to make the Wreath foundation.
Step 4
Cut various left and right facing greenery included in the Poinsettia and Holly Botanicals and Bow "Colourize It" SVG Cutz set from a variety of patterned and solid cardstocks in two sizes.
Step 5
Play around with layering and placement of the Pine Sprigs and adhere them to the Wreath with a dab of glue just on the ends of the stems.
Step 6
Cut and assemble three multi-layered Poinsettia following my Poinsettia Tutorial.
Step 7
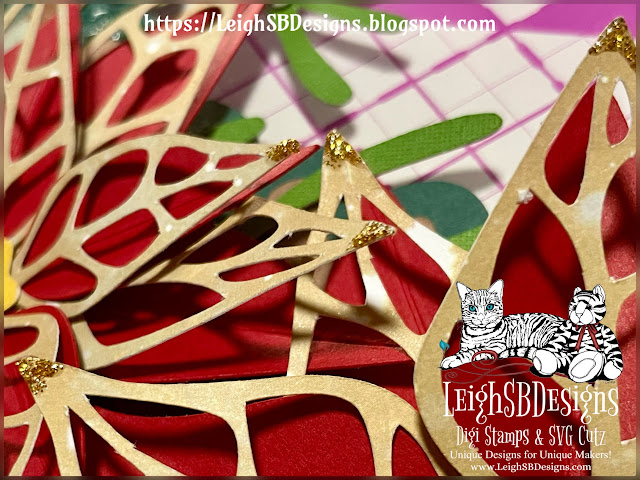
Tip all the fancy Poinsettia petals with gold glitter.
Step 8
Adhere the Poinsettias to the Wreath with a generous dab of glue on the back of each flower.
Step 9
Cut the Holly Leaves from patterned cardstock.
Then cut out all the matching Holly Trim from yellow pearlescent cardstock.


