July CREATivities
The Summer BUZZ Collection
Re-Release Sale-bration thru July 19!
The Gilded Raven Release!
"Rocky Mountain Christmas"
Winter 2025 Collection
Adopt all the Loveleigh Kitties, they're PURRfect for every occasion!
Showing posts with label TECHNIQUES: The Sharpie Domino Queen Technique. Show all posts

Thursday, April 20, 2017

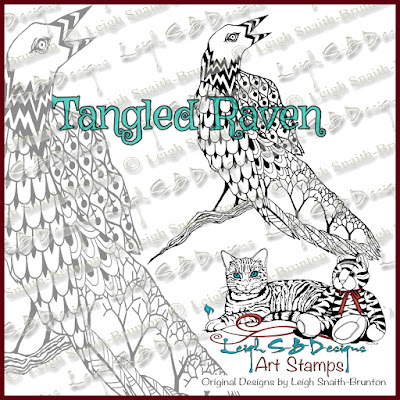
LeighSBDesigns Art Stamps New Release - Tangled Raven!

Howzit Stamping Friends!
 I'm so thrilled everyone is loving my LeighSBDesigns Art Stamps digi releases so far, still plenty more to go so here's release #3!

Smeared Ink fans will recognize this one from the Autumn's Pencil rubber stamp set I designed for them a few years ago and now I'm super excited to bring you the digis๐Ÿ˜ƒ

  Today's release is Tangled Raven!
https://www.etsy.com/listing/525645543/dark-whimsical-tangled-raven-digi-stamp?ref=shop_home_feat_3

 He can be used all year long but of course he's perfect for your Halloween makes and do you know what's just around the corner?  Half-O-Ween in May of course, YAY, we're nearly half way to October LOL๐Ÿ˜‹

 He's now available at my Etsy Boutique at an introductory release price for the next 3 days so dash on over and grab him while he's on sale๐Ÿ˜‹
 
Here's some of my projects featuring him!
Here he is in a collage with lil Miss Oddleigh Flower all coloured with Copics.
monochromatic Copic colouring with 3D fussy cut wings
another view of the layered wings
This is one of my altered game art pendants using Bendominoes, Sharpies and the rubber version of Tangled Raven which will be available in the future.


 If you're just joining us for the first time today here's the scoop!
We're busy celebrating the launch of my LeighSBDesigns Art Stamps line and there's freebies up for grabs so continue reading!

LeighSBDesigns Art Stamps are available for instant download at my Etsy Boutique and I'm currently offering digi stamps for now and will expand my line into rubber too.

My unique collection of whimsical and quirky original designs are based on my drawings and photography! It will constantly be morphing and expanding as inspiration takes me off on new adventures. I see beauty in everything from cute kitties to creepy skulls and my collection of themes, styles and genres will be sure to appeal to everyone.

Join me as I release a new digi image every 3 days until my Etsy Boutique is stocked with all the designs I'm excited to offer you๐Ÿ˜Š You will have 3 days to take advantage of my special intro prices until I release the next new image on the 4th day.

GRAND OPENING FREEBIES!

Receive this freebie Steampunk Easter Egg digi when you join my LeighSBDesigns Facebook Fan Group!

Freebie #1 for joining LeighSBDesigns Facebook Fan Group
 Help me spread my grand opening news and receive this cute freebie Easter Bunny digi! Do me the honour of writing a post on your blogs, tell you readers all about LeighSBDesigns Art Stamps and how they too can receive these freebies! Post links to your blog posts in the LeighSBDesigns FB Fan Group and this Easter Bunny is all yours!

Freebie #2 for blogging my news on your blogs!
Get to know me better and check out my new website at LeighSBDesigns.com which is now my online home.  There you will find links to everything as well as Stamping Galleries for all my current and past design team projects, non-DT projects and also some examples of my Fine Art and more. I've got years of art to upload to the Galleries but I've added quite a bit already.  Pop on over and check it out, I hope you'll enjoy checking everything out๐Ÿ˜‰

http://leighsbdesigns.com/

In case you missed my previous announcement...all my design team blogging is happening over at Velvet Paw Creations so pop on over and follow me there too๐Ÿ˜Š

http://www.velvetpawcreations.com/

See you in my LeighSBDesigns FB Fan Group soon and don't forget to come back on Sunday for my next new release! I hope you'll stay and follow me on my new adventure!
Happy Stamping!
THE SHARPIE DOMINO QUEEN

Monday, November 4, 2013

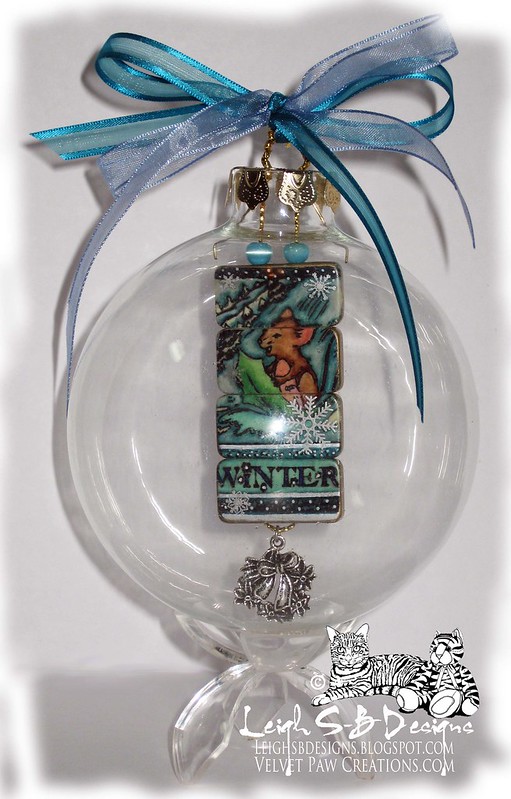
"Fire" Domino Pendant for Smudgy Antics Challenge "Fire and Ice"!

Howzit Friends!
I hope you all had a spooktacular Halloween!
We sure did over at DominoART with our 31 Days of Halloween Scarefest and blog hop with Smeared and Smudged!  I'm announcing the winners on Tuesday so stop by and check out all the spooktacular altered game art and see who snapped up the 3 fabulous prizes!

"Fire"Domino Pendant

 I've got one of my "Sharpie Domino Queen" creations to share with you today for week one of Smudgy Antics new challenge "Fire and Ice"!  I used a Rick St Dennis image from Smeared Ink's exclusive Rubber Club set called "Morte".


I stamped a portion of the image onto a super-sized white domino and used Sharpie markers in my signature "Sharpie Domino Queen" style to colour the image and create a background that looks like flames.  The surface was sealed with Triple Thick gloss sealer and once dry I applied a coat of Inkssentials Matte Accents to give the stamped image a dimensional effect and added a touch of diamond glitter glue to the candle flames.  I used a DecoColor metallic gold paint pen to edge the domino before applying Tim Holtz Idea-ology script paper tape to the sides.  To make the pendant I adhered the sun bail to the front of the domino instead of the back and added a burgundy sued cord and jewelry findings to make the necklace. 

Now we've got Christmas to look forward too, YAY!  I'm still needing a few more sign ups for my Merry Players list for DominoART's 12 Days of Xmas Festival and I'm also taking sign ups in advance for DominoART's 15 Days of Terror for May 2014 which is when we celebrate Half-O-Ween ;0)  Click the links above for more deets on both events!  My new DominoART challenge started November 1st too, Any Game Goes with Any Theme, so dig out your bag of miscellaneous game pieces and come and play with us!
Thank you for visiting with me today and I hope you'll come and play in our Smudgy Antics challenges and I'll see you over at DominoART too! 
Happy Stamping!
 THE SHARPIE DOMINO QUEEN
I design for Smeared Ink  * Lost Coast Designs * About Art Accents


Wednesday, February 20, 2013

"Masquerade Ball" DominoART Necklace

Hello Friends!
How about a sneak peek at the next challenge theme on the Third Coast Creative Challenges Blog!
The Mardi Gras - Masquerade Challenge starts this Friday Feb 22 and everyone is invited to the party!
 
  Today is my turn to post on the Third Coast Coterie Blog and here's my DominoART Necklace for your inspiration featuring my signature "Sharpie Domino Queen" technique ;0)


Tuesday, December 18, 2012

Christmas Robin DominoART Tree Ornament!

Season's Greetings to you all!

I thought I'd give you another break from my 12 Days of creepy Creepmas creations and invite you over to my DominoART blog to check out the Christmas Robin domino ornament I've made for Day 18 of DominoART's annual 24 Days of Christmas Festival ;0)


Thanks for stopping by and leaving me your wonderful comments!  I truly appreciate hearing from you all :0)

Happy Stamping and Happy Holidays!
 THE SHARPIE DOMINO QUEEN
I design for Blockheads Paper Arts * Third Coast Rubber Stamps * About Art Accents

Saturday, December 1, 2012

DominoART's 24 Days of Christmas Festival has begun!

Today is Day 1 of my  
DominoART blog's 24 Days of Christmas Festival!
Come and join me and my Merry Players every day and count down Santa's arrival DominoART style :0)

The Festival is being sponsored by Blockheads Paper Arts and Delicious Doodles with a 3rd sponsor to be announced soon!  There's also a DominoART Readers' Gallery were you can upload your own altered game art to the Christmas 2012 inlinkz collection for the chance to win a prize too!  Plus there just might be some surprise giveaways for those of you who stop by each day and leave a comment and follow us too!  It's going to be a festive December with lots to see and prizes to be had so I hope you'll come and join the fun ;0)

 DominoART Christmas Tree Bauble
Check out my full mixed media creation with more photos on DominoART!


Thanks for stopping by!
Happy Stamping!
 THE SHARPIE DOMINO QUEEN
I design for Blockheads Paper Arts * Third Coast Rubber Stamps * Lost Coast Designs * About Art Accents

Monday, October 1, 2012

31 Days of Halloween with DominoART and Smeared and Smudged and the start of Blockheads Paper Arts October Technique Challenge!

Hello Everyone!

'Tis the start of the Haunting Season and Best Witches to you all!

 I'm super excited coz it's Day 1 of my 2nd annual 31 Days of Halloween over on my DominoART Blog!  It's going to be a grand spooktacular event with 31 gloriously scary altered domino creations for you to feast your greedy eyes on!


DominoART's Wicked Players list is located in the left hand side bar.  Each Day links directly to a petrifying project so you can browse them all to your hearts content!  The links will be added periodically.

I've two fabulous companies sponsoring 3 wicked cool prizes! 
Blockheads Paper Arts
is sponsoring the 
Grand Prize of a $50 Gift Certificate!

and

SkyBluePink
  is sponsoring two 
$13 Gift Certificates 
for the 2nd and 3rd place prizes! 
Cool Stuff for Non-Fancy Prices
 All of DominoART's Wicked Players are in the running for some scary good prizes plus there will be some sneaky prizes provided by me throughout October too!  I might pick a random winner from DominoART's followers or from everyone who visits and leaves a comment each day!  I might hide a DominoART Treat that you have to find...who knows, anything could happen!

But the fun doesn't end there, keep reading!

Are you being inspired by all the wicked DominoART eye candy and would like to share your own creations with us?  Then I'd like to invite you to link up your Halloween altered game art in the Readers' Art Gallery!  Add your project URL to the inlinkz collection on the 31 Days of Halloween Readers' Art Gallery page and you never know, I might just award a DominoART Treat to my favourite entry ;0)

You'll have to haunt us all month long to see if you're a winner of any of the prizes up for grabs ;0)

But wait...there's more!

Just in case spooktacular DominoART Eye Candy and Treats galore aren't enough for you, DominoART is taking part as a Wicked Blogger in the 4th annual Smeared and Smudged 31 Days of Halloween Blog Hop!  Woohoo!!


You can participate as a Horrifying Hopper or as a Sinister Lurker for the chance to win even more prizes from Smeared and Smudged!  You don't have to be a member of their forum to play either!
Also keep your eyes peeled coz one day when you least expect it DominoART will be hiding their Scavenger Hunt pic for you all to find!  When you see it you must email them to be included in the drawing for that day :0)

The Smeared and Smudged Blog Hop roll is located on DominoART's right hand side bar!  For all the gorey details on how to play in their Blog Hop please visit Terra's blog which is the first one on the list! 

Oh I'm not done yet, this post is just packed with frightfully good news ;0)

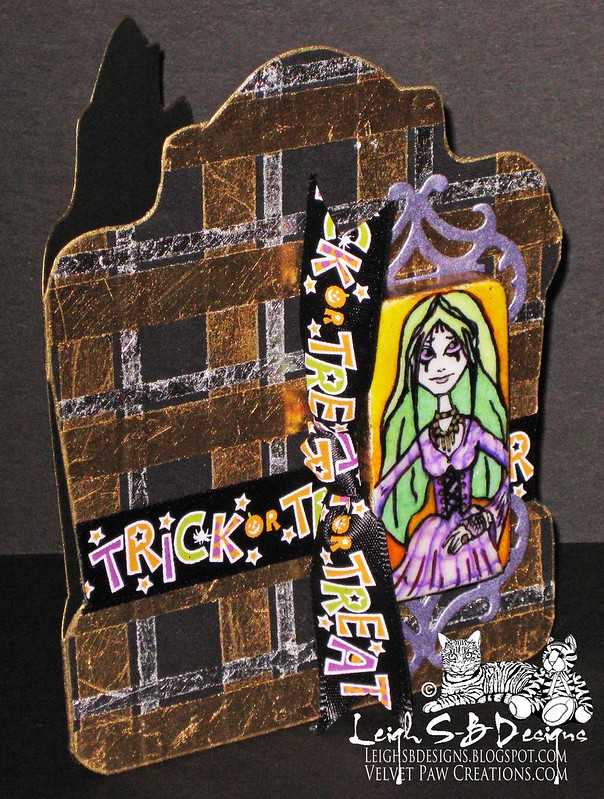
Here's a peek at my spooktacular domino creation for
Day 1 of 31 Days of Halloween!
which is also the first project I'm sharing for Blockheads Paper Arts October Technique Challenge hosted by me called

Precious Metals - A Compendium of Leafing Techniques


This project features one of 6 techniques demoed and shows you how to create a plaid design using various widths of double sided tape with gold and silver Leafing applied.

Pop on over to DominoART to see my full project (Oct 1st post)!

Then hop on over to Blockheads for all the gorey details and take the Precious Metals challenge for a chance to win even more prizes!  There are two prizes up for grabs via their Blog and Facebook page!  Challenge starts Oct 1 and ends on Oct 21.

You will see examples featuring the various techniques by the Blockheads Design Team and all the challenge entries in the inlinkz collection below!

Phew, there's a lot going on this October with plenty of ways for you to get your freak on!

  Enjoy ;0)

Happy Haunting!

 THE SHARPIE DOMINO QUEEN
I design for Blockheads Paper Arts * Third Coast Rubber Stamps * About Art Accents


Friday, June 8, 2012

'Melia Amulet' Bendomino Necklace Published in Altered Arts Magazine...a 3rd Coast Creative Coterie project!

Happy Friday Everyone!


I'm very pleased to finally be able to share my altered bendomino necklace that was published in Altered Arts Winter 2011-12 issue with you all and also share the news that I'm on Third Coast Rubber Stamps Creative Coterie again this year, woohoo ;0)

Before you dash over to DominoART to check out my tutorial I just want to quickly remind you all that I've got a DominoART design team call going on at the moment!  I've got 2 wonderful DominoARTists signed up already and will be introducing them very soon so stay tuned for that!  All the DT info is here if you're interested in becoming a DominoARTist too! 

Please stop by my DominoART blog for the full tutorial on how to create this eye-catching necklace featuring my signature "Sharpie Domino Queen" technique!

Stamps used are available from Third Coast Rubber Stamps
VB-011-K Melia Mermaid
VB-013-G Seashorse 


Happy Stamping!
 THE SHARPIE DOMINO QUEEN
I design for Blockheads Paper Arts * Third Coast Rubber Stamps * About Art Accents

Saturday, December 3, 2011

Christmas Porcelain Ornaments featuring Blockheads Paper Arts Christmas Stamps!

Happy December Everyone!

I'm back today with three awesome porcelain ornaments that are perfect to hang on your tree, give as gifts and you can even add them as gift tag embellishments on your presents as an extra little giftie for family and friends!


I make porcelain ornaments each year and get mine from Michaels.  I used Blockhead Paper Arts awesome Christmas stamp sets to decorate the ones I've made this year and here's the three stamp sets for you to check out.  Click on each sheet to go to Blockheads and the first 2 sets below are currently on sale so grab them while you can!

Figgy Pudding Mice
An Illustrated Christmas
Christmas Morning 

 I also used the Ornate Flourish from the Feeling Regal set on the Star Ornament.

Feeling Regal

 Snowman Snowflake Ornament
Stamp the images on to all the ornaments with black StazOn ink and either heat set or leave overnight to dry.  Colour all the ornaments with Sharpie markers using my signature Sharpie Domino Queen Technique!  Also check out my other Sharpie projects here on my blog!


I stamped the Snowman from the An Illustrated Christmas set on the front of the snowflake ornament.  If you don't like how the image stamps or if it smudges then don't panic!  Just wipe the porcelain ornament with a baby wipe or with rubbing alcohol and the image just comes right off!
You can't see it very well in the photo but I added Blue Ocean Sharpie to the outer edges of the snowflake and lightened and blended with a Colourless Blender Design Art Marker until it was just a subtle touch of colour along the rim of the ornament.

TIP:  You can get the same effect with a Copic or Marvy Le Plume Permanent Blender pen if you don't mind using it with your Sharpies or with a Adirondack Alcohol Ink Fillable Pen filled with Blending Solution.  You can also just use a Q-Tip dipped in rubbing alcohol!

I used the following Sharpies on this one:
Snowman: Ocean Blue and Blue Ice,
Scarf:  Olive and Kiwi
Carrot:  Orange and Pumpkin
Sticks: Brown,
Hat:  Slate Grey and Earl Grey

The ornaments are all double sided and on the back of this one I stamped the Snowflakes from the An Illustrated Christmas set and the Merry Christmas sentiment is from the Christmas Morning set.  I used Ocean Blue and Blue Ice for all the colouring on the back.


 Santa Star Ornament

For the star ornament I used the Santa from An Illustrated Christmas and the following Sharpies:
Skin:  Pink Lemonade,
Hat:  Pomegranate, Red, Ocean Blue and Blue Ice,
Beard/hair:  Coconut,
 Holly:  Red, Spruce Green and Kiwi.

On the back of the star I stamped the large Merry Christmas sentiment from the Christmas Morning set and portions of the ornate flourish stamp from the Feeling Regal stamp set.
I used Pomegranate Sharpie to outline the design.


The Holidays Are For Everyone
Tree Ornament
On this ornament I used the cute mouse and sentiment from the Figgy Pudding Mice set and stamped a portion of the present border from the Christmas Morning set on the 'trunk' of the tree and the decorative Star on the back with the sentiment 'The Holidays Are For Everyone'!


I coloured the design with the following Sharpies:
Mouse:  Coconut, Pink Lemonade and Red,
Snow:  Ocean Blue and Blue Ice,
Leaf and Trees:  Spruce Green and Kiwi
Tree trunks:  Brown,
Presents:  Ocean Blue, Blue Ice, Red, Pomegranate, Spruce Green and Kiwi.

Once all the colouring is done you need to seal them.  I prefer to use Krylon spray sealers on mine but you can also use Judikins Diamond Glaze too.  Spray each side first with Krylon Artists Workable Fixative.  Just apply 2-3 very light mistings and let each coat dry.  Then spray with Krylon sealer in the same way.  I used Gloss on mine but I've also used Matte and Satin in the past.  It's just a personal preference really and what I feel like using based on the design at the time.


So the ornaments can be hung on the tree or attached to gifts I finished them off with decorative ribbon tied in a bow.  You can also add other embellishments to the bow area like holly or poinsettias.  I also enjoy adding Swarovski crystals to my ornaments so they sparkle in the Christmas tree lights ;0)

I'm entering my ornaments into the following fun Challenges :0)
Buttons or Bows with Craft Your Days Away
The Snowman and Mouse Ornament in - Snowmen, snowflakes..snow with Sweet Stampin'
The Santa Ornament in - Tis the Season Challenge with So Artful Challenge
Decorate for Christmas Challenge with My Sheri Crafts

Only 21 days till Christmas and I hope I've given you some nifty ideas for gifts and for decorating your Christmas presents this year! 
Happy Stamping and have an awesome weekend!


I design for Blockheads Paper Arts * Third Coast Rubber Stamps * About Art Accents

Saturday, October 22, 2011

'Winter Dragon' Domino Pendant - A Third Coast Creative Coterie Project!

Happy Saturday Everyone!

It's been quite chilly here in San Diego this week with lots of foggy mornings so I was inspired to share a wintery Third Coast Creative Coterie design team project with you today!

I designed a DominoART pendant featuring the gorgeous Dragon Orb (CH-696-H) rubber stamp by Third Coast Rubber Stamps.
I'm absolutely crazy for dragons and Third Coast has a large selection of gorgeous dragons to choose from ;0)

Winter Dragon
DominoART Pendant

I used my signature 'Sharpie Domino Queen' Technique to alter the domino so no surface preparation was needed and I stamped the image directly onto the shiny standard sized domino with Coal Black Ancient Page dye ink and heat set with my favourite heat gun called the Heat It.  I coloured the dragon and the background (upper and lower left side of the domino) with a combination of Ocean Blue and Sky Blue Sharpie markers.  I used Purple and Lilac to colour the details on the dragon and the orb in the background.


I painted the large orb on the upper right of the design with purple pearlescent glass paint and used an extra-fine point metallic silver paint pen on the tiny orb the dragon is clutching in its right claw.  I then used Stickles glitter glue to create the magical wintery crystal orb the dragon is holding in its left claw.  I love how the orb glows and sparkles!  I highlighted the dragon's eyes with an extra-fine gold paint pen to give the impression that the dragon's eyes are reflecting the glow from the crystal orb.  I then edged the domino with a broad point metallic silver paint pen.  Once everything was dry I applied a coat of Judikins Diamond Glaze.


I then fashioned a bale from metallic midnight/cobalt blue wire and free-form wrapped the wire around the domino so that it was encased inside the wire 'cage'.  I curled the one end to mirror the curl of the dragon's tail and also mirrored the curve of the orb in the background where the wire wrapped around the domino.


On the back of the domino I looped the wire to form the bale and hooked the other end of the wire beneath the back section.  Once the wire was snug against the domino I applied a small amount of Judikins Diamond Glaze beneath the curled wire end on the front of the domino so that it would adhere to the domino and further secure the wire in place.

I finished off my necklace with a turquoise velvet cord with a silver lobster claw clasp.

Have a great weekend!
Happy Stamping!

THE SHARPIE DOMINO QUEEN

I design for Blockheads Paper Arts * Third Coast Rubber Stamps * About Art Accents

Saturday, September 17, 2011

Trick or Treat DominoART ATCs - A Third Coast Creative Coterie DT Project

Howzit Stampers!


Halloween is coming and I've been scaring up a storm in my studio!  I'm thrilled to share these double trouble DominoART ATCs with you today!  I designed these for Third Coast Rubber Stamps as a proud member of their Third Coast Creative Coterie design team.  We have our own Blog now so go check out all the spooktacular eye candy :0)

SUPPLIES
All the stamps I used are available from Third Coast Rubber Stamps
Free Parking AP-479-P
Spider Web AP-522
Broomstick Dog Ap-523
Cat from the Scary Hairy Girl Duo VB-321-P
Happy Bat sm VB-041-EE
Tree of Dread sm VB-054-C
Boo S. Postal Service WS-146-D
Sizzix Bigz Die Trick or Treat 
Standard Double 6 White Dominoes
Black glitter cardstock
Green Glitter Jelly Roll Pen
DCWV Old World Mat Stack Decorative Cardstock
Strathmore Bristol Vellum Surface ATC blanks
White Prismacolor pencil
Versafine Onyx Black ink pad
Ancient Page Coal Black and Mandarin ink pads
ColorBox Fluid Chalks:  Wisteria, Lavender, Prussian Blue, Yellow Ochre
Sharpie Markers:  Orange, Leg Warmer Orange, Banana Clip Yellow, Stingray, Valley Girl Violet, Slate Grey, Brown, Coconut, Argyle Green, Jellie Pink
Sharpie Black Paint Pen - Oil Based Medium Point
Metallic Copper and Silver Paint Pens - Extra Fine Points
Judikins Diamond Glaze
Recollections Brads:  Black Fleur De Lis, Black Glitter Flourish, Tiny White Buttons
Micro Pop Dots, Glue Dots
Permanent Adhesive Tape
Heat It Embossing Tool


I started with the ATCs first and stained them with various inks using a combination of the DTP method (direct to paper) and applying the ink with a scrunched up piece of paper towel.  The Purple one is a combination of ColorBox Fluid Chalks:  Prussian Blue, Wisteria and Lavender.


The Yellow one is a combination of ColorBox Fluid Chalks:  Wisteria and Yellow Ochre with Ancient Page Mandarin.

I stamped all the images with Versafine Onyx Black ink and coloured in some of the images with a Black Sharpie coz I just wanted silhouettes instead of details for the backgrounds.  You can see I started colouring in the Happy Bats on the Yellow one above and coloured the broomstick handles on the Purple one.  I then added glitter details to both with a green glitter Jelly Roll pen.


Die cut the large Sizzix Trick or Treat saying from black glitter cardstock and adhere them to the ATCs with micro pop dots.  If you don't have these micro dots you NEED them, I don't know how I managed without them!!


Now for the dominoes.  I used 2 standard double 6, brand new straight out of the tin, dominoes for this project and coloured them using my signature Sharpie Domino Queen technique!  Check out all my Sharpie Tutorials here on my blog and also on my website, Velvet Paw Creations, for more info on how to do my technique.  I'm still in the middle of re-designing my entire website so some links aren't ready yet but you'll find those tutorials here on my blog too!


Stamp just the Moon portion of the Free Parking rubber stamp onto both dominoes with Ancient Page Coal Black dye ink.  Then stamp the Cat on one domino and the dog on the other and heat set the ink with an embossing tool, I'm a huge fan of the Heat It embossing tool.


Colour both dominoes with Sharpie markers, most of them are from the newest Limited Edition set called 80's Glam.  I used Orange, Leg Warmer Orange, Banana Clip Yellow, Jellie Pink and Argyle Green on the cat and Stingray and Valley Girl Violet on the sky and touched up some of the stamped image with a Black sharpie.


I used Orange, Leg Warmer Orange and Slate Grey on the sky.  Stingray, Valley Girl Violet and Argyle Green on the Witch Hat.  Brown, Coconut and Jellie Pink on the dog.  I coloured the sides of the both dominoes with a Black Sharpie oil-based paint pen and added silver metallic touches to both with an extra-fine point paint pen.  I then sealed both dominoes with a coat of Judikins Diamond Glaze.  I embellished the dominoes with a decorative brad at this point so that they would adhere to the dominoes as the glaze dried.  I used the Fleur De Lis on the dog and the Flourish on the cat.  Both are brads and I just cut off the brad arms.


While the dominoes dried I stamped the Boo Postal Service stamp on to a piece of DCWV patterned mat stock with Versafine Onyx Black ink and cut it out with scissors.  I then coloured the circle behind the ghost with the green glitter Jelly Roll pen and the ghost with a white Prismacolor pencil and attached it to the ATC with permanent adhesive tape.


I then adhered the dominoes to the ATCs with permanent glue dots.  I finished off the Trick ATC with 3 tiny white button brads on the left hand side. 

I hope you enjoyed checking out my DominoART ATCs and if you want to see more spooktacular DominoART eye candy then stop by my DominoART Blog for 31 Days of Halloween for a scary good time!  The fun starts Oct 1st of course  ;0)

Happy Stamping!
THE SHARPIE DOMINO QUEEN
I design for Blockheads Paper Arts * Third Coast Rubber Stamps * About Art Accents