News
The Summer BUZZ Collection
Re-Release Sale-bration thru July 19!
The Gilded Raven Release!
"Rocky Mountain Christmas"
Winter 2025 Collection
Adopt all the Loveleigh Kitties, they're PURRfect for every occasion!
Showing posts with label Blockheads Paper Arts Design Team Challenges. Show all posts

Saturday, March 3, 2012

"Spring Is Coming!" - New Blockheads Blog Hop Challenge - Bleach Rubber Stamping Technique!

Hello Everyone!
Here's my second project example for Blockheads current Blog Hop Bleach Technique Challenge  and this card is called "Spring Is Coming!".  Oh please tell me its coming coz I'm cold here in 'too wintery for my liking' San Diego LOL, but it's supposed to warm up for the weekend and then get cold again, ugghh ;0)

Check out my other design team example "Is Spring Here Yet?" and also pop on over to Blockheads for the technique demo and challenge details too.
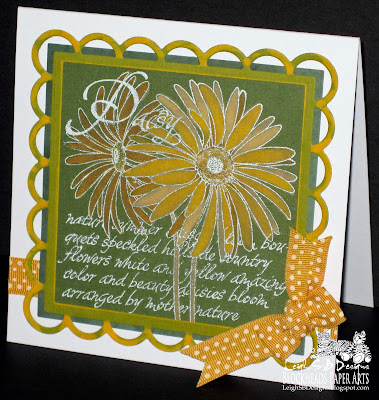

I used Blockheads Paper Arts Daisy Collage stamp on this one and I love how well it worked with the Bleach Technique!  This time I decided to work with white embossing powder and alcohol-based permanent markers and the result reminds me of silk paintings.
Daisies Flower Set
Marvy Le Plume Permanent Markers
ColorBox Fluid Chalks ink pad - Warm Green
White Fine Detail Embossing Powder
Spellbinders dies - Squares and Lacey Squares
Household liquid bleach
Something to apply the bleach with like a Tiny Touch Applicator or Tsukineko Fantastix
White folded card blank - square
Dark olive green and a lighter green cardstock
Tim Holtz Idea-ology Paper Stash cardstock 
Double sided tape
Glue Dot
Quickie Glue Pen
Yellow Polka Dot Ribbon
Heat It Embossing Tool

Friday, March 2, 2012

"Is It Spring Yet?" - New Blockheads Blog Hop Challenge - Bleach Rubber Stamping Technique!

Hello Everyone!
It's Challenge time again over at Blockheads Paper Arts!
My team mate, Leslie, is hosting this one and it's all about using bleach with your rubber stamping and you can see her awesome technique demo and the Challenge details on the Blockheads website here.


I had an absolute ball playing with the bleach and seeing how each colour cardstock magically reveals a new colour.  This is another oldie technique like my Chalk Attraction technique which I hosted last month and it was loads of fun getting re-acquainted with it.  I had forgotten how much fun it is to paint and stamp with bleach and I think newbie stampers and seasoned stampers a-like will enjoy this Challenge so I hope you'll come and join the blog hop for a chance to win a $25 gift certificate to Blockheads Paper Arts!  You can even submit your entry to the Blockheads' Gallery if you don't have a blog and be in the running for a 4" x 5.25" stamp set of your choice...how cool is that!!

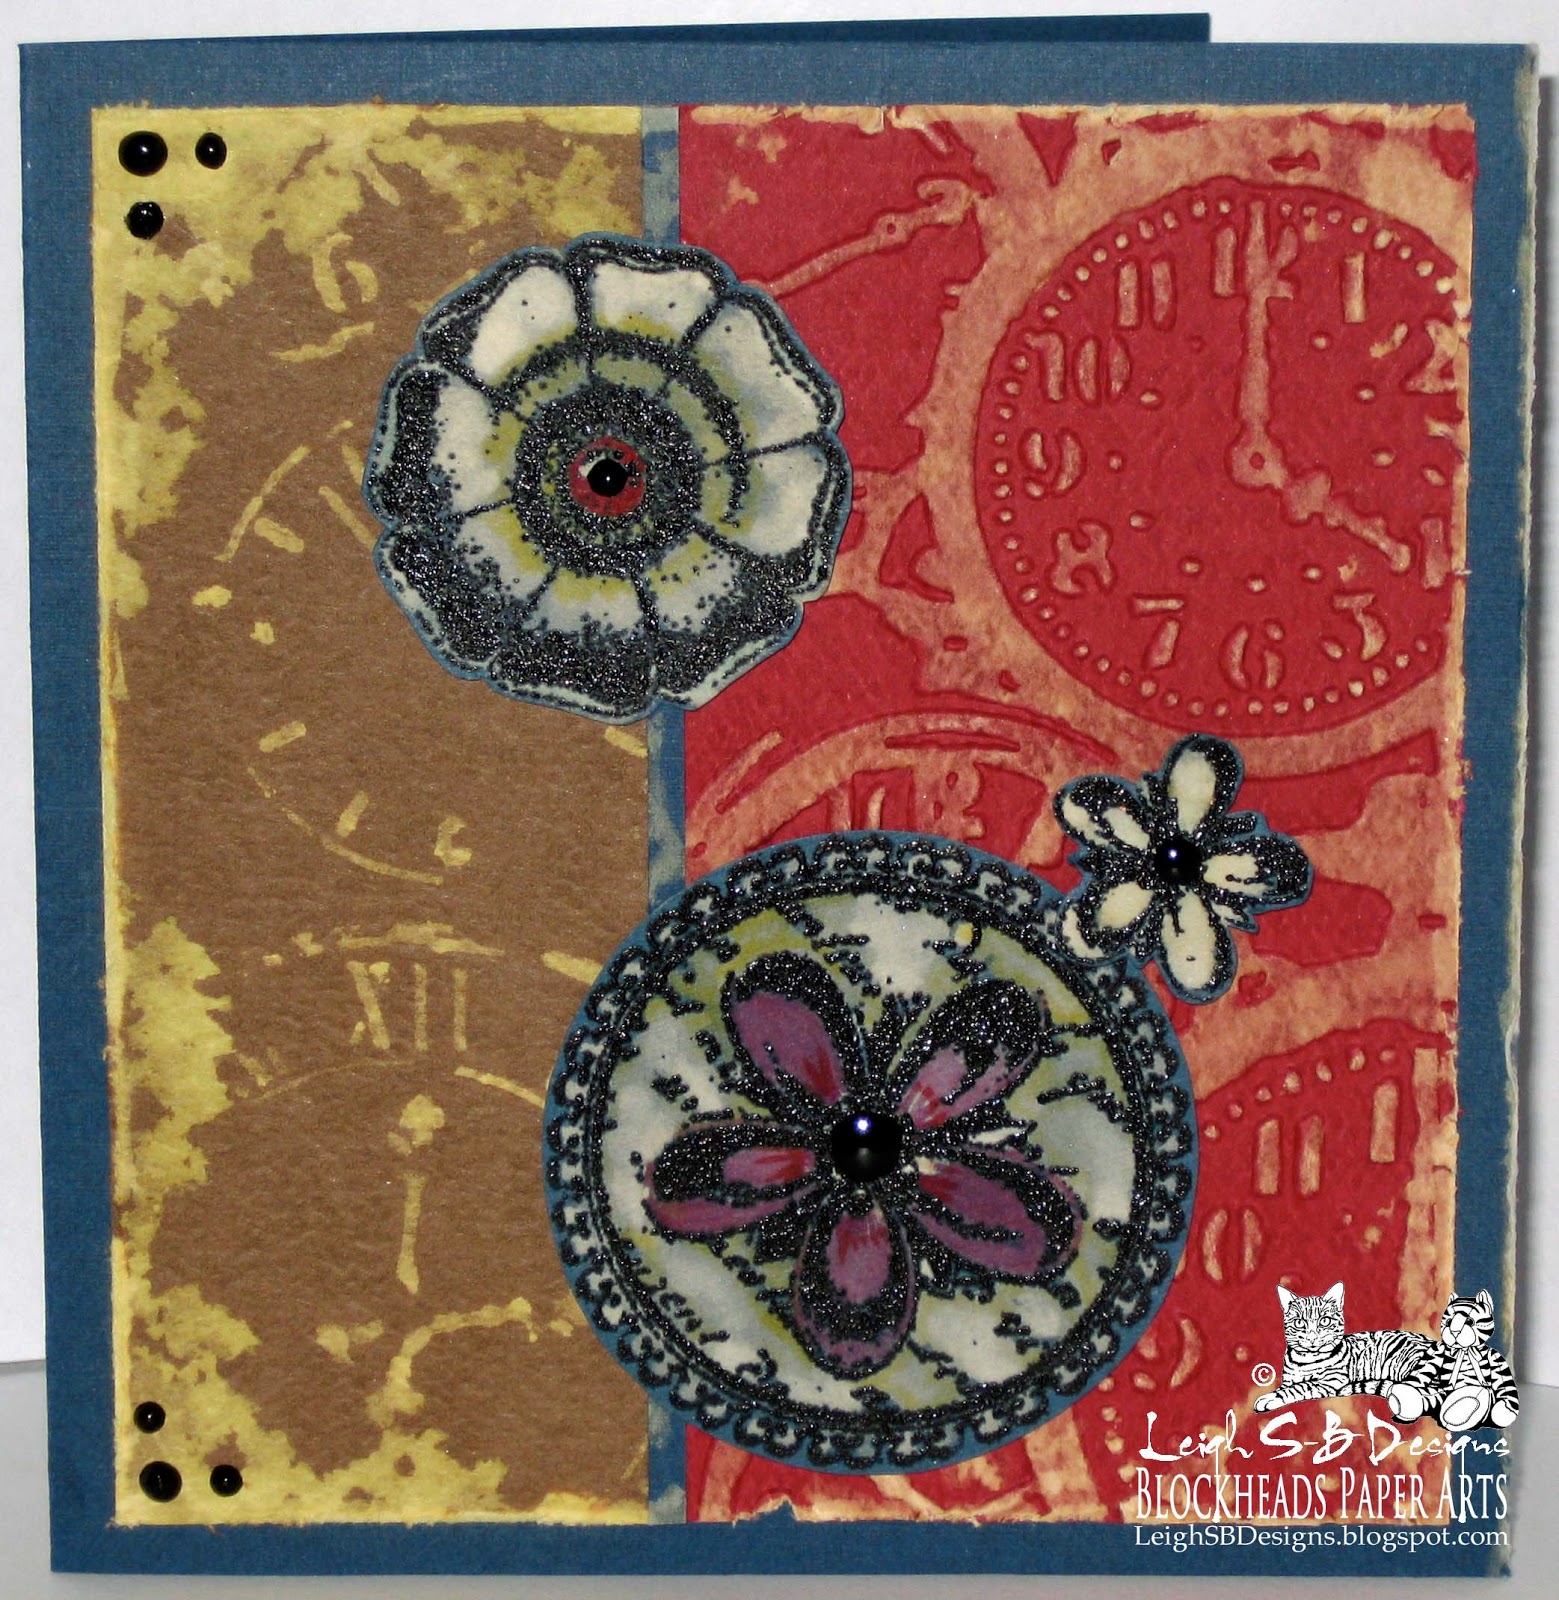
I've got two projects to share featuring the Bleach Technique.  It's been really cold here in San Diego, yes it DOES get cold here LOL, and the titles and themes for my cards are Spring inspired and have a floral-time theme going on.  Here's my card called "Is It Spring Yet?"  This one is dark for a spring theme with my choice of colours coz it was a very wintery day when I made it.  I'll put my other card tutorial titled "Spring Is Coming!" in a separate post after this one to help keep this one relatively short ;0)

The floral medallion and blossoms I used are from Blockheads Paper Arts exclusive stamp set called Nature Medallions and a grungy corner stamp from the Grunge It Up set and I also continued with more Crafter's Workshop Template fun and incorporated the Mini Time Collage into my design as well as a Clock Texture Fades embossing folder by Tim Holtz!

Blockheads stamps:
Nature Medallions
Grunge It Up

Crafter's Workshop Mini Time Collage Template
Tim Holtz Texture Fades Embossing Folder - Clock and Steampunk Set
Brilliance Graphite Black Pigment Ink Pad
Ranger Black Embossing Powder
Marvy Le Plume II markers - Victorian Set
Inkssentials Enamel Accents - Black
Tim Holtz Distress Tool
Household liquid bleach
Something to apply the bleach with like a Tiny Touch Applicator or Tsukineko Fantastix
Heat It Embossing Tool
Brown, dark red and dark blue cardstock
Quickie Glue Pen
Double sided Tape
Pop Dots

Thursday, January 19, 2012

My Blockheads "Out Of The Box" Technique Blog Hop Challenge Card!

Happy New Year Everyone!

I'm back from my vacation to the UK where I spent a fabulous Christmas with my family!  I'm finally feeling human again after a week or so of walking around in jet lag zombieland, LOL, and now I'm eager to share the card I made for Blockheads Paper Arts' "Out of The Box" Technique Challenge!


There's still a couple of days left to enter the challenge so pop on over to Blockheads to find out exactly how to do this technique and then visit the Blockheads Blog for more details on how to enter the challenge and see the awesome challenge submissions!

Me and my fellow Blockheads Design Team members will be picking one challenge entry to a win a $25 gift certificate to Blockheads Paper Arts!  So grab your Spellbinders, check out the technique, make your card and post it to your blog.  For your entry to qualify you MUST include this html code in your blog post so that it links up with the challenge blog hop!  If for some reason you don't see the code below once I've published my post then you'll find it on the Blockheads Blog here!  Then submit your blog post URL via the inLinkz 'Add Your Link'  button.  I hope you'll join the fun and I can't wait to see your versions of the "Out of The Box" Technique!

Here's my card I made using the "Out of The Box" Die Cutting Technique!


Spellbinders Labels 14
Memento Tuxedo Black ink pad
Double sided tape
Low Tack tape
Glue Dots
Black and white cardstock
White paper ribbon/raffia or read on to find out exactly what I did use for the bow ;0)
Black Sharpie marker:  ultra fine point
Scissors
Pencil
Exclusive Blockheads Stamps: 
Inspired By Nature Full Sheet

Start by stamping the small Dragonfly and the small Flower stamp onto a piece of white cardstock with Memento Tuxedo Black ink.  Align the Spellbinders Label 14 die over the image so that a portion of the wings are on the 'outside' of the die and trace the interior shape of the die with a pencil.


Closely cut out the wings that are on the 'outside' of the traced die shape ONLY.  Cut right up to the traced line plus about another 1/16th of an inch INSIDE the traced line!  The extra cut allows you to place the wings on the outside of the metal die.  Secure the die in place with low tack tape like Post-It tape or repositionable sticky tape and run it through your die cutting machine.
Viola!  The Dragonfly's wings extend beyond the die cut, how cool is that!  It's a pretty neat technique for using your favourite dies with and you can get quite elaborate with what sections of the stamped images extend beyond the boundaries :0)


I then filled in the rest of the die cut with more flowers and added the small leaf too.


Die cut mats for the main panel from more white cardstock and some black cardstock and I stamped more flowers and leaves onto the 2nd white mat.  I actually cut out the larger of the black shapes with scissors because I wanted the mat border to be smaller.  So I simply used the die as a template and traced it out on the back of the black cardstock and cut it out with scissors.


I made my own folded card from white cardstock and stamped leaves around the outside edge of the front.  I used an ultra fine black Sharpie marker to draw in 'shadows' on one side of each leaf to give them more impact once the card was complete.


Adhere all the mats on top of each other with double sided tape.


You'll never guess what I used to make that really cool paper bow ;0)  My 4 year old nephew got an Ultimate Optimus Prime from Santa...'Ultimate' mind you, not just any Optimus Prime like he LOVES to remind you LOL!  Anyway, the toy was secured in the packaging with these rolled paper strings instead of the usual ties.  I pounced on them immediately and made sure they didn't go out in the trash!  As you can see in the photo above they unravel just like raffia.  I experimented with different bows and settled on the one you can see below which I attached to the card with a glue dot.


And there you have it, what a fun technique to do!  I hope you'll give it a try and share your creations with us at Blockheads Paper Arts!  I'd better dash and add my Design Team sample of the technique to the Blog Hop Challenge ;0)

I've entered my card in CAS-ual Fridays Black and White Penguin Suit Challenge - thanks for the heads up Colleen ;0)


Happy Stamping!

THE SHARPIE DOMINO QUEEN
I design for Blockheads Paper Arts * Third Coast Rubber Stamps * About Art Accents

Monday, August 1, 2011

Enter the new Blockheads Challenge on Facebook for a chance to win an awesome prize!

Howzit Stampers!
Today is the start of the new Blockheads Challenge over on their Facebook page!  Karen, my fellow Design Teamster, is hosting this challenge which concentrates on her various Faux Fabric Techniques!
Check out Karen's series of tutorials on the Blockheads Design Blog and also see more examples on her Dreaming and Creating blog too.  Click on the cool banner above (designed by me) for all the Challenge details and links to the various Faux Fabric techniques!

The Faux Fabric Challenge starts today and runs through to August 21!  That's 3 weeks for you to create up a storm and have the chance on snatching up a fantastic PRIZE!

PRIZE DETAILS
You may use any stamp manufacturer, but there is a bonus for using BLOCKHEADS STAMPS!
  
One participant will win a $25 gift certificate to Blockheads Paper Arts AND, Stacey, the awesome owner of Blocheads Paper Arts, has also added a super cool bonus of another $15 if you use Blockhead Stamps!  That's a $40 gift certificate for being a fan of Blockheads stamps!  How awesome is that!!!!

So hurry on over and enter the Faux Fabric Challenge TODAY!
Good luck!
 
THE SHARPIE DOMINO QUEEN
I design for
Blockheads Paper Arts
Third Coast Rubber Stamps