News
The Summer BUZZ Collection
Re-Release Sale-bration thru July 19!
The Gilded Raven Release!
"Rocky Mountain Christmas"
Winter 2025 Collection
Adopt all the Loveleigh Kitties, they're PURRfect for every occasion!
Showing posts with label Winter Projects. Show all posts

Monday, December 14, 2020

'Tis the Season Blog Hop: Christmas Chorus Frog Watercolour painting and "Ho Ho Ho" card by Leigh!

Howzit Creative Friends!
 Welcome one and all to our fun 'Tis the Season "stay crafty @ home" Blog Hop to help keep your spirits high, creatively inspired and busy while celebrating the season safe at home during this terrible pandemic!  Just 6 days left of our fabulous hop and all your entries are so fun and festive...keep the magic of the season coming☃️


Get festive with us and share your Fall/Autumn, Winter, Christmas and Merry Craftmas makes using LeighSBDesigns Art Stamps and/or any other company products!

The 'Tis the Season Blog Hop details and festive linky party are in the main post HERE!
 

🍁 Christmas Chorus Frog 🍁
Watercolour Painting and "ho ho ho" card by Leigh

My ‘Tis the Season Blog Hop inspiration for you today celebrates nature and the magic of the season with my watercolour painting of Christmas Chorus Frog and the festive "ho ho ho" card I made❄️
 
 
 I printed Christmas Chorus Frog out onto a sheet of mixed media cardstock and used watercolour pencils to paint him and white Dylusions paint pen to add highlights.
 
 
I used Crystal Stickles glitter to add lots of magic shimmer!  It's so very pretty in real life! 


 I made a whimsical festive card using the painting and stamped "ho ho ho" in black Versafine ink using one of Tim's sentiment rubber stamps.
 
 
I mounted the painting onto a red cardstock mat and then layered it onto gorgeous white glitter card.
 
 
I then mounted everything onto a folded card base I made from white cardstock. 


The real Chorus froggie my drawing is based on is still outside my front door croaking his head off inside my holly plant❤️


Check out my STAMPtember 2020 Collection!


Thanks for stopping by to see today's featured make!
Stay Safe and Happy Creating!
THE SHARPIE DOMINO QUEEN

Friday, December 4, 2020

'Tis the Season Blog Hop: Winter Roses center step card by Val!

Howzit Creative Friends!
Welcome one and all to our fun 'Tis the Season "stay crafty @ home" Blog Hop to help keep your spirits high, creatively inspired and busy while celebrating the season safe at home during this terrible pandemic!  We're now in our 2nd month of the hop and we're loving all your fabulous festive makes shared so far...keep the seasonal joy coming😘

Get festive with us and share your Fall/Autumn, Winter, Christmas and Merry Craftmas makes using LeighSBDesigns Art Stamps and/or any other company products!
 

The 'Tis the Season Blog Hop details and festive linky party are in the main post HERE!
 
 
🍁 Winter Roses 🍁
center step card by Val

LeighSBDesigner Val's ‘Tis the Season Blog Hop inspiration for you today celebrates the beauty of Winter and features my Fall Roses!  Shop for this versatile floral design and more in the THE WINTER SALE through Dec 25!

 
Val turned the Fall Roses into gorgeous Winter roses with her monochromatic colour palette in shades of blue and created fabulous dimension by fussy cutting out additional roses to lay over the main design.
 
 
Val used the following supplies to create this beauty!  
 
Shop for this one in the Winter Sale!

Spectrum Noir Tri-Blend Markers:
True Blue and Ice Grey
Stepper Die
Tim Holtz Glitter
Snowflake patterned paper
Smooth white cardstock
Pop Dots
 
Check out LeighSBDesigns STAMPtember 2020 Collection!


Thanks for stopping by to see today's featured make!
Happy Creating!
THE SHARPIE DOMINO QUEEN

Sunday, August 9, 2020

Stay Crafty @ Home Blog Hop: Winter Solstice Faerie Snowflake Shaker Ornament by Leigh!

Howzit Creative Friends!
Welcome one and all to LeighSBDesigns fun Stay Crafty @ Home Blog Hop to help keep you creatively inspired and busy while staying safe at home during this terrible pandemic!

This is a 2 month long "Anything Goes" hop that ends September 25th at 11:55pm pacific!  To keep you inspired we'll be sharing lots of wonderful makes featuring LeighSBDesigns' digi stamps and I'm also very excited to release my brand new designs soon for SPOOKtember and STAMPtember so you really don't want to miss a single post😁

You are welcome to enter projects using LeighSBDesigns Art Stamps and/or any other company products too!  We can't wait to see all your fabulous any themed makes so join the fun and share whatever inspires you to create🎨

LeighSBDesigns hops are always stress free...YOU decide when and how often YOU want to play so I hope you’ll join us for 2 months of creative fun🎨

ALL THE DETAILS, RULES AND LINKY PARTY ARE HERE!

 
 Winter Solstice Faerie
Snowflake Shaker Ornament by Leigh
 
My Stay Crafty @ Home Blog Hop inspiration for you today is this wonderful snowflake shaker ornament featuring my Winter Solstice Faerie❄️
 
You can see how I made this festive ornament in my in depth project tutorial HERE!


Check out my little video of the ornament in action❄️


 ❤️ SHOP THE NEW RELEASE ❤️
 
The Spread Love Heart Wreath & 14 Sentiments set is now available on release sale at LeighSBDesigns Etsy Boutique!  Sale will end at midnight pacific on August 14th!
 In the Spread Love Heart Wreath & 14 Sentiments set you get the following as an instant downloadable zip file in 300+ resolution without watermarks, ready for you to resize as desired, print and colour with your favorite mediums:
❤️ Spread Love Heart Wreath digi stamp in 2 files: 1 jpg and 1 png file with a transparent background
❤️ 14 Sentiments as separate png files with transparent backgrounds
 Thanks for stopping by to see today's featured project!
Stay Inspired and Stay Safe!
THE SHARPIE DOMINO QUEEN

Friday, July 17, 2020

CHRISTMAS in JULY Blog Hop: Have a Very Yeti Christmas card by Val!

Howzit Creative Friends!
Welcome one and all to LeighSBDesigns fun new blog hop to celebrate CHRISTMAS in JULY and help keep you creatively inspired and busy while staying safe at home during this terrible pandemic!
We're busy sharing wonderful Christmas and Winter themed makes featuring LeighSBDesigns' digi stamps to inspire you this month and absolutely loving the fabulous makes you've all shared so far, it gives me warm Christmas fuzzies to have you all joining in the fun❄️

You are welcome to enter projects using LeighSBDesigns Art Stamps and/or any other company products too so share away!  My hops are always fun and stress free....that means YOU decide when and how much YOU want to play so I hope you’ll join us for a month of creative festive fun while getting a jump on your Christmas cards and gifts❄️

See the HOP POST for all the hop details, rules and the inlinkz linky party!

Shop LeighSBDesigns CHRISTMAS in JULY SALE at LeighSBDesigns Etsy Boutique for amazing Christmas and Winter themed digi stamps through midnight pacific on July 31st!


❄️❄️❄️ Have a Very Yeti Christmas ❄️❄️❄️
card by Val

LeighSBDesigner Val's CHRISTMAS in JULY blog hop inspiration for you today is this stunning festive card featuring the Winter Yeti Build-A-Scene Set and "Have a Very Yeti Christmas" sentiment and Party Hat from the "Yeti Senti Sign Post Set add-on pack"❄️

Val used the following supplies to make this whimsically elegant and festive card:
Spectrum Noir Illustrator Markers:
Waterfall, Rose Red, Moonlight, Rose Blush
White Gel Pen
Black Sharpie Pen
Snowflake Die Frame
Tim Holtz Clear Rock Candy Glitter
Blue/white polka dot decorative paper
Quickie Glue Pen
Sticky foam tape

❄️❄️❄️ CHRISTMAS in JULY SALE ❄️❄️❄️

Shop LeighSBDesigns CHRISTMAS in JULY SALE for the Yeti Build-A-Scene Collection and more amazing Christmas and Winter themed digi stamps through July 31st!

 ❄️"Winter Yeti Build-A-Scene Set"
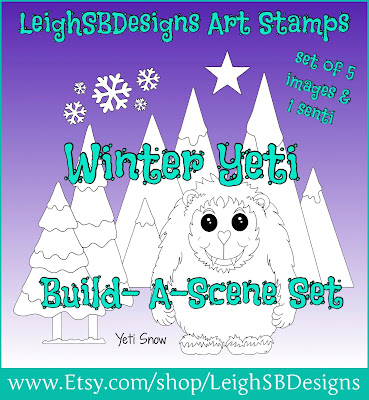
In this set you get to create Winter scenes for the cutie Winter Yeti using the included Winter Mountains, Winter Trees, Winter Snowflakes and the Winter Star.  This set also comes with one Yeti Senti that says "Yeti Snow".

https://www.etsy.com/listing/749025867/winter-yeti-build-a-scene-set-cute?ref=shop_home_active_3

The festive add-on pack includes a Scarf, a stack of Presents, a Gift Tag that says "25" on it, a Santa Hat, a sprig of Holly and a Christmas tree as well as the Yeti Senti, "Have a Very Yeti Christmas"❄️
Please note:  The Winter Yeti is NOT included in the festive add-on pack!

https://www.etsy.com/listing/735165898/a-very-yeti-christmas-festive-add-on?ref=shop_home_active_2

This fun add-on pack includes a customizable Sign Post, a Party Hat as well as 17 Yeti Senties for the sign post!  The Yeti Senties includes Winter, Christmas, Party, New Year, Birthday and Friendship sentiments❄️
Please note:  The Winter Yeti is NOT included in the Yeti Senti Sign Post add-on pack!

https://www.etsy.com/listing/735166770/yeti-senti-sign-post-set-add-on-pack?ref=shop_home_active_1

❄️I know you will just love this fun "Yeti Build-A-Scene Collection" so bundled the entire set together and included FREEBIES for you!  You get the "Winter Yeti Build-A-Scene Set", the "A Very Yeti Christmas add-on pack", the "Yeti Senti Sign Post Set add-on pack" as well as FREEBIE horizontal Yeti Senties!  This set is not included in the Christmas in July Sale!

https://www.etsy.com/listing/735150454/yeti-build-a-scene-collection-bundle?ref=shop_home_active_4

See the HOP POST for all the hop details, rules and the inlinkz linky party!

Thanks for stopping by to see today's featured project!
Happy Creating!
THE SHARPIE DOMINO QUEEN

Wednesday, December 28, 2011

Ice Roses And Holly - A Winter Card for the Holidays designed for the 3CCC

Happy Holidays Everyone!

I hope Santa was good to everyone this year and you got lots of crafty goodness in your stockings ;0)
I'm on vacation at the moment and you are all probably super busy with your holiday festivities so I'm popping in today to share a quick project with you ;0)


The "Ice Roses and Holly" winter card I designed for the Third Coast Creative Coterie is really beautiful but it doesn't take ages to make so drop what you're doing and grab your supplies and get in a little stamping Me time!

Thursday, November 24, 2011

"Faera the Tiger Fairy" Fall & Winter Art Card - a Third Coast Creative Coterie project!

Happy Thanksgiving Everyone!

Today I'm sharing my non-traditional 'two seasons merged into one' Tiger Fairy art card designed for
Third Coast Rubber Stamps Creative Coterie!

Faera the Tiger Fairy

The Tiger Fairy is a very rare species but if you time it just right you might be lucky enough to catch a glimpse of one when they come out to play just as Fall turns into Winter!


I based my design on the colours of the gorgeous ribbon which represent the end of Fall and by including the Christmas Rose and Holly stamp as my background image I moved the design into Winter too!  I think this one would be perfect as a non-traditional Thanksgiving or Christmas card ;0)
 
The featured stamps are all from
Third Coast Rubber Stamps
Fairy Faera CH-717-H
Tiger Eyes lg CH-684-H
Christmas Rose and Holly DP-003-R


Stamp Fairy Faera onto Neenah Solar White cardstock with Tuxedo Black Memento ink and colour with Copic markers.  I used the following Copics:  Hair:  E11, 13, 15, Skin: E000, 00, 02, Wings: G000, GY11, Clothes: G21, 82 and 85.  Add tiger stripes to the fairy's clothing with a black Copic Multiliner.  Colour the background with Cedar Green Derwent Watercolour pencil and blend with a Dove Blender pen.  Add white highlights with a Gel pen.  Die cut the panel with a Spellbinders Label 8 die and apply Peeled Paint Distress Ink to the die cut edge with a Blending tool.  Use the same Spellbinder Label 8 die as a template and trace the shape onto copper cardstock, cut out and then adhere the Fairy panel to it with permanent adhesive tape.


Cut rectangle mats from olive green, dark lime green and copper cardstock.  Stamp the Tiger Eyes image with Tuxedo Black Memento ink onto the dark lime green panel and mask the eyes.  Stamp the rest of the panel with the Christmas Rose and Holly image multiple times in Ancient Page Leaf Green ink, masking each area before continuing.  Distress the edges of the panel with a Distress tool and then apply Peeled Paint Distress ink with a Blending tool.  Add highlights to the eyes with a white gel pen to make them really pop.  Adhere the Tiger Eyes panel to the copper mat and then to the olive green mat with permanent adhesive tape.

Cut a length of the gorgeous Ribbon that has velvety stripes (Michaels) and adhere it to the panel with double-sided tape and secure the ends to the back of the panel with tape too.  Adhere the entire layered panel to a black folded card blank.  Then adhere the Fairy panel to the front of the card with pop dots.  Die cut assorted Sizzix flourishes from the two green cardstocks and distress gently with Peeled Paint Distress Ink.  Adhere the flourishes to the card with small dabs of glue.
Embellish the card with 3 Recollections paper roses in 3 shades of green. 


I'm entering this card into the following challenges:
Challenge #14 Thanksgiving, Thank you or Sketch - Crafting for All Seasons Challenge Blog
Free For All with Creative Craft Challenges
Challenge #89 Anything Goes - One Stitch At a Time
Challenge #58 Anything Goes - Lollipop Crafts 
Challenge #71 Anything Goes - Fresh Brewed Designs
Challenge #68 Snow Angels - Use a Fairy or Angel - Wags n Whiskers Rubber Stamps
Flutter By Wednesdays #181 Butterfly/Fairy/Angel 

Enjoy your holiday weekend!
Happy Stamping!

THE SHARPIE DOMINO QUEEN
I design for Blockheads Paper Arts * Third Coast Rubber Stamps * About Art Accents

Monday, November 7, 2011

Holiday Beverage Sleeve and matching Gift Card Holder for Feline Lovers - A Third Coast Creative Coterie Creation!

Howzit Stampers!

Winter definitely arrived over the weekend down here in San Diego with lots of rain...bbbrrr!
The inspiration for this Holiday Beverage Sleeve and matching Gift Card Holder came to me while savoring my first Eggnog latte of the season, oh yeah!


My kitty winter themed combo creation would be perfect as gifts for feline loving co-works, friends and family!  I used the quirky little cat image called Mini Me (ES-200-I) by Third Coast Rubber Stamps as the star of the show and a Snowflake Cuttlebug Embossing Folder for the rest.


Stamp the Mini Me kitty twice onto white cardstock with Memento Tuxedo Black ink.  Trim one by closely following the outline of the image and die cut out the second with a small Spellbinders Label 8 die.   Emboss both kitties with the Snowflake design and paint the debossed areas with Distress Stain Stormy Sky and the little kitty with Distress Stain Bundled Sage.  


Apply more Stormy Sky to the background of the 2nd image to make it darker.  Drybrush over the embossed snowflakes on both kitties with white acrylic paint to highlight them.  Draw over the stamped lines where needed with a black Sharpie to make the image stand out again.  Add a magical and wintery sparkle to both with a light misting of Vanilla Shimmer Smooch Spritz.  Edge the die cut one with a black Sharpie marker.


Adhere the cut out kitty to a blueish-sage piece of paper with a glue stick and trim.  For the second kitty die cut a slightly larger mat from the blue-sage paper and adhere it to the paper mat.  


Die cut two slightly larger Spellbinders Label 8 mats from metallic blue cardstock and distress the edges on both with white acrylic paint.  


To make the Belly Band for the Gift Card holder sandwich a length of "Let It Snow" silk ribbon (Michaels) between the kitty panel and the metallic mat as shown.  Adhere the mats together with the ribbon in place with Crafter's Pick The Ultimate glue.  Trim the ends of the ribbon into dove tail points.


Use a beverage sleeve as a template and cut a piece of white cardstock slightly larger.  Run the piece through a Xyron to add permanent adhesive and adhere it to a sheet of the same blue-sage paper.  Emboss the snowflake design into the panel.  Apply Stormy Sky Distress Stain directly to the cardstock in a random fashion so that some areas are more saturated than others.  Apply a small amount of Distress Stain Bundled Sage for a variegated effect and allow to dry.  Run the cardstock through a Xyron again and adhere it to the original cardboard beverage sleeve. Trim away the excess cardstock and drybrush over the embossed snowflakes and the edges of the sleeve with white acrylic paint.  Spritz the sleeve with Vanilla Shimmer Smooch Spritz.  


Adhere another piece of the "Let It Snow" ribbon around the center of the sleeve with a glue stick.  Overlap the ends of the sleeve and adhere together with The Ultimate glue.  To complete the Beverage Sleeve adhere the kitty panel to the front with TU glue.


Now for the Gift Card Holder.
I made a template based on a standard gift card and traced the shape onto a piece of white cardstock. Run it through a Xyron to add permanent adhesive.  


Adhere the panel to the same blue-sage paper and and score and crease two folds to form the flaps.  Cut 4 notches into the center section with an Xacto knife - this is where the gift card will sit.  


Emboss the panel with the snowflake design and cut out the Gift Card Holder.  Apply the same colour treatment to the Holder as I described above for the Beverage Sleeve.  


Complete the Gift Card Holder by inserting the gift card inside and securing the holder closed with the Kitty Belly Band and finish with a bow tied at the back.


I really had lots of fun creating this little combo gift set and now I'm ready for another Eggnog 
latte...hhmmm yummy ;0)

I'm entering my creations in the following Challenges:
Fall/Winter Challenge over at Mark's Finest Papers
Wee Memories Challenge #75 WMC75
Happy Stamping!

THE SHARPIE DOMINO QUEEN
I design for Blockheads Paper Arts * Third Coast Rubber Stamps * About Art Accents