July CREATivities
The Summer BUZZ Collection
Re-Release Sale-bration thru July 19!
The Gilded Raven Release!
"Rocky Mountain Christmas"
Winter 2025 Collection
Adopt all the Loveleigh Kitties, they're PURRfect for every occasion!
Showing posts with label Silhouette Cameo. Show all posts

Tuesday, May 10, 2022

Tutorial Tuesdays with Leigh: FantaSea "Mermaid Scales" Vertical Slimline Make-a-Card featuring Pearl Balleigh MerMonster!

🧜🏻‍♀️ Happy MerMay Creative Friends 🧜🏻‍♀️
 
It's Tutorial Tuesday with Leigh time and today I'm going to show you how I made my Mother's Day card featuring Digi Stamps and SVG Cutz from my brand new FantaSea Collection🧜🏻‍♀️
 
 
Check out the new FantaSea Collection of Digi Stamps and SVG Cutz launch post!
 
 
The FantaSea Collection is on special release sale through May 12th and all my Mermaid themed collections are on sale for the entire month of MerMay!
Sale ends at midnight pacific on May 31st!
 
"Mermaid Scales"
Vertical Slimline Make-a-Card SVG Cutz kit
with Pearl Balleigh MerMonster
by Leigh
 
 My Mother's Day slimline card today features Pearl Balleigh MerMonster and the Mother's Day senti included in the set plus the "Mermaid Scales" Vertical Slimline Make-a-Card SVG Cutz kit from my brand new FantaSea Collection🧜🏻‍♀️
 
 
My new FantaSea "Mermaid Scales" Vertical Slimline Make-a-Card SVG Cutz is a mer-mazing 30 piece cut file kit that lets you make a vertical slimline card from start to finish!  The kit includes 28 mermaid scale layers, a slimline card base with a perforated fold line and a mat layer.  LeighSBDesigns SVG Cutz are for popular electronic cutting machines compatible with SVG files like Silhouette, Cricut and Scan n Cut.  All my SVG Cutz are designed in Silhouette Design Studio and include both Silhouette Studio 3 and SVG files. 
 
 
First I cut out the slimline folded card base and mat layer included in the FantaSea "Mermaid Scales" Vertical Slimline Make-a-Card SVG Cutz kit.  I used 138lb (250gsm) heavy weight white cardstock to cut the slimline card.  The slimline card comes with a perforated fold line so you just cut it out and fold, easy peasy.  You will use the mat layer as the base for the mermaid scales to adhere to and it peeks out at the bottom beneath the last scale so you'll want to cut the mat layer from a different colour if you're using alternating colours.  Just cut mat layers from all the colours you plan to use to keep things simple.  You can then use one of the left over mats to decorate the inside of your card too!
 
 
The slimline make-a-card kit is designed to work with both 8.5 x 11 (A4) and 12 x 12 cutting mats so the size of your cardstock and cutting mat will determine how you lay the mermaid scales out for cutting.  I used 3 shades of purple from Crafter's Companion heavy weight 12 x 12 textured cardstock to create my alternating scale layers.  With scissors I cut panels from each colour measuring 3.5 x 12 inches and laid them out on my 12 x 12 inch cutting mat and using the mat I then lined up the scales on my computer screen to match.  To alternate the colours of the mermaid scales I worked left to right and started with scale #1 at the top of the lightest purple panel, scale #2 on the middle panel and scale #3 on the darkest purple panel then back to the lightest shade for scale #4.  Do this for all the mermaid scales and you if you've got enough space on your cardstock it doesn't hurt to add additional scales as back up!
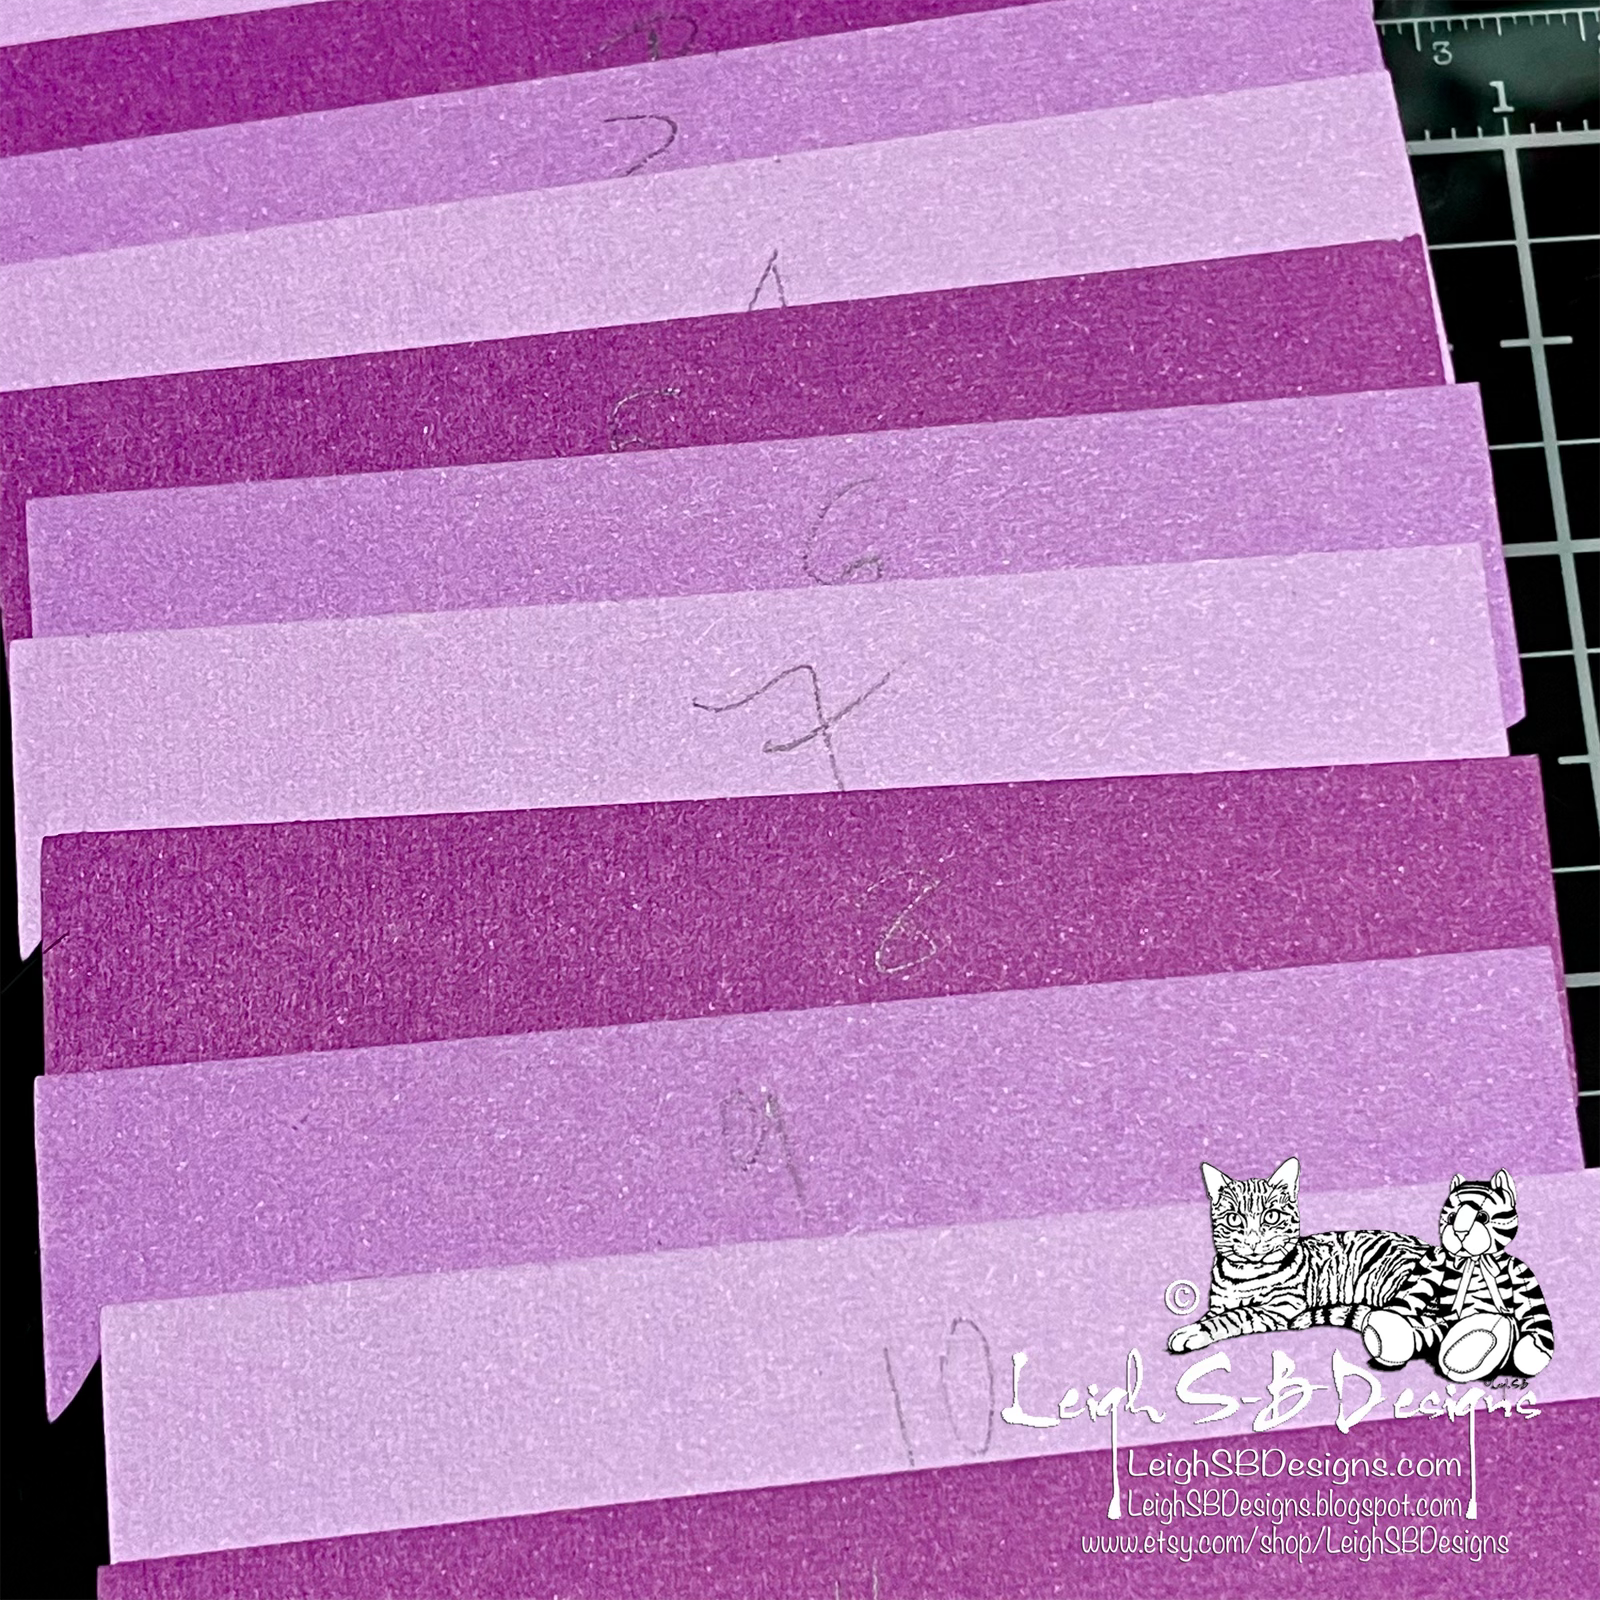
 
TOP TIP:
To keep the mermaid scales in order start by removing scale #1 from the the cutting mat (lightest purple panel) and write #1 on the back.  Then remove the rest of the scales working from left to right in the same order you placed them, numbering as you go.  This way your scales will always be in order no matter what you do with!
 
 
I then laid out all my scales for a dry run, making sure each scale cut out nicely.
 
 
I used Villainous Potion Distress Ink to ink up just the scalloped edge of each scale.  This is why numbering your scales is a must coz it's so easy to get them mixed up while customizing them!
 
 
Use the mat layer that comes in the slimline card kit as the base layer to adhere the mermaid scales to for perfect alignment.  The amount of alternating colours you use and how closely you overlap them will determine how many scales you will need for your card.  I provided 28 but you might need extra or use less so I recommend doing a dry fit on your mat layer before gluing the scales down.  You will also then be able to determine how much of the mat layer colour peeks out from under the last scale at the bottom.  Then always start with the bottom scale layer first and glue as you work upwards, lining up the scale edges with the edge of the mat layer, for perfect overlapping scales.  Working from the bottom to the top will then allow you to trim away any overlap if you were a bit off with your dry test.  
 
TOP TIP:
I just applied a dab of glue to each scallop and a bit on the top edge as I worked upwards and then put a line of glue along the top edge of the last scale to make sure the mermaid scale layer was fully adhered to the base layer. 

 
I then applied Villainous Potion Distress Ink to the mermaid scales panel edges to cover the cardstock's exposed white core edges and then added Waterfall Stickles glitter for a touch of magical mermaid sparkle.


The layered mermaid scales make a mermazing slimline card on their own or you could complete it with just a sentiment or take it further and embellish with a digi stamp from my new FantaSea Collection🧜🏻‍♀️
 

 I coloured Pearl Balleigh MerMonster in Adobe Fresco on my ipad with an Apple pencil and printed out her and the Mother's Day senti included in the set.  I printed the sentiment from Silhouette Design Studio and used the offset feature to cut the sentiment out and a Torn Edge Crafter's Companion circle die to cut out Pearl Balleigh.  I also cut 2 larger offset mat layers for the sentiment but decided to not use them for this make.


 I then used the Waterfall Stickles glitter to edge the Pearl and senti panels too.  In the photo above you can see how the glitter takes on a different colour depending on the colour beneath for a fun different look using the same stickles colour.
 
 
I decorated the inside of the card with a panel cut from the lightest purple edged in Villainous Potion and the senti panel.
 
 
I embellished the the upper right corner of the slimline card with clear dew drop gems adhered with Glossy Accents.


Then adhered the Pearl Balleigh MerMonster panel to the card front with low profile pop dots for just a little bit of dimension.


To complete my card I added more pretty magical shimmer by painting Pearl's eyelids and the pearl she's hugging with a Spectrum Noir clear sparkle brush glitter pen.  It's always hard to capture just how pretty the sparkle is in real life but the next pic gives you a good idea!  I then added magic transparent white Viva Pearl dimensional gel to the bubbles.
 
 
The  "Mermaid Scales" Vertical Slimline Make-a-Card SVG Cutz with Pearl Balleigh MerMonster makes such a striking slimline card full of FINtastic layered texture.  The 30 piece slimline card kit may look daunting at first glance but my kit make it really easy for you to cut out and assemble for lots of fun mermazing card making🧜🏻‍♀️
 

Our challenge for May is underway, come play in Challenge #5 MerMay, details and linky party are in the MAIN CHALLENGE POST🧜‍♀️

 
The FantaSea Collection is available at LeighSBDesigns Boutique on special release sale through May 12th plus all my Mermaid themed collections are on sale for the entire month of MerMay too!
Sale ends at midnight pacific on May 31st!

 

  You can shop for the Villainous Potion Distress Ink and Waterfall Stickles glitter and more at Scrapbook.com via my affiliate link at no extra cost to you.  Thank you for supporting LeighSBDesigns Inspiration Blog while getting awesome deals on your fave products!

Happy Creating!
THE SHARPIE DOMINO QUEEN

Sunday, January 23, 2022

Poe Appreciation Blog Hop 2022: Day 5 Finale - POE Book by Leigh!

❄️ Happy 2022 Creative Friends ❄️
January 19th was Edgar Allan Poe's Birthday and as is tradition here at LeighSBDesigns we celebrate with 5 glorious days of all things Poe!  Today is the finale but it's never too late to play in our


Everyone is invited to enter Poe inspired makes in our 7th annual Poe Appreciation Blog Hop using any stamp company products as frequently as you choose!  The full Hop details, rules and the linky party are all in the MAIN POST!  We always have a POEtastic time so tell your friends and celebrate your love of Poe with us and be in the running for some POEtastic prizes too!  Please read the Hop Rules before linking up! 

The Poe fun doesn't end today coz we also now host a completely separate monthly Challenge!  This month's theme is SNOW or POE so do check out the Challenge Main Post for all the details and play along!  You're very welcome to play in both events just not with the same makes though FYIπŸ˜‰


πŸ–€πŸ–€πŸ–€πŸ–€πŸ–€πŸ–€πŸ–€
 
Day 5 Finale
"POE Book"
SVG Cutz
by Leigh
 
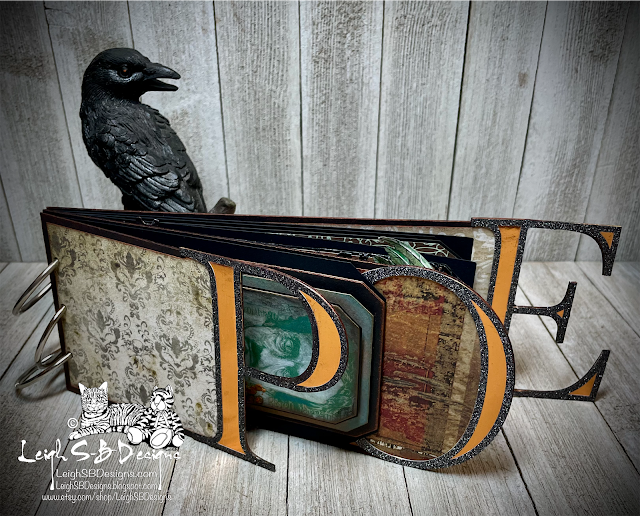
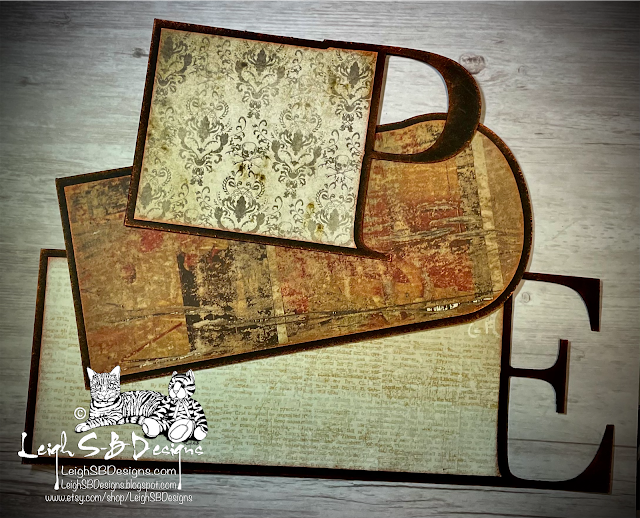
For today's finale of our POEtastic 7th annual Poe Appreciation Blog Hop I'm back to share my POE Book featuring the "POE Book" - Make-a-Book SVG Cutz set included in the Edgar Allan Poe SVG Cutz 2022 releaseπŸ–€


To make my POEtastic POE BOOK I started out by resizing the grouped "assembled" set as large as possible in Silhouette Studio so the book was nearly 4 inches tall and I could cut the largest page, the "E" page, out of a sheet of 8.5 x 11" heavy weight black cardstock.


 I cut all 3 of the POE letter pages out of Crafter's Companion heavy weight black cardstock using my Silhouette Cameo 4.


 I then made mirror images of each letter page and cut them out of the same cardstock.  To make each page nice and chunky and sturdy I then glued each page to its mirror version.


I wanted a vintage look with touches of metallic bronze so I cut each of the mat layers out of various patterned cardstocks as well as mirror versions of each mat too.  For the "P" page I used a sheet of Tim's Halloween Idea-ology paper and 2 DCWV papers for the "O" and "E" pages.   


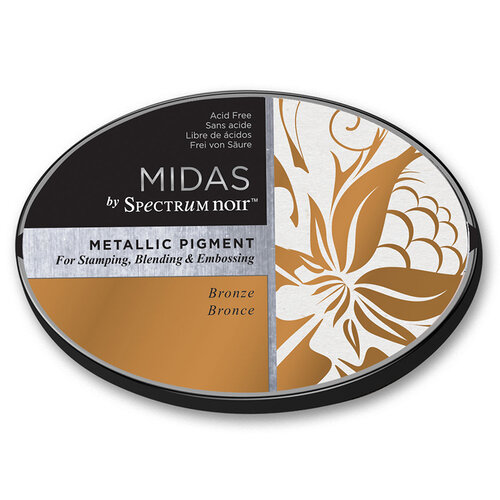
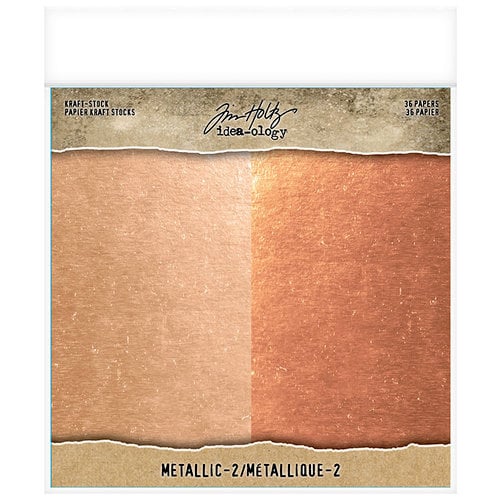
I applied Bronze Spectrum Noir Midas metallic pigment ink to both sides of each page and all the mats and then adhered the mats to the pages.  I then cut the separate POE letters overlays included the SVG Cutz set from Scrapbook.com’s glitter paper and the matching mats from Tim’s copper mirror cardstock.


I adhered the letter overlays to the mats and then adhered each letter to the book pages.


 I decided to go with book binding rings for my book so I used my handy dandy Japanese drill to make 3 holes into each letter page.  I’ve ordered some black and antique bronze rings so used my silver ones in the meanwhile.


I made pages for my book from black cardstock in different lengths and punched holes in those too. 


Here’s the back cover of the book which I decorated with more DCWV paper.


I decided to put past Poe makes inside my book and the page lengths are determined by the size of each make.


Check out my original post for this POEtastic tag above and the post for the Winter Raven tag below!


Check out the original post for the Poe tag below!
And that’s a wrap…our 7th annual Poe Appreciation Blog Hop has come to an end, well tonight at 5 minutes to midnight pacific to be precise but you know what I mean πŸ˜‰  But the Poe fun doesn’t end today coz you can still play in our SNOW or POE Challenge that ends on January 28th!  YAY!


Snap up the SVG Cutz sets featured today and also check out all my new POEtastic SVG Cutz 2022 release and the entire Edgar Allan Poe collection in the video and then shop LeighSBDesigns Poe Sale on now for the duration of the hop!
You're also welcome to grab my "Poe Love" FREEBIE HERE!


πŸ–€πŸ–€πŸ–€πŸ–€πŸ–€πŸ–€πŸ–€
 
 You can shop for the Spectrum Noir Midas Bronze ink pad, Tim's Rose Gold/Copper cardstock pad and Scrapbook.com's exclusive glitter paper pads and more at Scrapbook.com using my affiliate link!
πŸ–€ Thanks for supporting LeighSBDesigns Inspiration Blog while shopping for your favourite supplies πŸ–€
 
Crafter's Companion - Midas Ink Pad - Metallic - BronzeIdea-ology - Tim Holtz - 8 x 8 Kraft Stock - Metallic - 2


Thanks for stopping by to see today's featured make in our Poe Hop Finale!  See you soon for the winners post so stay tuned!
Happy Creating!
THE SHARPIE DOMINO QUEEN

Wednesday, January 19, 2022

Poe Appreciation Blog Hop 2022: Gothic Poe Gnome Window - Slimline Shaker Card by Leigh!

❄️ Happy 2022 Creative Friends ❄️
Today is Edgar Allan Poe Birthday and as is tradition here at LeighSBDesigns we celebrate with 5 glorious days of all things Poe, so here we go, it's now time to kick off our


Everyone is invited to enter Poe inspired makes in our 7th annual Poe Appreciation Blog Hop using any stamp company products as frequently as you choose!  The full Hop details, rules and the linky party are all in the MAIN POST!  We always have a POEtastic time so tell your friends and celebrate your love of Poe with us and be in the running for some POEtastic prizes too!  Please read the Hop Rules before linking up! 

Starting this month we also now host a completely separate monthly Challenge!
This month's theme is SNOW or POE so do check out the Challenge Main Post for all the details and play along!  You're very welcome to play in both events just not with the same makes though FYIπŸ˜‰


πŸ–€πŸ–€πŸ–€πŸ–€πŸ–€πŸ–€πŸ–€
 
Day 1
"Gothic Poe Gnome Window"
Slimline Shaker Card
by Leigh
 
I'm kicking of our totally POEtastic 7th annual Poe Appreciation Blog Hop today with a handsome slimline shaker card featuring my new Raven Gothic Window SVG Cutz and my lovable quirky Poe GnomeπŸ–€
 

 Welcome to my inner sanctuaryπŸ˜‰
On a cold winter night I like to curl up in front of the fire with Poe Gnome perched upon a stack of my favourite Edgar Allan Poe books reading to my hearts content by candlelight while the wind howls and bats fly around in the falling snow outside my Gothic window!
 

Ahhhh, to get lost in a scary tale on a dark and stormy night, sounds divine right!
 

I started out by cutting the lace overlay and mat layers of the Gothic Raven Window SVG Cutz set using my Silhouette Cameo 4.
 

 I applied Distress Black Soot ink to the panels and silver Spectrum Noir gilding wax to the top lace overlay panel before adhering them together without the base panel.  I made the shaker element by gluing a rectangle piece of acetate to the back of the assembled piece, added black double sided foam tape and filled it with faux snow and a few black confetti bats and then adhered the base panel in place.
 

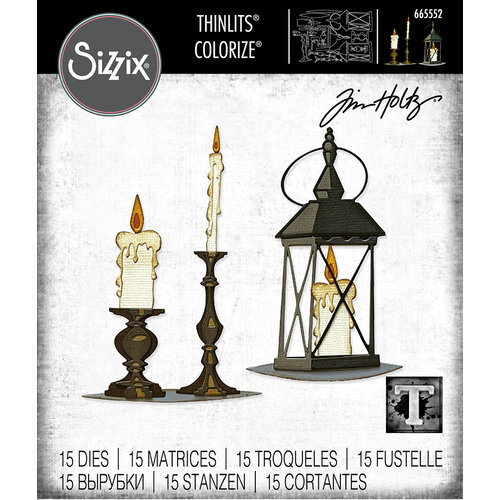
I then die cut out all the elements of Tim’s 2 colorize candlesticks from textured cream cardstock and used Distress Oxide inks to colour all the individual pieces before gluing them together.


I then coloured up Poe Gnome with Prismacolor pencils and fussy cut him out with scissors.  I coloured him to look like he’s glowing with reflected fire light while the Raven perched on his head keeps a watchful eye on the bats flying outside the window!


I attached Poe Gnome in place with black foam tape and then adhered the candlesticks to the windowsill with glue.  I completed my slimline shaker card by mounting the Gothic Window panel onto a slimline card base I made from black heavy weight cardstock.

Now back to reading a spooky macabre tale, pull up a chair and join me in front of the fireπŸ˜‰


Snap up the Digi Stamp and SVG Cutz set featured today and also check out all my new POEtastic SVG Cutz 2022 release and the entire Edgar Allan Poe collection in the video and then shop LeighSBDesigns Poe Sale on now for the duration of the hop!
You're also welcome to grab my "Poe Love" FREEBIE HERE!


πŸ–€πŸ–€πŸ–€πŸ–€πŸ–€πŸ–€πŸ–€
 
 You can also shop for Distress inks and Tim's Candlelight Colorize dies at Scrapbook.com using my affiliate link!
πŸ–€ Thanks for supporting LeighSBDesigns Inspiration Blog while shopping for your favourite supplies πŸ–€
 
Sizzix - Tim Holtz - Thinlits Dies - Candlelight Colorize
 
 Thanks for stopping by to see today's featured make and hope to see you hopping along!
Happy Creating!
THE SHARPIE DOMINO QUEEN