Customer Appreciation SALE-bration
Introducing the new Spring Release!
April's Loveleigh Kitties Release!
Loveleigh Kitties Sneak Peeks!
 Loveleigh Kitties Released So Far!

Tuesday, June 26, 2018

Tutorial Tuesday: "BrightLeigh Beautiful" by GDT Gina!

Howzit Creative Friends!
I'm delighted to have Gina joins us again today to share this fabulous creation featuring the lil miss Oddleigh Flower set who is now on FLASH SALE until midnight PT Thursday!  What a fabulous creation Gina, thanks so much for sharing this joyful project with us😘
Enjoy😀


 Gina used the Flowers included in the set to create a wonderful garden for lil miss Oddleigh Flower to stand in.


Gina found decorative papers in her stash perfect for creating a whimsical and bright colour palette.


She coloured up all the printed images with Promarkers and did some fussy cutting.  But, to Gina's dismay, lil miss Oddleigh Flower ended up with a smudge on her cheek which you'll see how she "fixed" later on😋


She wanted the card to be really bright and cheerful so she covered the 5.8" x 8.3" (A5) base card with multi-coloured polka dot decorative paper.


But Gina says she felt that left lil miss Oddleigh Flower "floating".


So to fix the "floating" issue Gina simply added a strip of decorative paper down the left side to "anchor" her as she didn't want too much layering going on.


She also strategically placed a little flower on her cheek to hide the smudge...problem solved😋


Gina then created a sign stamped with the perfect sentiment for lil miss Oddleigh Flower's garden and embellished both sides of the card with paper flowers.


Gina completed the scene with glitter glue for lots of magical sparkle in the summer sun.


Gina says lil miss Oddleigh Flower will be sitting by her desk to remind her to keep the sparkle in her life!  Brilliant idea Gina...everyone needs to be reminded of that I think😉


lil miss ODDLEIGH FLOWER set
https://www.etsy.com/uk/listing/525209613/whimsical-miss-oddleigh-flower-stylized?ref=shop_home_active_2

Materials used:
Promarkers
5.8" x 8.3" (A5) base card 
160gsm super smooth printer paper
Assorted decorative papers
Belle and Boo glittered butterfly card
Ranger Diamond Stickles
Die cut paper flowers kit - Craftwork Cards

Thanks for stopping by to see today's Tutorial Tuesday project😋
Happy Creating!
THE SHARPIE DOMINO QUEEN

Tuesday, June 19, 2018

Tutorial Tuesday: Oddleigh Flower-fest Gothic Arch by Val!

Howzit Creative Friends!
LeighSBDesigner Val has a fabulous Tutorial Tuesday project for you today full of the joyful flower filled days of Spring🌸

If you missed yesterday's news, LeighSBDesigns Etsy Boutique currently has a 15% off storewide SALE to celebrate Etsy's 13th birthday!  Sale ends June 22 at midnight PDT!
Enjoy😀


Hi Everyone, Val here with a fun Gothic Arch Flower-fest tutorial featuring the wonderful lil miss Oddleigh Flower set and Candles border from the Oddleigh Cupcake set!


 Start off by cutting out the gothic arch shape from white cardstock using the dimensions provided in the photo or you can make the arch any size you wish.


Cut out a second arch to create a frame.
 

Colour the base arch with Broken Glass and Peeled Paint Distress Oxides and colour the frame with CR2 and CR3 Spectrum Noir markers.  Rubber stamp birds flying in the sky with your favourite black ink.


Mount the frame arch over the base arch using 3D foam strips to give the arch dimension and to make it more sturdy.


 Cut 2 more arches from black cardstock.
Cover the back of the white base arch with one of them using double-sided sticky tape.


 Print out all the images multiple times onto Neenah white cardstock and colour them up with Spectrum Noir Colourista pens.  You will need lots of flowers and just one print of the candles border for this one!


Cut out all the images and use sticky foam strips and your favourite glue to adhere everything to the arch.  Embellish all the flower centers with yellow glitter glue.


Use the 2nd black arch panel to make a stand for the Gothic Arch.
 Cut the arch in half and score fold lines about a 1/4 inch from the center cut line on both pieces. 


Attach the stand to the back of the Gothic Arch with double-sided tape.


This would make a fun birthday card don't you think!  I had so much fun creating the arch and decorating it and hope you will give it a go!  Come and share your projects with us in LeighSBDesigns Facebook Fan Group😉


Here's a look at the finished project!


 Don't forget to check out our 15% off storewide SALEbration happening right now!
Sale ends June 22 at midnight PDT!

ODDLEIGH FLOWER SET
https://www.etsy.com/uk/listing/525209613/whimsical-miss-oddleigh-flower-stylized?ref=shop_home_active_2

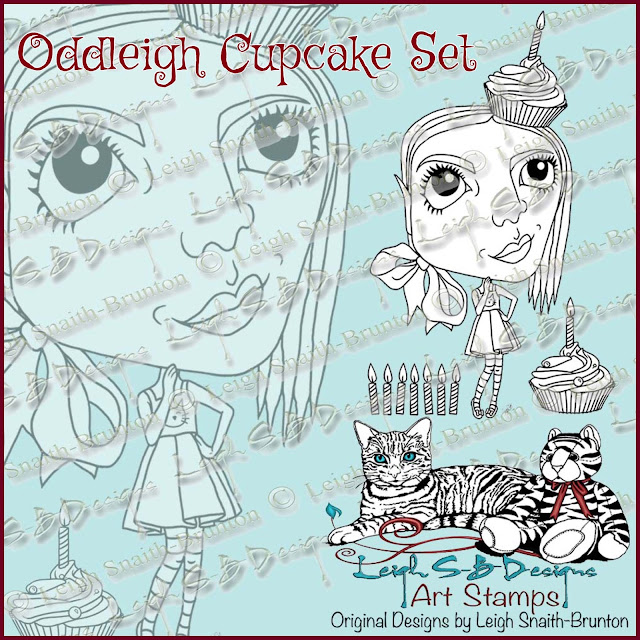
ODDLEIGH CUPCAKE SET
https://www.etsy.com/uk/listing/590710244/oddleigh-cupcake-set-3-digi-designs-by?ref=shop_home_active_11

I used the following materials:
Spectrum Noir Colouritsta pens:
Gold, Leaf Green, Orchid, Forest Green, Cobalt
Spectrum Noir CR2, CR3
Black ink pad
Neenah white cardstock
Black cardstock
Yellow glitter glue
Bird rubber stamp (craft mag freebie)
Double sided tape
glue

 Thanks for stopping by to see Val's project today😘
Happy Stamping!
THE SHARPIE DOMINO QUEEN

Monday, June 18, 2018

LeighSBDesigns 15% Etsy SALEbration!

Hi Creative Friends!
LeighSBDesigns is helping to celebrate Etsy’s 13th Birthday🎉
Enjoy 15% off storewide from today through midnight PDT June 22😁


Happy Creating!
THE SHARPIE DOMINO QUEEN

Tuesday, June 12, 2018

Tutorial Tuesdays: Anubis Bust Wall Art by Val!

Hiya Creative Friends!
 I'm delighted to share a gorgeous wall art piece by LeighSBDesigner Val for today's Tutorial Tuesday segment featuring my new Anubis Bust!  If you missed getting Anubis Bust during the release sale you can now get him on FLASH SALE at 25% off thru June 13, sale ends at midnight pacific!  Enjoy today's project😀


Hi Everyone, Val here and I'm excited to share my "Anubis Bust" large wall art tag with you all.
I printed Anubis Bust out onto Neenah solar white cardstock and die cut him out using a rectangle die measuring 6 3/4" x 2 1/2".


 I coloured him up using a combination of Spectrum Noir and Colourista markers and coloured Micron pens.


I then cut panels from white and black cardstock to create the large tag in the following sizes:
Two white panels measuring 8" x 5" and 7 3/4" x 4 3/4"
and a 7" x 4 1/2" black panel.


Using the largest white panel as the base for the piece, I coloured the outer edge with Spectrum Noir NT4 and NT5 and attached white and brown fiber as a hanger with glue.


 Edge the 2nd white panel with a black Sharpie marker and adhere it to the base panel so that just the coloured edges of the base panel shows.


Die cut out a frame from white cardstock using a rectangular decorative frame die and colour it with Spectrum Noir GB4, GB3 and NT3.  Mount the frame panel onto the black panel and adhere them both to the tag.


To add dimension I mounted the Anubis Bust panel onto the tag using strips of foam tape.


 I love the dimension of the finished piece and how the black edging and black cardstock behind the decorative frame makes the tag pop.


Don't forget Anubis Bust is on FLASH SALE at 25% off thru June 13!
Sale ends at midnight pacific!


 Materials used:

Spectrum Noir markers:  GB3, GB4, TN3, TN4 and TN5
Colourista markers:  Leaf Green and Orchid
Green, Red and Orange Micron Pens
Tonic nesting dies
Neenah white cardstock
Black cardstock
White and brown fibers
Foam Tape
Glue

Thanks for stopping by to see Val's project today!
Happy Stamping!
THE SHARPIE DOMINO QUEEN

Thursday, June 7, 2018

Egyptian god of the Dead by Nan and Half-o-Ween Winners!

Howzit Creative Friends!
I’ve got Half-o-Ween winners to announce, Woohoo🎉👻
Thank you to everyone who joined in on the Half-o-Ween Blog Hop fun and for leaving the players lots of love❤️

The Blogger prize of a $10 LeighSBDesigns Etsy Boutique gift certificate for playing and commenting goes to
GINA

and
The prize of a $5 LeighSBDesigns Etsy Boutique gift certificate for hopping and commenting on all the blogs goes to
JUNE

Congratulations ladies🎉. Please email me to claim your prizes by June 21st!

 Now for today’s project!
I’m sharing the clawesome Egyptian god of the Dead project LeighSBDesigner Nan shared on her blog for our May 31st hop featuring Anubis!

I love how LeighSBDesigner Val created a sun drenched scene for her Anubis project and Nan chose to set him in darkness surrounded by a painterly night sky!  The quote from The Book of the Dead is the perfect touch for Anubis🖤


Due to an Etsy glitch the release sale on both Anubis designs has been extended!
Enjoy 30% off thru June 10th!  Sale ends at midnight PDT!


Thanks for stopping by to see Nan’s project today!
Happy Stamping!
THE SHARPIE DOMINO QUEEN

Tuesday, June 5, 2018

Tutorial Tuesdays: Anubis Fancy Tri-Fold card by Leigh

Howzit Creative Friends!
On May 31st we had a spooktacular mini Half-o-Ween blog hop to celebrate reaching the half way point to October🎃  Those of us who LOVE Halloween always need a good excuse to indulge our dark sides so a big THANK YOU to those who joined in on the fun!  I will announce the winners of the two prizes this week so stay tuned👻   


 I shared my fussy cut tri-fold card featuring my two new Anubis releases for the blog hop and now here's my tutorial to show you how I created it.


Anubis (sitting) and Anubis Bust are currently on sale at a special release price!
Sale ends June 10 at midnight PDT!
 

  Print out both images onto Neenah solar white cardstock.  I used Prismacolor pencils to colour the fur areas and Copics for the bandages, Egyptian paintings and ornamentation to show a difference in the texture and style between the two areas.  I added highlights with a white gel pen and used a metallic gold gel pen on all the jewelry and to enhance the designs on Anubis' faces.


 Fussy cut out both images leaving a narrow white border then mat onto black cardstock and fussy cut again leaving a narrow black border.  This is one of my fave techniques to do coz it both strengths the fussy cut elements and also makes them stand out nicely against the backgrounds.
 Now for the fancy tri-fold card!  Cut a sheet of watercolour paper down to 8.5 inches by 10.5 inches.  Score and fold into 3 panels measuring 3.5 inches wide.


 Randomly apply Pumice Stone and Tea Dye Distress Ink to the panels with a foam ink applicator just to add a base of colour.  Then smear Tea Dye and Black Soot DI onto a non-stick craft sheet, spritz with water and randomly press the panels into the ink.  Dry with a heat tool as you go and just continue adding more layers of drips and splats for a wonderful ancient papyrus look.
 

  Unevenly apply Tea Dye DI ink to the large hieroglyphs stamp and cover each panel to get the worn look of ancient Egyptian stone chiselled walls.
 

 Stamp Egyptian scenery along the bottom of the panels on both the front and back of the tri-fold with Onyx Black Versafine ink.  Mask off areas and continue stamping to create continuous scenes and use a black Pigma Micron pen to fill in extra details where the stamps ended.


 Stamp the last panel, which is the tallest, with more hieroglyphs in Onyx Black ink.  I also stamped the first panel on the opposite side just to give it a cohesive look on both sides.
 

 Adhere the scrap piece of burlap and the Anubis Bust to the front panel with glue and a pop dot.  Fussy cut out the front panel leaving about a 1/4 inch border around the images.  Fold the card with the spine of the front panel on the right hand side and adhere Anubis (sitting) to the 2nd panel so he's visible behind the Anubis Bust when the panels are folded.
 

 Continue where the first panel ended and fussy cut around Anubis (sitting).  Fold the 2nd panel with the spine on the left and continue fussy cutting out the 2nd panel.  Cut the top of the last panel into a point to look like a pyramid towering behind both Anubis'.


 Finish off by applying Black Soot DI to all the edges of the tri-fold card.


 ANUBIS BUST

ANUBIS

Supplies used:
Sphinx rubber stamp - Stamp Cabana
Hieroglyphs rubber stamp - Judikins
3 Egyptian scenery and Hieroglyph rubber stamps - Sonlight Impressions
Pumice Stone, Tea Dye and Black Soot Distress Inks
Onxy Black Versafine Ink
Foam Ink Applicator
Prismacolor pencils:
Black, White, Indigo Blue, Black Cherry, Dark Brown, Yellow Ochre, Goldenrod, Yellowed Orange, Canary Yellow and Crimson Red
Copic markers:
E11, 40 - 47, N0-4, BG11 and 13, G21 and 85, Y13-17 and Y38, R27, 29 and 59
Black Pigma Micron pen
Ranger white gel pen
Metallic gold gel pen
Neenah solar white cardstock
Canson watercolour paper
Black cardstock
Tim Holtz Distress Sprayer and water
Scrap of burlap fabric
Glue
Pop dot

I love how my project turned out and hope you've enjoyed seeing how it came together!
Don't forget to snap up these two gorgeous Anubis designs while they're on sale at a special release price!  The 30% off Sale ends June 10 at midnight PDT!

Thanks for stopping by to see my project today!
Happy Stamping!
THE SHARPIE DOMINO QUEEN