July CREATivities
The Summer BUZZ Collection
Re-Release Sale-bration thru July 19!
The Gilded Raven Release!
"Rocky Mountain Christmas"
Winter 2025 Collection
Adopt all the Loveleigh Kitties, they're PURRfect for every occasion!
Showing posts with label Design Team Creations. Show all posts

Sunday, September 29, 2019

Welcome Autumn Tanlged Pumpkins card by Val!

Howzit Creative Friends!
We are now in the second week of Autumn and trees are already colourful here in southern
California๐Ÿ  In celebration of the arrival of Fall LeighSBDesigner Val has been creating beautiful Fall inspired cards and here's another one featuring my Tangled Pumpkins๐Ÿ

  You can get Tangled Pumpkins and lots more in LeighSBDesigns Spooktember Sale๐Ÿ
The sale ends September 30 at midnight pacific!


Val used the following supplies to create this beauty!
LeighSBDesigns Tangled Pumpkins digi art stamp
"Welcome Autumn" Autumn's Pencil Rubber Stamp set by Leigh Snaith-Brunton
Wild Honey Distress Oxide
Promarkers:  Apple, Bright Orange, Gold, Canary, Lipstick Red and Almond
Clarity Stamps Frame
Circle Stencil
Smooth white cardstock
Black cardstock
 
https://www.etsy.com/shop/LeighSBDesigns?section_id=1&page=2#items
 
See you on Tuesday for Day 1 of our 31 Days of Halloween Blog Hop๐ŸŽƒ

https://leighsbdesigns.blogspot.com/p/31-days-of-halloween-blog-hop.html

Thanks for stopping by to see today's featured project!
Happy Creating!
THE SHARPIE DOMINO QUEEN

Saturday, December 6, 2014

Altered Eclectics DT announcement :0)

Hello Everyone!
I'm thrilled to announce that I have joined the Altered Eclectics design team!  SQUEE :0)
My 12 Days of Christmas domino garland was my first project share over on their challenge blog!

If you're not familiar with Altered Eclectics then here's the scoop!
We run monthly challenges that start on the first of each month and it's for altered art only and the theme is always ANYTHING GOES!

The current challenge is the final one for 2014 and is the exception to the time frame coz it runs until February 1st 2015 so you've got plenty of time to come and play with us over the holidays ;0)

http://alteredeclectics.blogspot.co.uk/2014/12/the-countdown-to-christmas.html

Here's my 12 Days of Christmas domino garland project if you missed seeing it during my DominoART's 12 Days of Christmas blog hop on Dec 1st!

http://dominoartblog.blogspot.com/2014/12/12-days-of-christmas-blog-hop-dominoart.html

See you tomorrow for Day 4 of 12 Days of Creepmas!

Have a great weekend!
Happy Stamping!
 THE SHARPIE DOMINO QUEEN
I design for Smeared Ink * Lost Coast Designs * About Art Accents

Monday, July 30, 2012

"Summer Wishes" A Third Coast project plus Check out the Anything Goes Challenge at our Third Coast Creative Challenge Blog!

Hello Everyone!

I hope you're all having a fabulous week and enjoying your summer vacations!!


As Challenge Coordinator I'm hosting a new challenge over at Third Coast Rubber Stamps brand new blog and you're all invited to come and play with me ;0)  TCCC#2 starts August 1st and its a fan favourite, an Anything Goes challenge!  Which means the theme is open to whatever your heart desires...however, I did throw in a twist ;0)  You must use the colour Yellow in some way, whether it be incorporated into your coloured images or you use yellow cardstock or flowers or ribbon...you get the idea!


 I was inspired by all the glorious warm weather we are having...aahhhh...to create this sun drenched, summer party time card to get you all in the mood for creating with YELLOW!

Tuesday, March 6, 2012

"Numerology" DominoART Card featuring a Crafter's Workshop Template!

Hello Everyone!
It's time for DominoART's March DMT which stands for DominoART's Monthly Technique!
This month I challenge you to try using a stencil or a template to create a design on a domino or any other similar game tile!  I'm calling this one the "D'ART Stenciling Technique".


The theme for my DominoART card is Numerology which is a branch of knowledge that deals with the occult significance of numbers.  I had a ball playing around with the various elements and think this card would be suitable for someone who is into Numerology or just as an all occasion card.  You could really personalize it to a number or a date that is significant like a birthday, anniversary or a graduation date.  The possibilities truly are limitless!
Please pop over to my DominoART Blog to see the full tutorial on how I altered the domino and made this card!  I've also got a DominoART Challenge going if you're interested in altering dominoes or other similar game pieces, so come and join us!


Thanks for stopping by today and enjoy the rest of your week!
Happy Stamping!
 THE SHARPIE DOMINO QUEEN
I design for Blockheads Paper Arts * Third Coast Rubber Stamps * About Art Accents

Sunday, February 26, 2012

"Dream" Steampunk Mini Book

Hello Everyone!
Following on from my last project here's my 'Dream' Mini Book that features the Crafter's Workshop Template Mini Numbers Collage and Steampunk style stamps by Blockheads Paper Arts.


I've been experimenting with Crafter's Workshop Templates for Blockheads Paper Arts' design team using various products to create interesting backgrounds and effects.  I've got a few projects to share and this is my second template project.  I love making tiny books and haven't done so in a while so couldn't resist making this one ;0)

Here's a peek at some of the backgrounds I've made with the Mini Numbers Collage template so keep an eye out for all the projects I've done with them ;0)  If you missed the Steampunk inspired "IMAGINE" card using the background on the left then check it out here.

Here's a list of all the stamps and supplies I used from Blockheads!

 Mini Numbers Collage
Victorian Invention

Feeling Regal
Verses Full Sheet

Quickutz Mini Album Die set - Sugarplum
Tim Holtz Idea-ology Nostalgic Tape
Tim Holtz Idea-ology Film Strip Ribbon
Tim Holtz Idea-ology Charm Clips
Tim Holtz Distress Tool
Penny Farthing Charm (Hobbycraft UK)
Tiny Brass Brads
Tiny Hole Punch
Metallic Gold Rub-ons
Memento Tuxedo Black and London Fog Ink Pads
Versamark Watermark Ink Pad
Perfect Pearls Gold Powder and soft bristle brush
Decorative Chalks or Pebbles Chalks
Sponge Chalk Daubers
Tim Holtz Idea-ology Paper Stash cardstock
Brown, light grey-brown and seafoam cardstock
Bronze-Copper metallic shimmer paper
Metallic yellow ribbon
Brayer
Double-sided Tape
Permanent Adhesive Tape

Friday, December 9, 2011

Blockheads' Naughty Christmas Mice - Wood Ornament featuring Sharpie Coloured Game Pieces

Happy Friday Everyone!
Last week I shared my tradition of making porcelain Christmas tree ornaments with you all and now I'm back today with another two-sided Christmas ornament but this one is a lazor-cut wooden one with a two sided Sharpie coloured game tile center piece!  I decorated each side differently to show you two looks in one but you can make both sides the same if you want to of course!


 The two naughty mice causing havoc on the Christmas tree from Blockheads Paper Arts' Figgy Pudding stamp sheet are the featured images on the Lexigo game tiles.  If you're crazy about altering game pieces like me then you're probably familiar with the Chekit game!  The cream coloured game tiles are now hard to come by so I was particularly excited to find the Lexigo game that has the same shape pieces but are just slightly smaller and have letters on the back instead of patterns!


 I used the following supplies to create this wonderfully fun but still elegant Christmas tree ornament!
I call this a Christmas tree ornament but you could totally hang this on a display stand as a featured ornament in your home too!

Blockheads' Figgy Pudding Mice stamp sheet (the top left one)
 2 x Lexigo game pieces
Lazer cut wood ornament from Michaels
Black StazOn ink
Distress Stains:  Bundled Sage and Fired Brick
Fireworks Ink Spray:  Lilac Posies
Smooch Spritz:  Vanilla
Sharpie Markers:  Ultra Fine points - Black, Green, Lime, Rose, Pink Lemonade, Red, Brown, Coconut and Almond
Judikins Diamond Glaze
Delta Ceramcoat Gloss varnish
Metallic Gold Paint pens (broad and fine tip)
Yellow Glitter Glue
Gold wire
Gold jump ring and jewelry pliers/wire cutter
K and Company Poinsettia and Holly embellishments
Heat It embossing gun


Start off by colouring the inner edge with a broad point metallic gold paint pen, the side with the letters is the back so that edge is the inner edge.  It's important to do this step first because you won't be able to colour the sides of the game pieces when they're glued together!  Apply a small amount of Judikins Diamond Glaze to the back of one of the pieces and adhere them together.


Stamp the mice onto the game tiles with black StazOn ink and either heat set with a heat gun or leave overnight for the ink to dry.  Colour the images with Sharpie markers using my Sharpie Domino Queen technique and then edge and colour the sides with a broad point metallic gold paint pen.


Cut a length of gold wire and wrap it around the game tiles so that it sits in the groove between them.  Form a loop on one side and then wire wrap the other end around it to form the hanger.  Apply Judikins Diamond Glaze to the gold sides of the altered game piece with your finger or brush and then apply glaze to one side of the game tile directly from the bottle and let it dry.


Apply glaze to the other side once everything is dry.  Start on the wood ornament while you're waiting for the glaze to dry.


Stain one side of the wood ornament with Bundled Sage Distress Stain and let it dry.  Then spritz it with Fireworks Lilac Posies for a mottled effect.  The Fireworks sprays have a wonderful shimmery sparkle to them and this side of the ornament definitely gives me of visions of sugar plums ;0)


Stain the other side of the ornament with Fired Brick Distress Stain and spray it with Vanilla Smooch Spritz so that it shimmers too.  It's hard to see the beautiful shimmer in the photos but trust me, it is oh so pretty ;0)  Once dry apply gloss varnish to the entire ornament (both sides).


Colour the bow part of the ornament with the broad point metallic gold paint pen and outline all the edges of the cut outs and the edges.  

TIP:  Sealling the ornament with varnish first stops the gold paint from absorbing and bleeding into the wood and makes the gold areas more shiny too!


Colour the edges of the ornament with the broad point pen and then use the fine point metallic gold paint pen to get into the tight spots on the bow.  You could paint the sides of the ornament with gold paint and a brush if you don't have paint pens!


Apply yellow glitter glue to the bow, the outside edge of the present and the inside edge of the circle only.  Attach the altered game tile center piece to the inside of the ornament with a jump ring and embellish with dimensional paper poinsettias and holly and you're done!

I love the way this ornament turned out!  It's fun and playful with the use of the mice images but still very elegant and beautiful because of the detailed scroll work of the wood!

I hope I've inspired you to create your own ornaments this year!  They make wonderful gifts but don't forget to treat yourself to one too ;0)

Happy Holidays!

I design for Blockheads Paper Arts * Third Coast Rubber Stamps * About Art Accents

Thursday, November 24, 2011

"Faera the Tiger Fairy" Fall & Winter Art Card - a Third Coast Creative Coterie project!

Happy Thanksgiving Everyone!

Today I'm sharing my non-traditional 'two seasons merged into one' Tiger Fairy art card designed for
Third Coast Rubber Stamps Creative Coterie!

Faera the Tiger Fairy

The Tiger Fairy is a very rare species but if you time it just right you might be lucky enough to catch a glimpse of one when they come out to play just as Fall turns into Winter!


I based my design on the colours of the gorgeous ribbon which represent the end of Fall and by including the Christmas Rose and Holly stamp as my background image I moved the design into Winter too!  I think this one would be perfect as a non-traditional Thanksgiving or Christmas card ;0)
 
The featured stamps are all from
Third Coast Rubber Stamps
Fairy Faera CH-717-H
Tiger Eyes lg CH-684-H
Christmas Rose and Holly DP-003-R


Stamp Fairy Faera onto Neenah Solar White cardstock with Tuxedo Black Memento ink and colour with Copic markers.  I used the following Copics:  Hair:  E11, 13, 15, Skin: E000, 00, 02, Wings: G000, GY11, Clothes: G21, 82 and 85.  Add tiger stripes to the fairy's clothing with a black Copic Multiliner.  Colour the background with Cedar Green Derwent Watercolour pencil and blend with a Dove Blender pen.  Add white highlights with a Gel pen.  Die cut the panel with a Spellbinders Label 8 die and apply Peeled Paint Distress Ink to the die cut edge with a Blending tool.  Use the same Spellbinder Label 8 die as a template and trace the shape onto copper cardstock, cut out and then adhere the Fairy panel to it with permanent adhesive tape.


Cut rectangle mats from olive green, dark lime green and copper cardstock.  Stamp the Tiger Eyes image with Tuxedo Black Memento ink onto the dark lime green panel and mask the eyes.  Stamp the rest of the panel with the Christmas Rose and Holly image multiple times in Ancient Page Leaf Green ink, masking each area before continuing.  Distress the edges of the panel with a Distress tool and then apply Peeled Paint Distress ink with a Blending tool.  Add highlights to the eyes with a white gel pen to make them really pop.  Adhere the Tiger Eyes panel to the copper mat and then to the olive green mat with permanent adhesive tape.

Cut a length of the gorgeous Ribbon that has velvety stripes (Michaels) and adhere it to the panel with double-sided tape and secure the ends to the back of the panel with tape too.  Adhere the entire layered panel to a black folded card blank.  Then adhere the Fairy panel to the front of the card with pop dots.  Die cut assorted Sizzix flourishes from the two green cardstocks and distress gently with Peeled Paint Distress Ink.  Adhere the flourishes to the card with small dabs of glue.
Embellish the card with 3 Recollections paper roses in 3 shades of green. 


I'm entering this card into the following challenges:
Challenge #14 Thanksgiving, Thank you or Sketch - Crafting for All Seasons Challenge Blog
Free For All with Creative Craft Challenges
Challenge #89 Anything Goes - One Stitch At a Time
Challenge #58 Anything Goes - Lollipop Crafts 
Challenge #71 Anything Goes - Fresh Brewed Designs
Challenge #68 Snow Angels - Use a Fairy or Angel - Wags n Whiskers Rubber Stamps
Flutter By Wednesdays #181 Butterfly/Fairy/Angel 

Enjoy your holiday weekend!
Happy Stamping!

THE SHARPIE DOMINO QUEEN
I design for Blockheads Paper Arts * Third Coast Rubber Stamps * About Art Accents

Wednesday, November 2, 2011

"Tanglelicious Pumpkins" Thanksgiving inspiration featuring Blockheads New Digi Stamps!

Happy November Everyone!

Thanksgiving is a few short weeks away and I had fun today creating this card featuring Blockheads Paper Arts new digi stamps.  I used their Pumpkin and Happy Thanksgiving images and manipulated them in Photoshop.  I composed a scene of 3 pumpkins and altered their shape and size and changed the size of the sentiment digi stamp and printed both images out on Neenah Solar White cardstock.


TIP:  Don't be intimidated by the digital stamps!  You don't have to have fancy art editing software to be able to create and have fun with them.  You can print out the images in the sizes they come but if you want to alter them then look for free or shareware art software downloads on the web, there's quite a few available that will allow you to manipulate the size of digi stamps!

I decided to go with a black, white and orange colour scheme and used a black Micron pen and an orange Zig pen to draw the Tangle patterns on the pumpkins.  In the center segments of each pumpkin I drew organic 'living' tangles:  Growth, Pendrills and Scrawlz and Hollibaugh in all the other sections and alternated the sections between black and orange.  I used Black N910 and Orange O835 Marvy Le Plume Permanent markers to colour in all the areas and Ash Grey AG873 for shadows.


I used a Spellbinders Label 8 die as a template to make the Pumpkin panel coz the actual die was too big for what I wanted.   So I just shrunk the size down by moving the die around and tracing the shape to the size I needed and cut it out with scissors.  I then die cut another panel from Neenah Solar White cardstock with the largest Labels 8 die and created the striped Tangle border with the same three Le Plume Permanent markers.  Next I used the Pumpkin panel as a stencil and lightly traced the shape onto the larger panel and drew the shadow line with AG873 and AG875.  I edged both panels with a metallic gold paint pen and adhered the Pumpkin panel to the striped panel with permanent adhesive tape.


I adhered the panels to a black folded card blank and drew in the white free-form border with the new Marvy Le Plume Pigmented marker OP920.  I then coloured in the 'Happy Thanksgiving' sentiment with O835, created shadows with AG873 and 875, added highlights with a white gel pen and coloured in 'Happy' with an orange glitter gel pen.  I finished off by cutting out the sentiment and adhering it to the card with pop dots.

It's a simple layout for a highly detailed image that packs a punch and I'm really pleased with how this one turned out!

I've got another Thanksgiving inspired card to come that's just for the guys so stay tuned!

Thanks for visiting with me today and as always....Happy Stamping :0)


THE SHARPIE DOMINO QUEEN
I design for Blockheads Paper Arts * Third Coast Rubber Stamps * About Art Accents

Monday, October 31, 2011

Kid's Treat Box Card featuring Third Coast Rubber Stamps!

The Trick or Treating continues with a definite treat in this case ;0)

Check out the Treat Box Card I designed for the Third Coast Creative Coterie design team that's perfect for kid's of all ages ;0)


I made this one especially for my 4 year old nephew, Daniel, and it went all the way to the UK and arrived in time and in one piece, phew! 

All the stamps used are by Third Coast Rubber Stamps:
AP-479-P Free Parking
AP-523 Broomstick Dog
VB-041-EE Happy Bat Sm


I stamped the scene onto white cardstock with a Tuxedo Black Memento ink pad and did all the colouring with Derwent Watercolour pencils and a Dove Blender pen.   I drew in the curvy trail line with a few scattered leaves to give the impression that the Broomstick Dog had just whooshed in then added highlights with a white gel pen.  I then distressed the edges of the panel with Black Soot Distress Ink.


I cut some panels from Halloween themed decorative paper and adhered them to the black folded card and mounted the panel onto the card with double-sided tape.


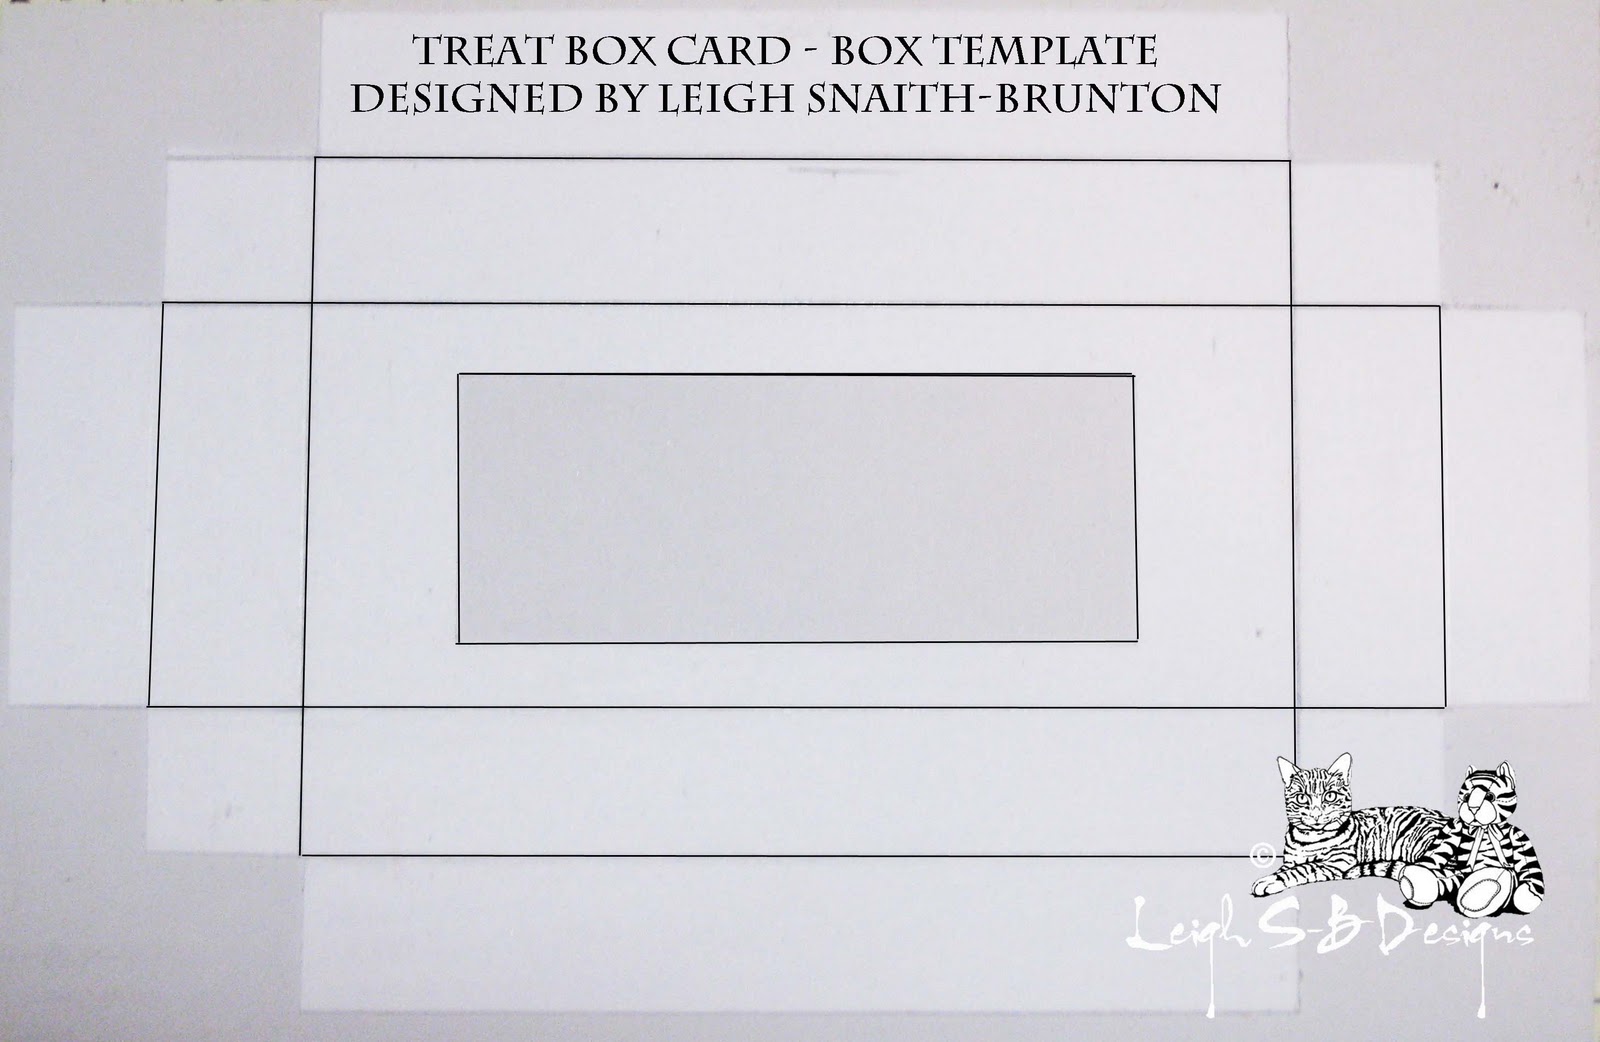
I then constructed a box for the treat based on the size of the actual chocolate from white cardstock which I then covered with the decorative spider web paper.


I cut an X slit in the window, trimmed the flaps, folded and adhered the flaps with a glue stick.


I then constructed the box and adhered the sections together with a glue stick. 


Only one side of the box can be opened to get the chocolate out so I drew in an arrow and wrote 'Open' on the side to be opened.  


I then adhered the treat box to the front of the card with double-sided tape and added the Martha Stewart Crafts self-adhesive bat border along the top of the card and the skulls border on both sides of the treat box.

After I took all my photos I decided to bling the card up a bit and made it more magical!  I added glitter glue around the edge of the stamped panel, edged the matte bats, edged the window on the treat box and also added glitter glue to the moon.  It was just the finishing touch that was needed ;0)

Thanks for joining me on this spooktacular Halloween night!
Sleep tight and don't let the boogie man bite ;0)

THE SHARPIE DOMINO QUEEN
I design for Blockheads Paper Arts * Third Coast Rubber Stamps * About Art Accents

Saturday, October 22, 2011

'Winter Dragon' Domino Pendant - A Third Coast Creative Coterie Project!

Happy Saturday Everyone!

It's been quite chilly here in San Diego this week with lots of foggy mornings so I was inspired to share a wintery Third Coast Creative Coterie design team project with you today!

I designed a DominoART pendant featuring the gorgeous Dragon Orb (CH-696-H) rubber stamp by Third Coast Rubber Stamps.
I'm absolutely crazy for dragons and Third Coast has a large selection of gorgeous dragons to choose from ;0)

Winter Dragon
DominoART Pendant

I used my signature 'Sharpie Domino Queen' Technique to alter the domino so no surface preparation was needed and I stamped the image directly onto the shiny standard sized domino with Coal Black Ancient Page dye ink and heat set with my favourite heat gun called the Heat It.  I coloured the dragon and the background (upper and lower left side of the domino) with a combination of Ocean Blue and Sky Blue Sharpie markers.  I used Purple and Lilac to colour the details on the dragon and the orb in the background.


I painted the large orb on the upper right of the design with purple pearlescent glass paint and used an extra-fine point metallic silver paint pen on the tiny orb the dragon is clutching in its right claw.  I then used Stickles glitter glue to create the magical wintery crystal orb the dragon is holding in its left claw.  I love how the orb glows and sparkles!  I highlighted the dragon's eyes with an extra-fine gold paint pen to give the impression that the dragon's eyes are reflecting the glow from the crystal orb.  I then edged the domino with a broad point metallic silver paint pen.  Once everything was dry I applied a coat of Judikins Diamond Glaze.


I then fashioned a bale from metallic midnight/cobalt blue wire and free-form wrapped the wire around the domino so that it was encased inside the wire 'cage'.  I curled the one end to mirror the curl of the dragon's tail and also mirrored the curve of the orb in the background where the wire wrapped around the domino.


On the back of the domino I looped the wire to form the bale and hooked the other end of the wire beneath the back section.  Once the wire was snug against the domino I applied a small amount of Judikins Diamond Glaze beneath the curled wire end on the front of the domino so that it would adhere to the domino and further secure the wire in place.

I finished off my necklace with a turquoise velvet cord with a silver lobster claw clasp.

Have a great weekend!
Happy Stamping!

THE SHARPIE DOMINO QUEEN

I design for Blockheads Paper Arts * Third Coast Rubber Stamps * About Art Accents