July CREATivities
The Summer BUZZ Collection
Re-Release Sale-bration thru July 19!
The Gilded Raven Release!
"Rocky Mountain Christmas"
Winter 2025 Collection
Adopt all the Loveleigh Kitties, they're PURRfect for every occasion!
Showing posts with label Cards for Guys. Show all posts

Tuesday, December 22, 2020

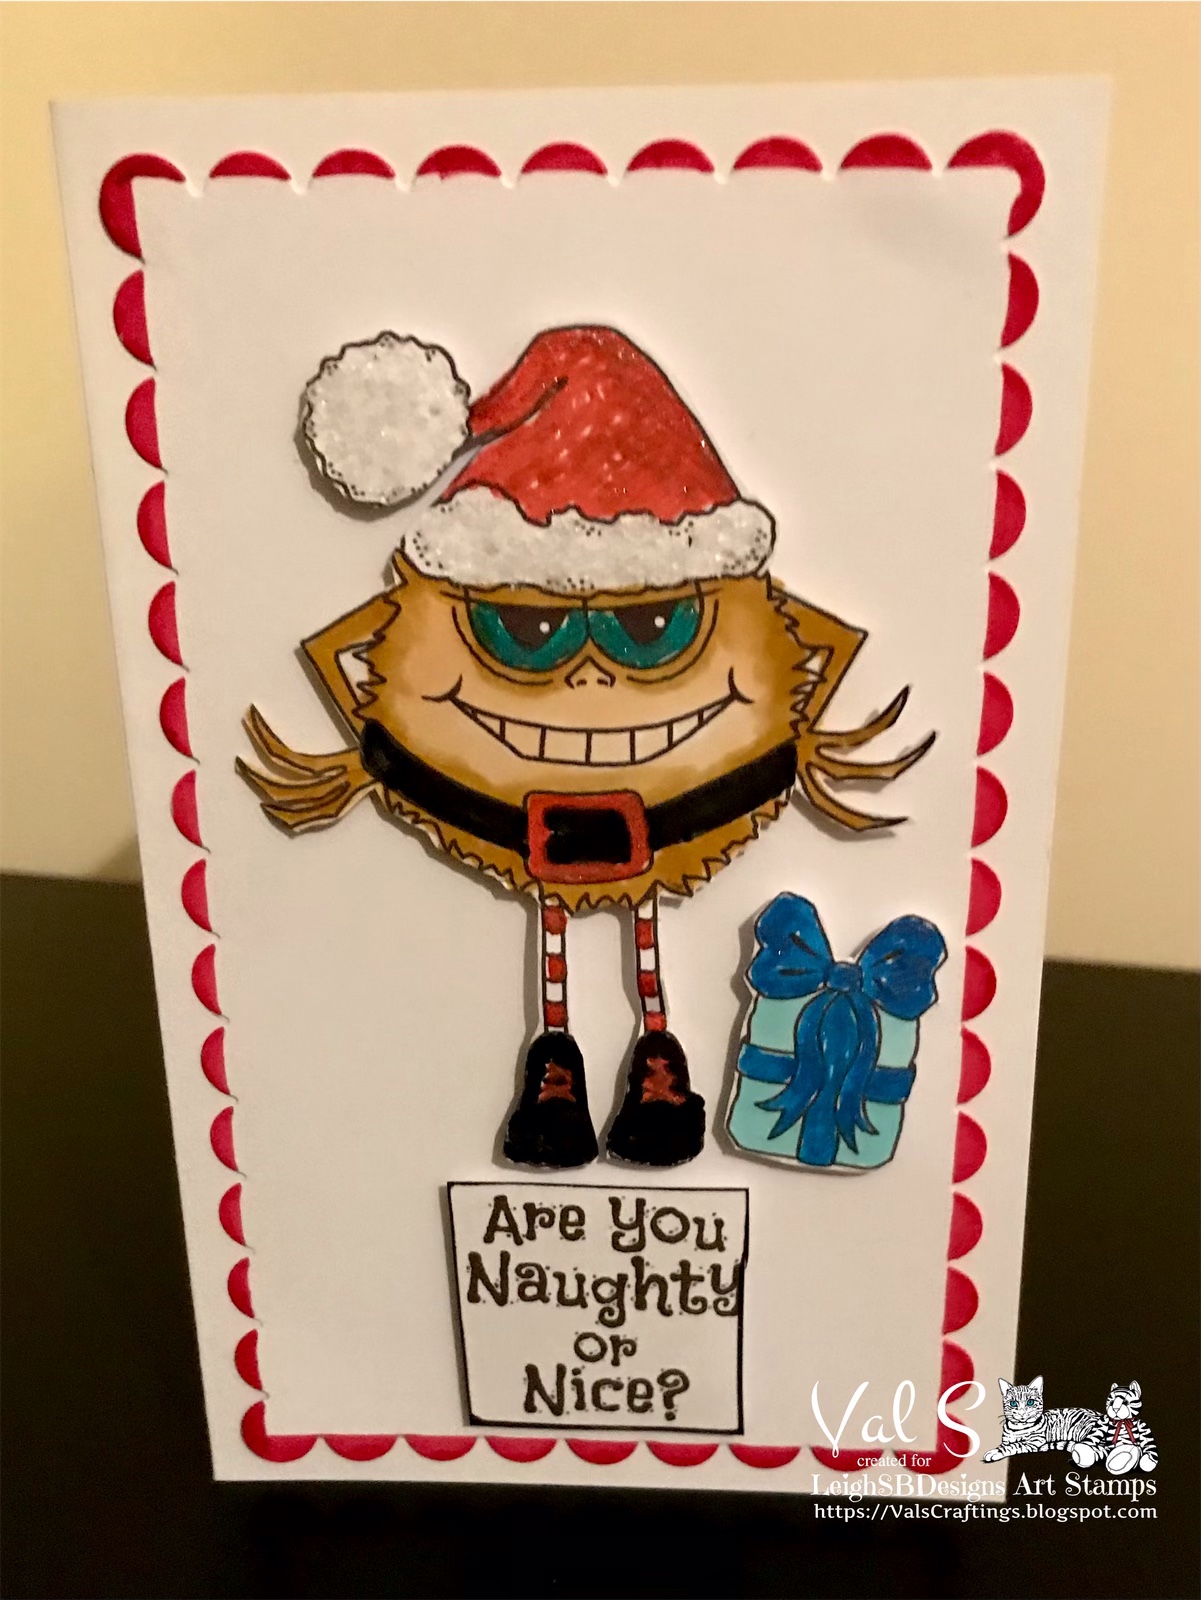
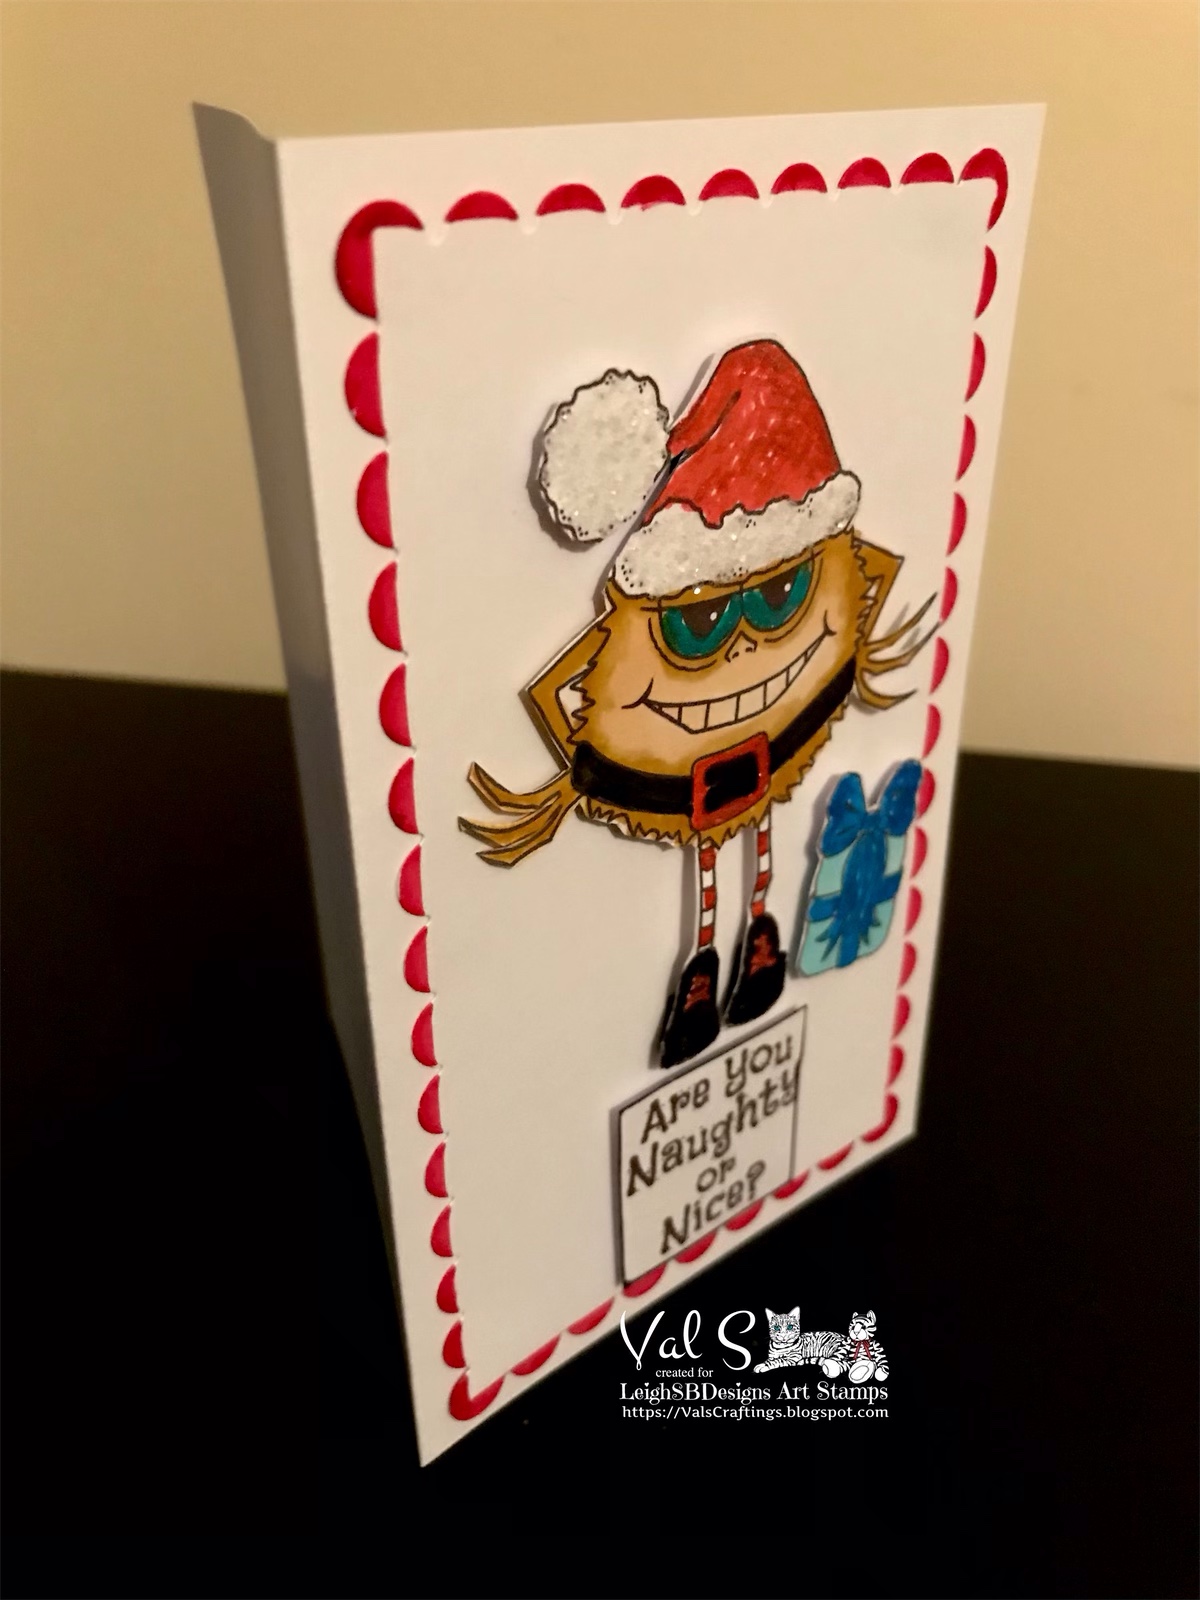
Are you Naughty or Nice? Santa Claws Balleigh Monster card for kids by Val!

Howzit Creative Friends!
If you missed our fabulous 'Tis the Season "stay crafty @ home" Blog Hop you can see all the festive hop entries shared by fans of LeighSBDesigns and makes shared by Val and I HERE and don't forget to shop the
 The fun continues on here now with more fabulous inspiration for the remainder of 2020 into 2021 and you've got more blog hop fun to look forward to starting with our annual Edgar Allan Poe Appreciation Hop that begins on Poe's birthday, January 19!


❄️ Are You Naughty or Nice? ❄️
Santa Claws Balleigh Monster card by Val

LeighSBDesigner Val's festive inspiration for you today is a fun and mischievous make featuring my new Santa Claws Balleigh Monster and the senti from the Naughty or Nice Sandy Oddleigh set ❄️
 
 
Val used the following supplies to create her fun and festive card perfect for kids of any age!
 
 
Spectrum Noir Tri-Blends:
Cool Blues, Fiery Red, Brown Blends, Mint Blue, True Black
Tim Holtz Rock Candy Glitter
White Gel Pen 
Smooth white cardstock
Pop sticky dots
 

Check out my STAMPtember 2020 Collection!


Thanks for stopping by to see today's featured make!
Stay Safe and Happy Creating!
THE SHARPIE DOMINO QUEEN

Thursday, April 18, 2019

Steampunk Easter Egg tag by Val!

Howzit Creative Friends!
LeighSBDesigner Val has another fabulous masculine Easter project to share with you today!  This time she's used the Steampunk Easter Egg freebie that's available in LeighSBDesigns Facebook Fan Group to create this handsome tag!


Materials used:
Promarkers:  Henna, Dusty Pink and Ice Grey4
Black Sharpie Pen
Americana Triple Thick Glossy Accent
Versamark Pen
Bronze Embossing Powder
Walnut Stain Distress Ink
Happy Easter rubber stamp
Fibers
Smooth white cardstock
Kraft Cardstock
Scalloped dies
 
Come join LeighSBDesigns Facebook Fan Group to get this fun FREEBIE!
 FACEBOOK FAN GROUP

Thanks for stopping by to see today's featured project!
Happy Creating!
THE SHARPIE DOMINO QUEEN

Sunday, April 7, 2019

Steampunk Easter Bunny - masculine card by Val!

Howzit Creative Friends!
LeighSBDesigner Val has a fabulous Easter card with more of a masculine vibe for your inspiration today! Creating cards for guys is always rather challenging but you can't go wrong with the Steampunk theme and my Steampunk Easter Bunny is perfect for your masculine projects!

 
Materials used:
Spectrum Noir markers:  TN3, TN4, TN5,CR5, CR4, CR2, IG5 and GB1
Promarkers:  Ice Grey4 and Amethyst
Distress Oxides:  Mustard Seed and Squeezed Lemonade
Americana Tripple Thick Glossy Accent
Happy Easter stamp
Bakers Twine
Neenah white cardstock
Yellow cardstock
Black cardstock

https://www.etsy.com/uk/listing/510997680/whimsical-steampunk-easter-bunny-digi?ref=shop_home_feat_4

Thanks for stopping by to see today's featured project!
Happy Creating!
THE SHARPIE DOMINO QUEEN

Friday, February 3, 2017

VALENTINE - The East Wind DT

Howzit Everyone!
Some big changes have happened over at The East Wind!  We are concentrating more on promoting Unky's fabulous new release images and only hosting a couple of Challenges this year.  Today we have a Challenge for February to kick off our new schedule and the theme is Love and Romance!
 

Everyone needs ideas for making more masculine Valentine's Day cards for the guys so here's my design team project for the challenge, a masculine card featuring this lovely digi called Aurora "Be My Valentine".  I printed her out onto Neenah solar white cardstock, coloured with Copics and added white Dylusion paint pen highlights.  I fussy cut her out and adhered her to the layered panels with Scotch Quick Dry adhesive which were adhered to the folded card with pop dots.  I made the folded card from a sheet of black cardstock and also decorated the inside of the card with more of the stripe decorative paper.
 

I juxtaposed the lovely feminine image with the use of masculine black, white and gray decorative paper combined with metal alphabet paper clip embellishments to spell out the word "Valentine" plus 2 self adhesive black diamonds.  It's the perfect combination of a masculine card with a feminine focal point. 
 

 Come and enter our February challenge for the chance to win gorgeous The East Wind digis and join us over in our The East Wind Facebook Group too!
http://www.theeastwind.com/

 Thanks for stopping by to see my project today!
Happy Stamping!

 Leigh S-B

THE SHARPIE DOMINO QUEEN
I design for * Lost Coast Designs * Carmen's Veranda * The East Wind * Delicious Doodles *

Tuesday, July 19, 2016

Zentangle Octagonal Cards - Lost Coast Designs News Stamp Showcase Day 2!

Howzit Everyone!
We're showcasing all the latest additions to the Lost Coast Designs stamp catalogue over at Lost Coast Portal to Creativity this week!


For Day 2 of the Showcase we featured our new ZENTANGLE FEATHERS and PATTERNS


I made these two striking octagonal shaped cards to feature the bold style of our new Zentangle stamps.   These cards are suitable for anyone and can work for any occasion but they make great masculine cards don't you think.
I used Zentangle Feather 1 and 2 on this one and also used one of the feathers to create the border framing the feathers. 


Zentangle Square 1 is such a striking design it can also be used on its own for a nice bold look. 


Thanks for stopping by to see my projects today!
Happy Stamping!

 Leigh S-B

THE SHARPIE DOMINO QUEEN
I design for * Lost Coast Designs * Carmen's Veranda * The East Wind * Delicious Doodles * Rick St Dennis EDT *

Whimsical Bird Gift Card Holder - Lost Coast Designs New Stamps Showcase Day 1

Howzit Everyone!
We're showcasing all the latest additions to the Lost Coast Designs stamp catalogue over at Lost Coast Portal to Creativity this week!


Yesterday we featured our new adorable birdies, WHIMSICAL BIRDS by Doris Arndt


I was thinking along the lines of when you need ideas for a group gift so I made a masculine themed gift card holder that makes giving a gift card from the mom, wife and kids to that special man so much more fun! 


I used Lost Coast Designs large Whimsical Frankie bird for my focal image and to mirror the spots on Frankie I used Carmen's Veranda White Dominoes on the background mat.  The text is from Lost Coast Designs large collection of Misc Words.


The colouring on the Bird die cut panel is a combo of Copics and Derwent pastel pencils.  I mirrored the shape of the Spellbinders die cut on the gift card cover and on the pocket inside.


Thanks for stopping by to see my project today!
Happy Stamping!

 Leigh S-B

THE SHARPIE DOMINO QUEEN
I design for * Lost Coast Designs * Carmen's Veranda * The East Wind * Delicious Doodles * Rick St Dennis EDT *

Wednesday, June 22, 2016

"Nap Time" Father's Day card for the Rick St Dennis EDT!

Howzit Everyone!
I'm sharing another kitty themed Rick St Dennis Elite Design Team project today using Nap Time.
My precious Daddy would have loved this card for Father's Day and I was thinking of him while I made it.


I started out by horizontally flipping the digi in Photoshop CS6 and sizing the image.  I then printed it out twice on Neenah solar white cardstock and coloured the main image and a portion of the 2nd print with Copics and Prismacolor pencils.  I fussy cut out the right hand side of the main image & the coloured portion of the second and used brown Derwent pastel pencil blended with a Dove blender pen to colour the background on the the left.  

 
To create the 3D layered part of the card I adhered the fussy cut portion of the chair, man and kitties with pop dots and then completed the card with the fabulous crossword puzzle from the 12 x 12 DCWV's Heirloom Stack patterned paper adhered to the right hand side of the card.  I chose the part that says Relaxation and Afternoon and from another part of the paper I cut out Nap and layered it onto a piece of cardstock coloured black and then layered it with pop dots too.
 

I finished the card off by distressing the edges and applying just a touch of Black Soot Distress Ink to frame it.  I love the warm cozy feel of the finished card and all the sleeping kitties!
 
Thanks for stopping by to see my project today!
I'm going to enter this one over at
Show Us Your Pussies #7 Furrything Goes

Happy Stamping!
 
Leigh S-B
 THE SHARPIE DOMINO QUEEN
I design for * Lost Coast Designs * Carmen's Veranda * The East Wind * Delicious Doodles * Rick St Dennis EDT *

Thursday, April 19, 2012

"Measure" Steampunk card featuring Lost Coast Designs - A Blockheads DT project!

Steampunk is definitely one of my favourite stamping themes and I had a blast getting my Steampunk action on with this card ;0)  Here's another project for Blockheads' upcoming newsletter feature on creating with Border Stamps featuring Borders by Lost Coast Designs!


Last Friday I shared a project that featured a loose stamped weave pattern created with just the border stamps themselves instead of weaving paper strips and now I'm going to show you how to do a tight basket weave pattern too.  I've  been playing around and created a few basket weave backgrounds.  Here's a sneak peak at a weave (left) that I'll be using in my next project created with just the Measuring Tape border and also a peek at the sewing themed background I created from a weave that went wrong...so don't throw away your 'mistakes' coz you can still make fun backgrounds with them ;0)


On this project I used the following Lost Coast Designs rubber stamps
Steampunk Typewriter Girl, Measuring Tape border, Bingo border and Numbers border.

Friday, April 13, 2012

"A View From A Window" Fantasy Art Card featuring Lost Coast Designs Border Stamps!

Happy Friday 13th!

 Not quite the view from a window you were expecting to see is it ;0)  It's raining buckets outside today so I changed my plans and decided to stay indoors to continue with my Atlantian fantasy story....


LSBD Log:  Day 42 - We are still finding so many wonderful treasures down here but today I discovered the best treasure of all!  I found a chamber with a phenomenal view overlooking the sunken city of Atlantis...


The Blockheads Design Team is playing with ideas for using border stamps and I've been having a ball with the borders by Lost Coast Designs!   My first project 'Portal To Atlantis' features the Iris Fold technique, my second project 'Codex Atlanticus' demonstrates using the border strips to make a basket weave and a border background collage and my third...wait for it...using the border stamps themselves to create a basket weave.  Alas, due to some time constraints I didn't get my 'tight basket weave' project completed in time for today but I was able to get this one with a loose weave design ready instead!

I used the following Lost Coast Designs border stamps on my fantasy art card:
Tear Drops (top right), Spiral (bottom left) and Wave (bottom right) to create the loose weave... looks like the ruins of the city of Atlantis don't you think!  Blockheads' Fish image from the Seascape - Fishes set and Inky sentiment from my favourite full sheet of Verses completed my card!

Wednesday, April 11, 2012

"Codex Atlanticus - Artifact #42" Art Card featuring Paper Weaved Border stamps by Lost Coast Designs

Howzit Everyone!

My fantasy scifi story continues from yesterday's project 'Portal To Atlantis' and I've got more fun uses for border stamps to share with you!

LSBD Log:  Day 31 - We have been exploring the strange ruins but its slow going with a lot of the chambers submerged under water but we are making some surprising discoveries.  Today's exciting find has made it all worth it - ref. catalogued artifact #42 the 'Codex Atlanticus'.  We have managed to translate a few sentences on the tablet depicting the Codex and believe it to be some kind of a cipher device but the meaning of the numbers and text on the right panel are still unknown .  The wealth of technology we are finding down here is astronomical...


I used the following Lost Coast Designs stamps on my fantasy art card:
Borders:  Tear Drops, Spiral, Wave, Antique Text, Tape Measure, Numbers and Bingo and the wonderful Steampunk Typewriter Girl image as the focal point of my card.

Tuesday, April 10, 2012

"Portal to Atlantis" Iris Fold Art Card featuring Lost Coast Designs Border Stamps at Blockheads Paper Arts

Howzit Bloggers!

I'm a huge fan of fantasy and Scifi and the stories about Atlantis and the Bermuda Triangle have been firm favourites of mine since I was about 13years old!  So when it came to designing some projects to give you ideas for what you can do with border stamps by Lost Coast Designs I was immediately inspired by the borders that seemed to have the feeling of water and my art card story developed from there.   So come with me on my Creative Adventure and delve into the mystery...


LSBD Log:  Day 11 - A strange portal has finally been unearthed revealing a spiral staircase, with intricately detailed mosaic steps, leading down into mysterious watery depths.  Could this be it?  Have we finally found the lost civilization of Atlantis, here in this remote location of the Bermuda Triangle?  What will we find down there?  The expedition will head down the staircase at 5am...

Saturday, March 17, 2012

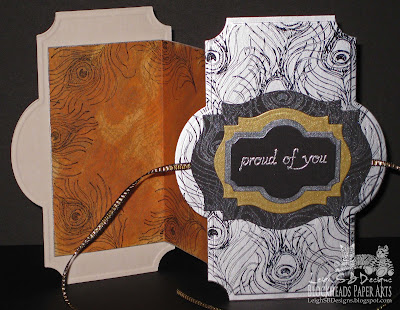
"Proud Of You" Art Deco Accordion Card!

Hello Bloggers!

 Over the last few days we've (the Blockheads Design Team) been sharing our 'Different Points of View' in celebration of the launch of the "Proud As A Peacock" stamp set!  It's a horrible wet and wintery day here in San Diego and I'm so happy I'm indoors and sharing my 3rd Peacock inspired
project that has an Art Deco feel to it and this one also features a stamp from Blockheads "Botanical Silhouettes" set which launched last week!

"Proud of You" Art Deco Accordion Card

Click on the pics below of my first two projects if you missed them:  
"Twilight Serenade" and "We're So Proud"

"Proud As A Peacock"
"Botanical Silhouettes" 

Tuesday, February 21, 2012

"IMAGINE" Steampunk Card featuring Crafter's Workshop Mini Numbers Template

Hello Everyone!

I've been experimenting with Crafter's Workshop Templates for Blockheads Paper Arts using various products to create interesting backgrounds and effects.  I've got a few projects to share so I'm starting off with this cool Steampunk style card.  You can get a head start on your Father's Day cards with this one but its also suitable for an guy card occasion too.


Here's a peek at some backgrounds I've been creating with the Mini Numbers Collage template so keep an eye out for all the projects I've made with them ;0)

I used the following Blockheads Paper Arts stamps on my "IMAGINE" card!
Victorian Invention
Grunge It Up
Verses Full Sheet
Household Notions
Vintage Light and Form
 Here's a list of all the supplies I also used.
All the linked items are available from Blockheads!
Spellbinders Labels 21 die
Spellbinders Tan Embossing Mat
Tim Holtz Alterations Ticket Decorative Strip
Tim Holtz Idea-ology Film Strip Ribbon
Tim Holtz Idea-ology Charm Clips
Tim Holtz Distress Tool
Clock Charm (Hobbycraft UK)
Tiny Brass Brads
Tiny Hole Punch
Regular/Standard hole punch
Metallic Rub-ons
Memento Tuxedo Black and London Fog Ink Pads
Brilliance Lightning Black Ink Pad
Versamark Watermark Ink Pad
Versmark Watermark Pen
Decorative Chalks or Pebbles Chalks
Sponge Chalk Daubers
Brown, blue, light grey-brown and seafoam cardstock
Double-sided Tape
Permanent Adhesive Tape

Wednesday, November 9, 2011

"Say Oink Oink If You're Thankful for Football!" A Blockheads DT Project!

Howzit Stampers!
It's nearly time for the big Thanksgiving game!  Do you need some card inspiration for the guys in your life?  Will a Thanksgiving card that involves Football score a touchdown for you?  Then I've got a manly Thanksgiving card to share with you ;0)


I designed this little cutie just for the guys and used the Pumpkin digi stamp and Naughty Pig rubber stamp available exclusively from Blockheads Paper Arts.

NAUGHTY PETS

SUPPLIES
White and Black cardstock
Neenah Solar White cardstock
Tim Holtz Alterations Pocket Watches and Steampunk Texture Fades set
Memento Tuxedo Black ink pad
Distress Ink Pads:  Fired Brick and Vintage Photo
Tea Dye Distress Stain
Black Micron pen
Marvy Le Plume Permanent Markers:
O835, R812, R803, OY848, E858 and E859
Orange Watercolour pencil
Turquoise Prismacolor pencil
Dove Blender Pen
Pencil
Tim Holtz Distress Tool
Inkssentials Ink Blending Tool and Foam pads
Tiny Black brads and tiny hole punch
Spellbinders Square dies
Black pop dots
Double Sided tape
Raffia
Painter's Tape/masking tape


Lay out 4 digi stamp Pumpkins and print them out onto white cardstock.  Die cut the panel out with a Spellbinders Square die.  Emboss the left hand side of the panel with Tim Holtz' Pocket Watch Texture Fade.


Decorate the two pumpkins on the right hand side with Tangle patterns.  Use a black Micron pen to draw and colour in the black areas and a pencil for the rest and for shading.  Use Orange (O835) Marvy Le Plume Permanent marker to colour in some of the Tangled areas and sections of the pumpkins on the left hand side too.  I used the following more masculine patterns on the top pumpkin:  Baton, Barbershop and Boomerangs.  On the bottom pumpkin:  Boomerangs, Ambler and Jonqal.  No floral swirly whirls for the guys ;0)


Mask off the embossed side with painters tape and apply Vintage Photo Distress Ink to the panel with an Ink Blending tool.  Remove the tape and mask off the stained side and apply Tea Dye Distress Stain directly to the cardstock in a random fashion.  Leave areas of white and apply more Tea Dye Stain with a piece of paper towel so that some areas aren't as saturated.  Apply Fired Brick Distress Ink to the just the embossed areas with a Ink Blending tool and remove the masking tape.


Rough up the edges of the panel with a Tim Holtz Distressing Tool and ink up the distressed edges with Fired Brick Distress ink.  Add more pencil shading to the Tangled pumpkins.  Punch tiny holes into all 4 corners and add tiny matte black brads.  Wrap raffia around the panel along the dividing line and adhere in place with double sided tape.


Stamp the Naughty Pig from the Naughty Pets collection onto Neenah Solar White cardstock with Memento Tuxedo Black ink.  Die cut out the panel with a Square Spellbinders die and a slightly larger square from black cardstock.  Colour in the image with Marvy Le Plume Permanent markers.  Pig:  R812 and R803, Football:  OY848, E858 and E859.  Colour the eyes with a Turquoise Prismacolor pencil and add background to the image with an Orange Watercolour pencil and blend with a Dove Blender Pen.  Roughen up the edges on both the panel and the black mat with the Distress tool and apply Fired Brick Distress Ink with the Ink Blending tool.  Adhere the image panel to the mat with double sided tape.  Punch tiny holes in all 4 corners and add tiny brads.


Make a folded card from black cardstock and adhere the large panel to it with double sided tape.
Adhere the Naughty Pig to the card with black pop dots.  Finished!  A manly mans Thanksgiving card that will surely delight the guy in your life, and if not, oh well at least you tried, right ;0)

This little cutie fits the bill for this weeks Fall/Winter Challenge over at Mark's Finest Papers!

Christmas is coming!  Christmas is coming!
Stay tuned coz I'm going to be getting all wintery with lots of seasonal creations!!!

My team mate, Karen, has already started getting into the Christmas spirit so hop on over to her blog for a look see!

Design Team Call for Blockheads Paper Arts!
We're looking for 3 creative artists to join our amazing Design Team! 

Get the scoop on the DT details here!
Happy Stamping!

THE SHARPIE DOMINO QUEEN
I design for Blockheads Paper Arts * Third Coast Rubber Stamps * About Art Accents