Introducing the new Spring Release!
Purrtastic releases so far!

Monday, October 31, 2011

Kid's Treat Box Card featuring Third Coast Rubber Stamps!

The Trick or Treating continues with a definite treat in this case ;0)

Check out the Treat Box Card I designed for the Third Coast Creative Coterie design team that's perfect for kid's of all ages ;0)


I made this one especially for my 4 year old nephew, Daniel, and it went all the way to the UK and arrived in time and in one piece, phew! 

All the stamps used are by Third Coast Rubber Stamps:
AP-479-P Free Parking
AP-523 Broomstick Dog
VB-041-EE Happy Bat Sm


I stamped the scene onto white cardstock with a Tuxedo Black Memento ink pad and did all the colouring with Derwent Watercolour pencils and a Dove Blender pen.   I drew in the curvy trail line with a few scattered leaves to give the impression that the Broomstick Dog had just whooshed in then added highlights with a white gel pen.  I then distressed the edges of the panel with Black Soot Distress Ink.


I cut some panels from Halloween themed decorative paper and adhered them to the black folded card and mounted the panel onto the card with double-sided tape.


I then constructed a box for the treat based on the size of the actual chocolate from white cardstock which I then covered with the decorative spider web paper.


I cut an X slit in the window, trimmed the flaps, folded and adhered the flaps with a glue stick.


I then constructed the box and adhered the sections together with a glue stick. 


Only one side of the box can be opened to get the chocolate out so I drew in an arrow and wrote 'Open' on the side to be opened.  


I then adhered the treat box to the front of the card with double-sided tape and added the Martha Stewart Crafts self-adhesive bat border along the top of the card and the skulls border on both sides of the treat box.

After I took all my photos I decided to bling the card up a bit and made it more magical!  I added glitter glue around the edge of the stamped panel, edged the matte bats, edged the window on the treat box and also added glitter glue to the moon.  It was just the finishing touch that was needed ;0)

Thanks for joining me on this spooktacular Halloween night!
Sleep tight and don't let the boogie man bite ;0)

THE SHARPIE DOMINO QUEEN
I design for Blockheads Paper Arts * Third Coast Rubber Stamps * About Art Accents

The Finale of 31 Days of Halloween - "Keeper of Lost Souls" Super-sized Mixed Media Domino Sculpture!

Happy Halloween Everyone!

It's Day 31 of DominoART's Spooktacular 31 Days of Halloween extravaganza over on the DominoART Blog!

I hope everyone has enjoyed checking out all the DominoART eye-candy all month long!
It has been a real treat and I want to thank everyone for sharing their wonderful DominoART creations with us!  Each project is listed by day in the left hand sidebar if you've missed some projects.  Just click on the artist's name and the link will take you straight to the featured project!
Here's the grand finale creation for Day 31 of Halloween by me!

The Keeper Of Lost Souls

The Keeper of Lost Souls is a Nature Goddess and she protects the souls of people who have left this world but they're missing and are still waiting to be found by their loved ones.
   
This is an eerie mixed media sculpture that incorporates a skeleton with an altered super-sized domino and is a Third Coast Creative Coterie design team project.

I used a portion of the gorgeous rubber stamp image called Bromberrie's Web (VW-019-N) available from Third Coast Rubber Stamps which can be found in the Summer 2006 catalog.  
Isn't she stunning!!


Hop on your broomsticks and dash on over to the DominoART Blog to see all the details and photos for this project!
Best Witches and Happy Stamping!


THE SHARPIE DOMINO QUEEN
I design for Blockheads Paper Arts * Third Coast Rubber Stamps * About Art Accents

Friday, October 28, 2011

"What's A Ghoul To Do But Eat De Chocolat" A Blockheads Design Team Halloween Project!

 Happy Halloween Everyone!

It's candy time and today I'm treating you to a Blockheads Design Team creation that has a chocolate theme going on in more ways than one...intrigued?  Read on to find out what my surprise chocolatey ingredient is ;0)

 'What's A Ghoul To Do But Eat De Chocolat'

Supplies
Mansion Digital Stamp and Goth Girl Rubber Stamp available from Blockheads Paper Arts
Marvy Le Plume Permanent Markers
White Gel Pen
Tuxedo Black Memento Ink pad
Platinum Planet Brilliance Ink pad
Black Soot Distress Ink 
Ink Blending tool (look in the Other Brushes section)
Tim Holtz Alterations Tattered Banners die
Sizzix Fence die
Tim Holtz Idea-ology Nostalgic Tissue Tape
Tiny Bubbles Cuttlebug Embossing Folder
Surprise Chocolatey Ingredient ;0)
Brown Cardstock
Black card blank
Neenah Solar White cardstock
White paper
Plaid ribbon
Double-sided tape
Glue stick
Pop dots in various sizes and thicknesses
Heat It embossing tool
Dymo Buddy Label Maker
 
Instructions
Blockheads Paper Arts now has a new exclusive line of digi stamps and I started my project by sizing the Mansion digi stamp in Photoshop and printed it out onto white paper and then cut it out.   I coloured the Mansion all black for a silhouette effect with Black 910 Marvy Le Plume Permanent marker.  I didn't want to completely lose the printed detail of the Mansion and that's why I decided to use the paper because the Black Le Plume Permanent marker has more of a semi-opaque quality to the ink on paper compared to its more solid opaque quality on cardstock.

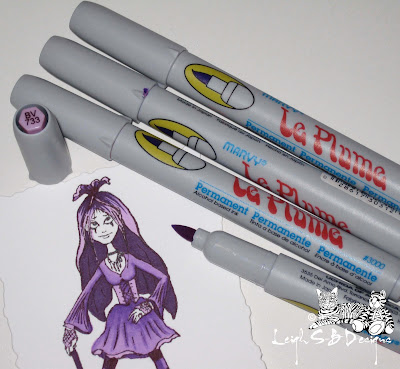
In cased you missed the great news Blockheads now carries the new Marvy Le Plume Permanent markers and Copic Sketch markers!!  I used the Marvy Le Plume Permanents for all my colouring on this project.


I coloured the windows of the Mansion with Yellow 625, Orange 835 and Orange 837 and used the Yellow marker to blend all 3 colours together to achieve that warm but spooky glow!  But the windows were a bit too cheerful for the mood I was going for so I toned them down by going over them with just one layer of Ash Grey 873.  Now the spooky mood is set!


I stamped the Goth Girl from Blockheads Paper Arts exclusive line of rubber stamps with Tuxedo Black Memento ink onto Neenah Solar White cardstock and then cut her out with sharp fine point scissors.  I prefer to do all my cutting out before I colour my images just in case I don't like the way it looks and then at least I didn't waste my colouring.

Goth Girl is a Goth Ghoul today so I coloured her clothing with a plaid pattern to match the plaid ribbon I used!  I created the plaid pattern with Y625, O835 and a Black Copic Multi-liner.  Her skin is coloured with OR821 and then I went over some areas again with the same marker to give her face a bit of shading.  I used Black 910 on her hair and shoes and you can see what I mean about it being more opaque on the cardstock compared to the paper I printed the Mansion on.  Her corset, shoes and sections of her stockings are coloured with OY848 which is the chocolatey brown colour and I also used Y625 on her stockings, gloves and cuffs.  I then added shading throughout the image with AG873.  I added highlights and hair details with a white gel pen and finished off with a touch of metallic silver on her corset buttons, jewelry and her cane is silver too.


Now for the card.  I used a black 6.25 x 5 inch folded card blank and cut a mat slightly smaller from chocolate brown cardstock.  I embossed 2/3rds of the mat with a Tiny Bubbles Cuttlebug Embossing Folder and using the Direct To Paper method I inked up just the embossed bubbles with a Platinum Planet Brilliance ink pad.  Heat set the ink and then distress the cardstock edges with Black Soot Distress Ink and a foam Ink Blending tool.


Now I can reveal my surprise chocolatey ingredient!  I covered the bottom 1/3rd of the mat with Hersey's Kisses Air Delight foil wrappers!!  The wrappers are metallic silver with chocolate brown bubbles and now my silver embossed bubbles on the upper portion of the chocolate mat is a mirror image of the bottom!  Cool heh!!  I also adhered two of the Hersey's Kisses 'Air Delight' tags along the bottom edge of the mat and distressed with Black Soot Distress Ink.  The wrappers and tags were all adhered with a glue stick.  I then adhered a length of plaid ribbon along the background join line with double-sided tape.  Next I adhered the Haunted Mansion to the mat with low profile pop dots and then die cut a Sizzix rickety fence from black cardstock, distressed it with touches of Platinum Planet Brilliance and adhered it to the mat with thicker cut up pop dots.  


I then adhered the Ghoul Girl with even thicker pop dots for a multidimensional layered effect.


Next I created the sentiment with a Dymo Buddy Label Maker and adhered the words to the top portion of the mat.  I like the way the silver bubbles also look like stars in a chocolatey sky!


I die cut a Tim Holtz Tattered Banner from scrap cardstock and covered it with the 'De Chocolat' portion from Tim's Nostalgic Tissue Tape and lightly distressed it with Black Soot Distress Ink.  Then adhered it to the card front and adhered the mat to the black card with double-sided sticky tape.

And there you have it...a multidimensional chocolate themed Halloween card good enough to eat!
I hope you like it!  I would love to hear your thoughts on my projects so please feel free to comment away ;0)

Now that Halloween is practically on top of us that means Thanksgiving and Christmas is just round the corner!  Yay!  Christmas is my absolute favourite time of the year and I'll be getting into the spirit of the season with lots of wintery projects and a Thanksgiving project too!  So stay tuned for lots of holiday inspiration!

Have a spooktacular Halloween weekend and I hope you get time for lots of stamping and eating candy!

THE SHARPIE DOMINO QUEEN
I design for Blockheads Paper Arts * Third Coast Rubber Stamps * About Art Accents

Saturday, October 22, 2011

'Winter Dragon' Domino Pendant - A Third Coast Creative Coterie Project!

Happy Saturday Everyone!

It's been quite chilly here in San Diego this week with lots of foggy mornings so I was inspired to share a wintery Third Coast Creative Coterie design team project with you today!

I designed a DominoART pendant featuring the gorgeous Dragon Orb (CH-696-H) rubber stamp by Third Coast Rubber Stamps.
I'm absolutely crazy for dragons and Third Coast has a large selection of gorgeous dragons to choose from ;0)

Winter Dragon
DominoART Pendant

I used my signature 'Sharpie Domino Queen' Technique to alter the domino so no surface preparation was needed and I stamped the image directly onto the shiny standard sized domino with Coal Black Ancient Page dye ink and heat set with my favourite heat gun called the Heat It.  I coloured the dragon and the background (upper and lower left side of the domino) with a combination of Ocean Blue and Sky Blue Sharpie markers.  I used Purple and Lilac to colour the details on the dragon and the orb in the background.


I painted the large orb on the upper right of the design with purple pearlescent glass paint and used an extra-fine point metallic silver paint pen on the tiny orb the dragon is clutching in its right claw.  I then used Stickles glitter glue to create the magical wintery crystal orb the dragon is holding in its left claw.  I love how the orb glows and sparkles!  I highlighted the dragon's eyes with an extra-fine gold paint pen to give the impression that the dragon's eyes are reflecting the glow from the crystal orb.  I then edged the domino with a broad point metallic silver paint pen.  Once everything was dry I applied a coat of Judikins Diamond Glaze.


I then fashioned a bale from metallic midnight/cobalt blue wire and free-form wrapped the wire around the domino so that it was encased inside the wire 'cage'.  I curled the one end to mirror the curl of the dragon's tail and also mirrored the curve of the orb in the background where the wire wrapped around the domino.


On the back of the domino I looped the wire to form the bale and hooked the other end of the wire beneath the back section.  Once the wire was snug against the domino I applied a small amount of Judikins Diamond Glaze beneath the curled wire end on the front of the domino so that it would adhere to the domino and further secure the wire in place.

I finished off my necklace with a turquoise velvet cord with a silver lobster claw clasp.

Have a great weekend!
Happy Stamping!

THE SHARPIE DOMINO QUEEN

I design for Blockheads Paper Arts * Third Coast Rubber Stamps * About Art Accents

Thursday, October 20, 2011

Zentangle'Ween Art Cards - A Blockheads Design Team Project!

 Happy Thursday Everyone!

Have you been swept up by the Zentangle phenomenon?  I sure have and I love it!
It was super cool to finally give the 'doodles' I've been doing my entire life a name and I was amazed too that a lot of my doodles were actual tangle patterns!  Of course it goes without saying that stampers have taken Zentangles further by doing them inside rubber stamped images and digi stamps.  I had a little medical procedure done last week and in my down time I got some Zentangles done, I hope you like them ;0)


Today I'm sharing two Zentangle cards and a jumbo Tag I've made using Blockheads Paper Arts new line of Digi Stamps!  I re-sized and combined images in Photoshop and printed them all out on white cardstock.

Beware the Eve of the Harlequin Moon

I used the Scary Cat digi stamp for my jumbo tag and the following Tangles:
Knightsbridge on the moon and Hollibaugh on the cat.   I love that the Hollibaugh tangle makes the cat look like a mummy-zombie breaking free of its bandages ;0)  


For my Zentangles I use the recommended Micron 01 pen for the fine details, a fine point Sharpie marker for the larger areas and a pencil for shading.  I realized once my jumbo tag was finished that I would have preferred the cat coloured black instead of the moon so I will do that next time!  So this kitty is a ghost-mummy-zombie so be triple beware of this kitty crossing your path ;0)  I cut out the panel and used a corner rounder punch on the corners then grunged up the edges with Black Soot Distress Ink and an Ink Applicator tool and then matted it on black cardstock.  I added self-adhesive black pearls to 3 corners.


I made the jumbo tag from black cardstock and cut a smaller panel from decorative Halloween pumpkin paper I found in Target's $1 section and punched a hole at the top with a standard hole punch.   I created a really cool half-punched design along the bottom of the tag with a Martha Stewart Lattice punch.  A while ago I discovered by happy accident that combined cardstock and paper mats are too thick for the punch to handle which results in the half-punched diamond pattern which I love so I used it here and then tore the bottom for a ragged edge!  I then applied Black Soot Distress Ink to grunge it up.   


I embellished the left side of the tag with an iron-on fabric applique spiderweb trim from Joann's.  It ironed on to the jumbo tag nicely and then I embellished the right hand side with Tim Holtz' Hobgoblin tissue tape.  


I finished off my jumbo tag with the warning message made with a Dymo Buddy label maker and added two kinds of flag fancy fiber (one is glittery and the other is matte). 

Haunted House Card

For this card I combined two of Blockheads digi stamps:  the 'Mansion' and the 'Boo!' sentiment.  I used quite a few Tangles on this one:  Hollibaugh, Printemps, Tagh, Web, Flukes, Keeko, Swirls, Cubine, one that looks like a Chevron, Squares and a few of my own thrown in for good measure.  I cut, punched, distressed and matted the Zentangle panel the same as the tag and then mounted it onto a decorative mat from the Martha Stewart Crafts Elegant Witch Mat Pad.  I actually used the design on the back of the mat coz it matched my monochromatic colour scheme but the lime green spider design on the other side was too good to waste so I cut a peek-a-boo window into the folded card I made from black cardstock.  Now the design can be appreciated when the card is opened ;0)  I completed my card with a glittery bat cut from a self-adhesive border trim by Martha Stewart Crafts.


Here's a few close-ups of the Zentangles!


Happy Halloween Pumpkin Card

On the last card I also combined two Blockheads digi stamps:  the 'Happy Halloween' sentiment and the 'Pumpkin'.  I used the Hollibaugh, Growth and Keeko Tangles on the Pumpkin with my own patterns on the leaves.  On the sentiment image I used Knightsbridge for the background and I don't have a name for the pattern I used on the border, anyone know?


I cut, punched and matted the Zentangle panel the same as I did on the tag and Haunted House card and then mounted it onto a decorative mat from the Martha Stewart Crafts Elegant Witch Mat Pad.  Again I used the design on the back of the mat but decided not to do a peek-a-boo window for this one.  I embellished the matted panel with white and black self-adhesive pearls and sheer black ribbon and also used a white mat on this card before adhering it to the folded card I made from black cardstock.

I hope you enjoyed checking out my Zentangle'Ween creations!  I've got a few more up my sleeve with a Thanksgiving theme so stay tuned for those!

Happy Stamping!
THE SHARPIE DOMINO QUEEN
I design for Blockheads Paper Arts * Third Coast Rubber Stamps * About Art Accents

Tuesday, October 11, 2011

"Passion For Purple" Marvy Le Plume Permanent Markers Blending Tutorial by Me

Howzit Stampers!


Today I'm sharing my first in a series of Tutorials on how to use Marvy Le Plume Permanent Markers and Copics.  This is a Blending Tutorial called "Passion for Purple" using the Marvy Le Plume Permanents - Blue Violet Blending Set!  Pop on over to the Blockheads Blog for the full tutorial with step-by-step photos!


I hope you find it very helpful and would love to hear your thoughts on my tutorial and the markers if you decide to collect them so comment away!

Also check out my tutorial on the card I made using this coloured image

Happy Stamping!


THE SHARPIE DOMINO QUEEN
I design for Blockheads Paper Arts * Third Coast Rubber Stamps * About Art Accents

Marvy Le Plumes Permanent Markers Review by Me

 Howzit Stampers

If you've been wanting to join the Copic craze but found them a tad pricey for your crafty budgets then you'll be very excited about these worthy rivals!  Marvy Le Plume Permanent markers are here and lucky for you Blockheads has them!  I've been having a blast testing them out and I'd like to share my thoughts about them with you too.  You can find my review on the Blockheads Blog!


The Le Plume Permanents are wonderful to colour with and blend just as nicely as Copics!   I'll be sharing some Blending Tutorials with you as well as some How To's on creating special effects with lots of tips and tricks to get you well on your way to gorgeous colouring...so stay tuned!


Happy Stamping!


THE SHARPIE DOMINO QUEEN
I design for Blockheads Paper Arts, Third Coast Rubber Stamps and About Art Accent

Friday, October 7, 2011

"Miss Purple Poison" - A Blockheads Design Team Card!

 Howzit Stampers!
There's a new permanent marker in town worthy of being a rival for Copics and guess what, they're more affordable and just as awesome and they're now available at Blockheads Paper Arts!


 Let me introduce you to the new Marvy Le Plume Permanent markers!  141 colours are available including a Blender Pen and Stacey and I have been very busy putting together some perfect blending sets to get you started as well as a 46 marker set consisting of what we consider the most versatile colours to have in your collection!  They are permanent, alcohol based markers with soft bullet shaped brush nibs and I've been having a blast experimenting with them.

Today I'm sharing a Halloween themed card I made using the new Le Plume Permanents and I will be sharing a step-by-step blending tutorial demonstrating how I went about colouring the image featured on my card as well as a product review over on the Blockheads Blog!  So keep an eye out for my announcements for those!

Purple is one of my all time favourite colours so I've got some serious 'passion for purple' action going on for this one, LOL ;0)  I've featured the Goth Girl stamp again...see, I told you she's quite a versatile image to have in your Halloween arsenal!  So far she's been a vampy Goth, a spooky Bride of Usher and now a witch known in scary circles as Miss Purple Poison.  It's rumored it's best to stay on her good side coz of her scary collection of toxic potions ;0)

SUPPLIES
Blockheads Paper Arts rubber stamps:
Goth Girl
Flourishes (partial of the Bird Cage stamp) from Victorian Eccentricities

Memento Tuxedo Black ink pad
Marvy Le Plume Permanent markers:  BV733, 736, 738, 739 and OP920 White
White Gelly Roll pen
Prismacolor pencils:  Cream, Blush Pink, Parma Violet, Red Violet and Black
Neenah Solar White cardstock
Three shades of purple cardstock
Black cardstock
Recollections Paper Border Toxic Labels
Decorative silk ribbon
Spellbinders Dies:  Fleur De Lis and Deckle Rectangle dies
Tim Holtz Alterations Raven and Scardy Cat die
Fleur De Lis Corner Punch (brand unknown)
Clear rhinestones
Black self-adhesive pearls
Glue Dots and Small Pop Dots
Double-sided tape, Permanent Adhesive Tape
Quickie Glue Pen
Paper Trimmer
Scoreboard
Scissors


Stamp the image onto a sheet of Neenah Solar White cardstock and colour with Marvy Le Plume Permanent markers.  I used 4 blending colours from the Blue Violet range.  I will be sharing a Blending Tutorial soon demonstrating exactly how I went about colouring in this image so keep a look out for it!  I used Prismacolor pencils to colour the Goth Girl's skin and facial features.  I went with the Cream coloured pencil instead of leaving her skin white coz I wanted to pick up on the cream backgrounds on the Toxic Labels.  I added a touch of background colour by creating a sense of a shadow being cast with a Prismacolor Red Violet coloured pencil.  I also used the same colour to distress the deckle edge and then darkened the distressing with a Prismacolor Black coloured pencil.  I completed the image with some white highlights.  I used the opaque White Marvy Le Plume marker on her eyes which is part of the new range but it's a pigment pen instead of permanent and is water-based and the Gel pen for the rest.  There's also a Gold and Silver water-based marker in the collection too.


I used a Deckle Spellbinders die to cut out the panel and layered it onto a dark purple Fleur De Lis die cut.  From a lighter shade of purple cardstock I cut a square panel and then I made a black folded card just slightly larger.  Before assembling all the elements together I cut a length of decorative silk ribbon, trimmed the right hand edge into a dove tail point and slipped it between the white panel and the Fleur De Lis panel and adhered it in place with permanent adhesive tape.  I then adhered all the mats together with double-sided tape.

The purple edged Toxic Labels came attached on a border strip and couldn't have been more perfect for my project.  I cut off 4 of the labels and I then cut 3 small pieces of ribbon, trimmed with matching dove tails and adhered them to the Toxic Labels with permanent adhesive tape and then adhered all the labels to the card with glue dots.

From the lightest purple cardstock I die cut the Scardy Cat and decorated it with stamped Memento Tuxedo Black flourishes which is actually a portion of the flourishes from the right hand side of the Bird Cage image!  I then darkened the edges of the Scardy Cat die cut with a Prismacolor Black pencil to make it stand out a bit better from the background.


I then punched out 3 mini Fleur De Lis from the lightest purple cardstock and 3 from the darkest purple cardstock and adhered clear rhinestones to them with a Quickie Glue Pen.  When I laid them out onto my card I realized I wasn't happy with the balance of the design and felt that the left side seemed empty to me so I did some magic masking aka post-it notes ;0) and masked off the Fleur De Lis panel and stamped more of the flourishes down the left hand side of the square purple panel.  I used my Copic Multi-liner (any black extra-fine point pen will work too) to fill in some areas that didn't stamp and I was happy with the result.  I then adhered all the mini Fleur De Lis with the Quickie Glue pen.  I embellished the white panel with self-adhesive black pearls and gave the Scardy Cat die cut a black pearl eye.  I finished off by adhering the Scardy Cat to my card with small glue dots for a bit of dimension.


Thanks for visiting with me today and don't forget to keep an eye out for the Blending Tutorial if you'd like to see how I coloured my little Miss Purple Poison witch!  Don't forget to also check out Karen's blog for more Blockheads inspiration!

Happy Stamping!
THE SHARPIE DOMINO QUEEN
I design for Blockheads Paper Arts, Third Coast Rubber Stamps and About Art Accent