News
The Summer BUZZ Collection
Re-Release Sale-bration thru July 19!
The Gilded Raven Release!
"Rocky Mountain Christmas"
Winter 2025 Collection
Adopt all the Loveleigh Kitties, they're PURRfect for every occasion!
Showing posts with label TECHNIQUES: Watercolour painting. Show all posts

Monday, December 14, 2020

'Tis the Season Blog Hop: Christmas Chorus Frog Watercolour painting and "Ho Ho Ho" card by Leigh!

Howzit Creative Friends!
 Welcome one and all to our fun 'Tis the Season "stay crafty @ home" Blog Hop to help keep your spirits high, creatively inspired and busy while celebrating the season safe at home during this terrible pandemic!  Just 6 days left of our fabulous hop and all your entries are so fun and festive...keep the magic of the season coming☃️


Get festive with us and share your Fall/Autumn, Winter, Christmas and Merry Craftmas makes using LeighSBDesigns Art Stamps and/or any other company products!

The 'Tis the Season Blog Hop details and festive linky party are in the main post HERE!
 

🍁 Christmas Chorus Frog 🍁
Watercolour Painting and "ho ho ho" card by Leigh

My ‘Tis the Season Blog Hop inspiration for you today celebrates nature and the magic of the season with my watercolour painting of Christmas Chorus Frog and the festive "ho ho ho" card I made❄️
 
 
 I printed Christmas Chorus Frog out onto a sheet of mixed media cardstock and used watercolour pencils to paint him and white Dylusions paint pen to add highlights.
 
 
I used Crystal Stickles glitter to add lots of magic shimmer!  It's so very pretty in real life! 


 I made a whimsical festive card using the painting and stamped "ho ho ho" in black Versafine ink using one of Tim's sentiment rubber stamps.
 
 
I mounted the painting onto a red cardstock mat and then layered it onto gorgeous white glitter card.
 
 
I then mounted everything onto a folded card base I made from white cardstock. 


The real Chorus froggie my drawing is based on is still outside my front door croaking his head off inside my holly plant❤️


Check out my STAMPtember 2020 Collection!


Thanks for stopping by to see today's featured make!
Stay Safe and Happy Creating!
THE SHARPIE DOMINO QUEEN

Friday, April 27, 2018

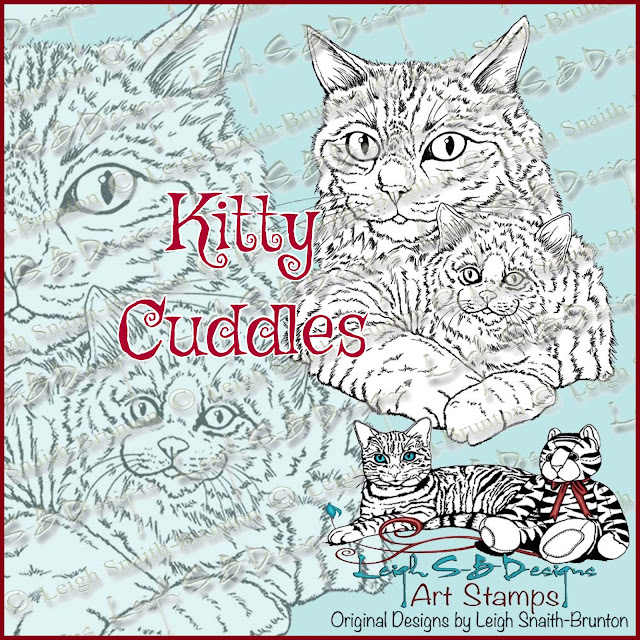
Kitty Cuddles - watercolour painting by Leigh!

Happy Friday Everyone!
For your inspiration today I’m sharing my watercolour painting of Kitty Cuddles done with Spectrum Noir ColourTint pencils.


I’m having so much fun with these pencils.


I printed Kitty Cuddles out onto a sheet of Spectrum Noir paper and used colours from the Primary and Nature sets with Derwent waterbrushes.


KITTY CUDDLES, is a realistic art drawing of a mommy cat with her kitten🐱
 A must for cat lovers and PURRfect for celebrating Earth Day, Spring, Mother's Day and whatever else your heart desires.

https://www.etsy.com/listing/609252835/new-kitty-cuddles-realistic-drawing-of-a?ref=shop_home_feat_2

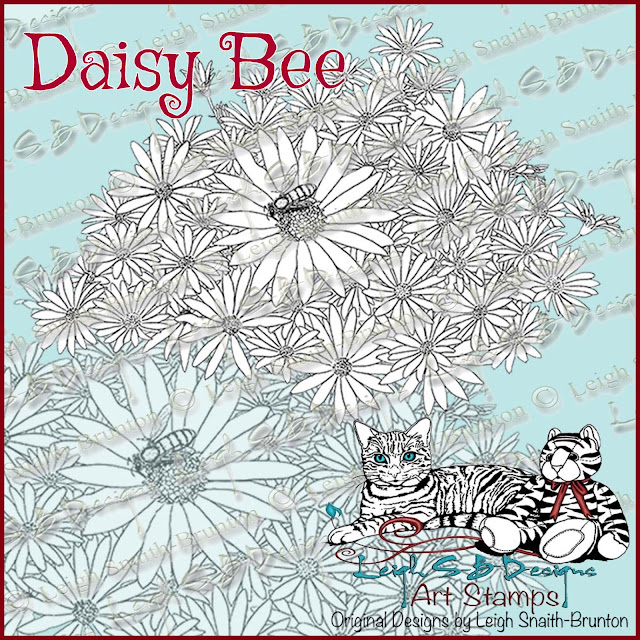
DAISY BEE, is a realistic art drawing of a bee on a bed of daisies🐝
This beautiful nature themed design is also perfect for Earth Day, Spring, Mother's Day and so much more🌸

https://www.etsy.com/listing/609251863/new-daisy-bee-realistic-drawing-of-a-bee?ref=shop_home_feat_1

Both designs are now available at LeighSBDesigns Etsy Boutique at a special intro price good thru midnight pacific April 28!

Thanks for visiting!
Happy Stamping!
THE SHARPIE DOMINO QUEEN

Monday, January 23, 2017

"Poe" Nuance Watercolour Portraits Poe Appreciation Blog Hop Finale!

Hiya Everyone!
Today is Day 5 and the finale of our 2nd annual Poe Appreciation Day Blog Hop over at Lost Coast Portal to Creativity!


If you're just tuning in then it's not too late to join the fun, here's the scoop!
We're hosting a progressive hop that spans over 5 days with new Poe projects accumulating as more Poe fans play so check daily and hop all the blogs!  The Blog Roll is in the form of an Inlinkz link up and the HTML code to use in your blog posts is provided over at Lost Coast Portal to Creativity HERE!  Get in on the fun by 5 to midnight PST tonight to be in the running to win our prize!

There is a PRIZE up for grabs!
One participating Blogger will be randomly selected to win $10 in LCD/CV Bucks to spend on rubber at our Lost Coast Designs and Carmen's Veranda online stores!  So hop on over to Lost Coast Portal to Creativity for all the info on how to play!  You can start your hopping from the beginning at LCPtoC, the Blog Hop Roll is at the bottom of this post!

We also released 5 new stamps just for the hop and we are also giving away TWO FREEBIE rubber stamps with every order placed!

For my finale I created two watercoloured Edgar Allan Poe portraits using Nuance Pigment Powders, Carmen's Veranda Edgar Allan Poe portrait stamp and Lost Coast Designs Raven with Tree Branches plus the License Plate Alphabet set on the card version.


To start I selected the Nuance colours I wanted to work with:  red, royal blue, violet and grey, mixed the powders with water in a palette and applied the paint directly to the Poe stamp with a paint brush.  The pigment paint dries quite fast which I reactivated with a sprtiz or 2 of water and then pressed a panel of Mixed Media cardstock I cut to 1.75" square onto the stamp to transfer the print.  I did the same with the Raven and then added my own brushed on touches to complete the piece.


I punched out the 2 top corners with a decorative Lace punch, applied Black Soot Distress Ink to the edges before matting the print onto black cardstock.  I then punched the 2 bottom corners with the same Lace design before adhering to a panel of red embossed cardstock.  I'd embossed the red panel with a Regency pattern (Craftwell embossing folder) and applied Black Soot Distress Ink to enhance the design.  I stamped out the letters to spell "Poe" and edged them with Black Soot Distress Ink too.  I applied silver rub-on creme to enhance all the cardstock edges, punched corners and the embossed details before adhering everything to a folded card made from a sheet of black cardstock.  I completed the card with self-adhesive black diamonds in 2 sizes.
 

This is one of my favourite watercolour techniques and I particularly loved how glorious the Nuance colours looked so I made a 2nd print and created this art piece that's POEfect for framing.

 
Thank you for participating and hopping with us this year.  I hope you have enjoyed seeing all the Poe art on show!  Here's another look at my other LCD/CV projects plus my Delicious Doodles journal cover I made for this year's hop, I had so much fun😋


 See you again next year for our 3rd Poe Blog Hop, mark your calendars for January 19 - 23, 2018 and don't forget to keep an eye on Lost Coast Portal to Creativity if you contributed to the hop to see if you are our Poe Blog Hop 2017 Winner😉

Now off you hop to see more fabulous Poe inspired creations!
Enjoy!

 Leigh S-B

THE SHARPIE DOMINO QUEEN
I design for * Lost Coast Designs * Carmen's Veranda * The East Wind * Delicious Doodles *


Monday, October 31, 2011

Kid's Treat Box Card featuring Third Coast Rubber Stamps!

The Trick or Treating continues with a definite treat in this case ;0)

Check out the Treat Box Card I designed for the Third Coast Creative Coterie design team that's perfect for kid's of all ages ;0)


I made this one especially for my 4 year old nephew, Daniel, and it went all the way to the UK and arrived in time and in one piece, phew! 

All the stamps used are by Third Coast Rubber Stamps:
AP-479-P Free Parking
AP-523 Broomstick Dog
VB-041-EE Happy Bat Sm


I stamped the scene onto white cardstock with a Tuxedo Black Memento ink pad and did all the colouring with Derwent Watercolour pencils and a Dove Blender pen.   I drew in the curvy trail line with a few scattered leaves to give the impression that the Broomstick Dog had just whooshed in then added highlights with a white gel pen.  I then distressed the edges of the panel with Black Soot Distress Ink.


I cut some panels from Halloween themed decorative paper and adhered them to the black folded card and mounted the panel onto the card with double-sided tape.


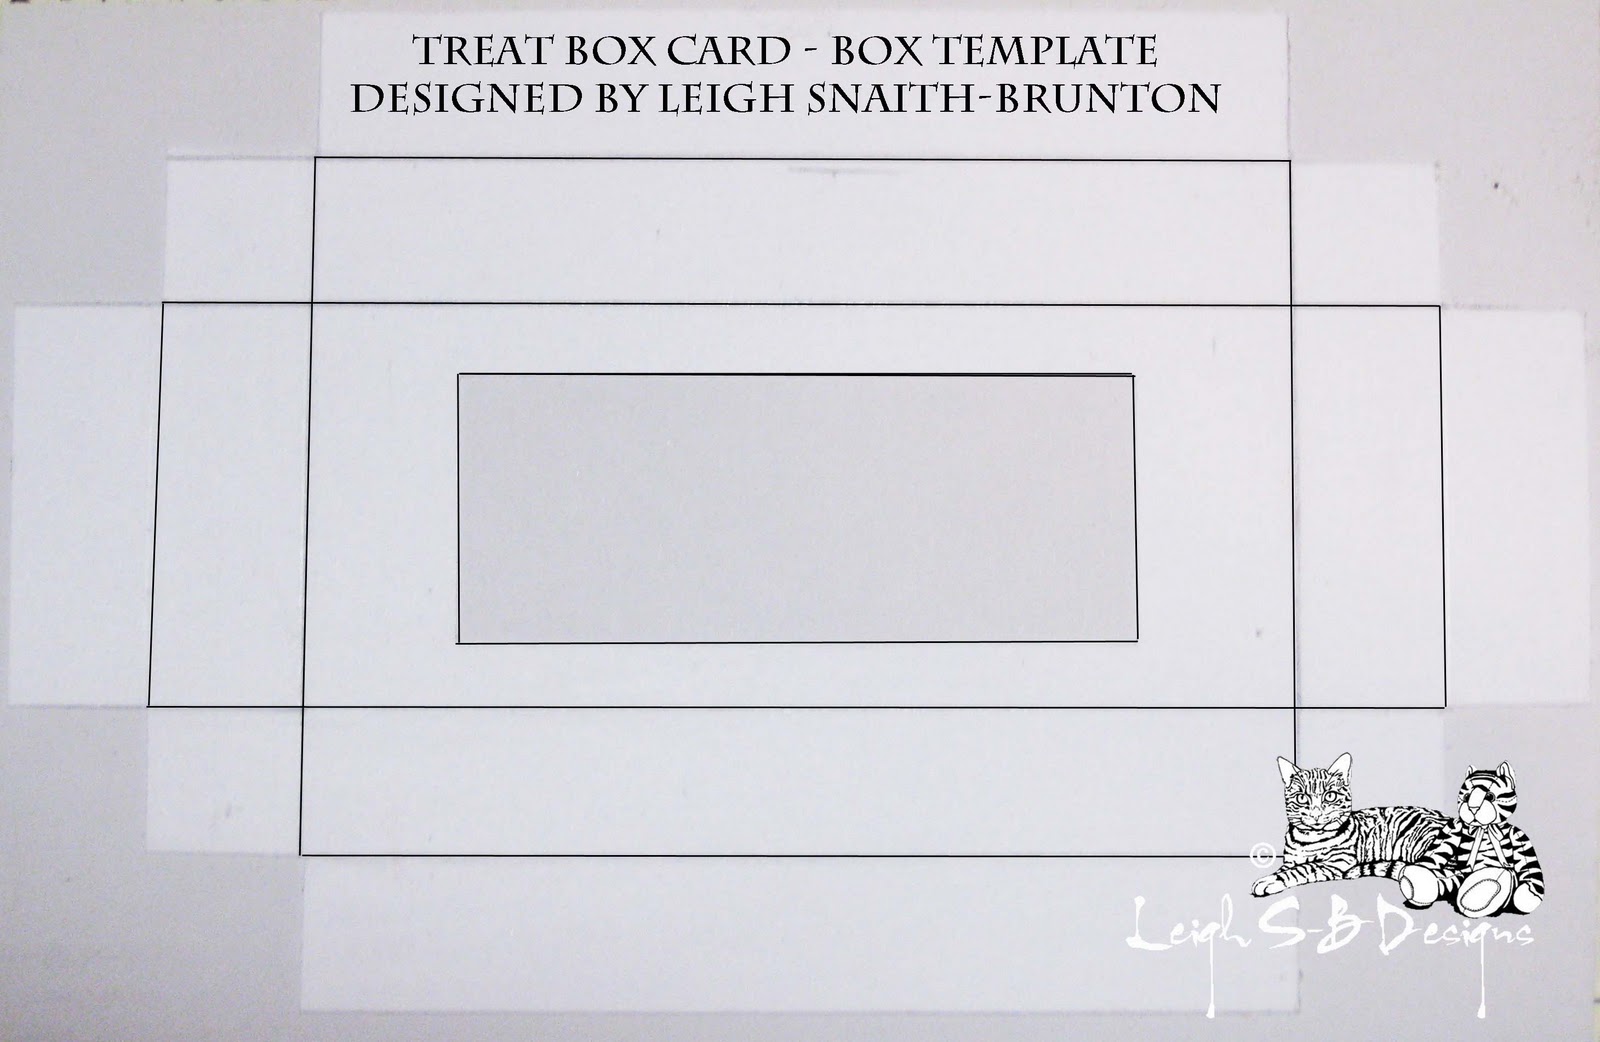
I then constructed a box for the treat based on the size of the actual chocolate from white cardstock which I then covered with the decorative spider web paper.


I cut an X slit in the window, trimmed the flaps, folded and adhered the flaps with a glue stick.


I then constructed the box and adhered the sections together with a glue stick. 


Only one side of the box can be opened to get the chocolate out so I drew in an arrow and wrote 'Open' on the side to be opened.  


I then adhered the treat box to the front of the card with double-sided tape and added the Martha Stewart Crafts self-adhesive bat border along the top of the card and the skulls border on both sides of the treat box.

After I took all my photos I decided to bling the card up a bit and made it more magical!  I added glitter glue around the edge of the stamped panel, edged the matte bats, edged the window on the treat box and also added glitter glue to the moon.  It was just the finishing touch that was needed ;0)

Thanks for joining me on this spooktacular Halloween night!
Sleep tight and don't let the boogie man bite ;0)

THE SHARPIE DOMINO QUEEN
I design for Blockheads Paper Arts * Third Coast Rubber Stamps * About Art Accents

Wednesday, April 6, 2011

"Pretty As a Picture" Poppy Watercolour Painting Oval Card featuring Blockheads stamps!

Hello Stamping Friends!

"Pretty As a Picture" 
Poppy Watercolour Painting Oval Card
I've got another Egg shaped card for you today featuring more of Blockheads Paper Arts rubber stamps and products!  I designed this oval shaped card for those of you who wanted some Spring/Easter inspiration but needed something a little bit easier to do than my Spring 3D Pop-Up Easter Egg Card ;0)

This one will be a snap for those of you lucky to own some of the new grand or mega Spellbinder dies but don't worry those are not a requirement at all coz you can easily make your own oval templates!
The main focal point of this card is the gorgeous Poppy rubber stamp available from Blockheads!  This image lends itself to so many stamping techniques but for this tutorial I wanted to show you how you can create a watercolour painting with rubber stamps and then turn it into a beautiful handmade card that will surely be treasured by all who receive one ;0)  So lets get started...

Ink up the stamp with any dye ink in a light neutral colour, I used Ancient Page Stone Gray, and remove most of the ink by stamping it onto a piece of scrap paper.  Immediately stamp again onto a sheet of paper designed for use with watercolour paints/pencils or markers.  The stamped image should be faint but still visible enough for you to see for colouring.  
 
I coloured the flower and the background with a combination of pastel pencils and watercolour pencils and blended them with a Dove blender pen to create the look of a watercolour painting.
 

I don't have any large oval Spellbinder dies yet so I made my own out of chipboard and traced the shape onto my poppy painting, cut it out and then edged the oval with a broad point black paint pen.  
 
At this point I decided to punch up the colouring of the petals a bit more and added just a touch of R27 (red) Copic marker and blended it a bit with a Copic colourless blender.


I then stamped the sentiment 'For You' from the Blockheads FL501-2C Sentiment Stamp Set in Memento Tuxedo black ink onto the same paper I used for the poppy painting (so the shade of white would match) and used a Spellbinder die to cut out the oval shape.
Then based on the size of my poppy painting I made more chipboard oval templates to create the mat layers for the poppy panel and also the sentiment piece in red, white and black cardstock.  I cut the large red and white mats out with scalloped 'Cloud' Fiskars scissors - those larger Spellbinders dies would make this part so much easier, going to have to get some of those for sure!  I used black cardstock to make the folded oval shaped card with a flat part at the top where the card folds and a flat part at the bottom to allow the card to stand.


I then glued the large red oval to the white mat (the same white paper I used for the poppy painting) with a permanent adhesive tape runner and also adhered a piece of black and red ribbon, available at Michaels, to the red mat and secured the ends with double-sided sticky tape to the back of the white mat.  
Then attached the layers to the black folded card and adhered the poppy painting to the red mat with permanent adhesive and assembled the sentiment piece too.
  
Next I cut a swirly flourish out of black cardstock with a Sizzix die and trimmed off the left hand swirl to use on another part of the card.

 
I attached the main flourish to the sentiment and then the whole piece to the front of the card with permanent adhesive tape.  I also put a dab of glue onto the small flourish piece I trimmed off and adhered it to the card by tucking it behind the poppy layer.
I finished off my Poppy card with a beautiful bow made from the same ribbon I used on the mat layers.  I cut the ends of the ribbon into dove tail points and adhered it to the card with a glue dot.
I hope I've inspired you to try your hand at creating watercolour paintings with your rubber stamps and turning them into beautiful cards sure to please!  I don't think this card will make it to the trash can, do you? :0) 

For more inspiration please check out my other tutorials and also pop on over to see what, Karen, my fellow Blockheads Design Teamster is up to!

Thanks for stopping by and enjoy the rest of your week! 

Leigh S-B
THE SHARPIE DOMINO QUEEN
Blockheads Design Team Member