News
The Summer BUZZ Collection
Re-Release Sale-bration thru July 19!
The Gilded Raven Release!
"Rocky Mountain Christmas"
Winter 2025 Collection
Adopt all the Loveleigh Kitties, they're PURRfect for every occasion!
Showing posts with label Tutorials by Leigh Snaith-Brunton. Show all posts

Tuesday, March 28, 2023

Tutorial Tuesday: "Spring Wildflowers Bunny" SVG Cutz Make-a-Wreath Tutorial by Leigh

☘️ Happy March Creative Friends ☘️
 
"Spring Wildflowers Bunny"
SVG Cutz Make-a-Wreath
Tutorial by Leigh
 
 
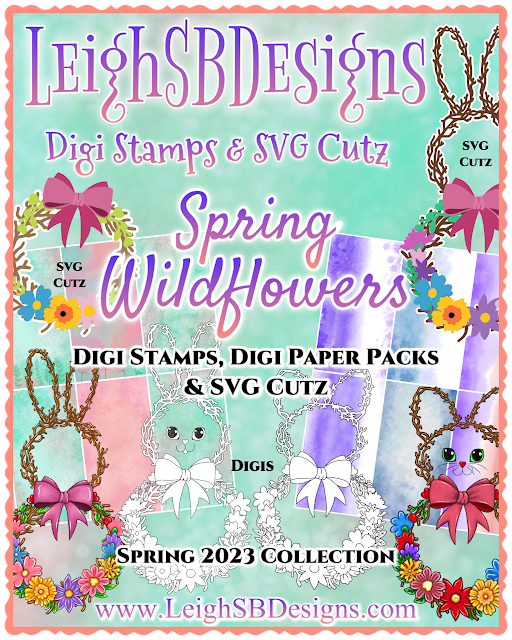
Spring has sprung and Easter is just around the corner so here's a wonderful fun and easy Spring Wildflowers Bunny Wreath tutorial for you featuring decorative digi paper and SVG Cutz from my new Spring Wildflowers 2023 Collections๐ŸŒธ

 
The Spring Wildflowers ~ Make-a-Wreath ~ SVG Cutz Mega Kit is a 42 piece MEGA KIT that includes everything you need to create incredible 3D twig wreaths in various styles and sizes from fully assembled bunny shaped wreaths, bunny or traditional round wreaths using the separate elements and then customize them with a bouquet of pretty wildflowers and a variety of floral greenery and a multi-layered bow in any colour and style you want!  Pair this wonderful mega kit up with my Spring Wildflowers Decorative Digi Paper Packs or use your own papers and cardstocks for lots of fun Spring, Easter and year long floral crafting for years to come! 


Let's take a closer look at what you get in the Spring Wildflowers ~ Make-a-Wreath ~ SVG Cutz Mega Kit!  This super versatile mega kit includes 42 individual pieces:
You get one fully assembled bunny shaped wreath plus a matching mat layer to make the bunny I'm featuring today.  You also get 2 separate bunny ear wreaths as well as one small circle wreath and one large circle wreath that you can use to create your own bunny wreath and traditional round wreaths in a variety of sizes.  How big you can go is only limited to the size of your electronic cutting machine mat, so if you've got a 12 x12 or 12 x 24 inch mat you can make a huge bunny wreath when you start by sizing up the large circle wreath and cut it out of 12 x12 inch cardstock or rolls of vinyl!  Then you will have so much fun building your bunny wreath by adding the "head" and "bunny ears" to the "body" - you can play around with the position and tilt of the "head" and "bunny ears" and then customize your bunny wreath with the wonderful variety of 18 wildflowers and 9 piece floral greenery and matching mat layers and then finish off with a magnificent multi-layered bow!  This mega kit is truly a must for all your Spring and Easter paper crafting and home decor makes!  


☘️ ๐ŸŒธ ☘️ ๐ŸŒธ ☘️ ๐ŸŒธ ☘️ ๐ŸŒธ ☘️ ๐ŸŒธ ☘️ ๐ŸŒธ
 
For today's tutorial I'm using the fully assembled one piece bunny wreath pictured on the far right of the above photo which works with your 8.5 x 11", A4 and 12 x 12 cutting mats.  You can size-up or down accordingly and I recommend that you group all the elements you intend to use together and size them all at the same time.  My Bunny Wreath today is 11 inches tall and about 5.5 inches at the widest point.
 
 
Using my Silhouette Cameo 4 and 12 x 12 inch cutting mat I cut the overlay twig wreath out of brown cardstock and the matching mat layer out of white cardstock.
 
 
I then used my new "Spring Wildflowers" Decorative Digi Paper Pack of 6 designs and "Misty Wildflowers" Decorative Digi Paper Pack of 6 designs to cut out a wonderful selection of wildflowers, greenery and bows.


Import the decorative digi papers into your cutting machine's design software and first print them out with your home printer using Silhouette's or Cricut's print and cut feature.  I then placed all the cut shapes onto the paper on my computer screen within Design Studio - as shown in the photo above - and cut them all out as shown in the photo below.


 Now you can play around with your collection of Spring Wildflowers and Greenery!  You can use them as single layers or add flower centers from the variety of shapes included in the kit with pop dots or take it to the next level and combine multiple floral shapes to create multi-dimensional wildflowers and even curl the pieces to enhance the 3D effect too!
 
 
The Bow comes with 5 layers which layer up to create a multi-dimensional bow, I used pop dots to make my pretty 3D bow!

 
The pretty Bow is so versatile coz you can use it all year long for literally any occasion from Birthdays to Christmas, the possibilities are endless and that goes for all the Wildflowers and Greenery too and of course all the circle wreaths are perfect for Christmas too!
 
 
I embellished the Bow and all the Spring Wildflowers and Greenery with Diamond Stickles glitter for lots of pretty sparkle!
 
 
I then had a ball decorating my Bunny Wreath with the pretty Bow, Spring Wildflowers and Greenery!  Look how stunning it turned out!  You will have so much fun with this wonderful mega kit!
 
 
My new Spring Wildflowers ~ Make-a-Wreath ~ SVG Cutz Mega Kit really makes it super easy for you to make amazing cards and home decor projects that look so professional and will WOW your friends and family so go add this wonderful SVG Cutz kit to your collection while it's on sale in the St Patrick's Day Sale!


 We do love to see what you make too so do come share all your makes with us using this incredible new Spring Wildflowers 2023 Collection which pairs up nicely with my St Patrick's Day/Irish themed digi stamps and play in our March Challenge - #15 Spring Leprechauns!

  
☘️ ๐ŸŒธ ☘️ ๐ŸŒธ ☘️ ๐ŸŒธ ☘️ ๐ŸŒธ ☘️ ๐ŸŒธ ☘️ ๐ŸŒธ


☘️ ๐ŸŒธ ☘️ ๐ŸŒธ ☘️ ๐ŸŒธ ☘️ ๐ŸŒธ ☘️ ๐ŸŒธ ☘️ ๐ŸŒธ
 

Intro to the Spring Wildflowers Collection


Thanks for stopping by to see today's featured make!
Happy Creating!
THE SHARPIE DOMINO QUEEN

Tuesday, May 17, 2022

Tutorial Tuesdays with Leigh: FantaSea "Mermaid Scales" Circle Card featuring Anubis FantaSea Pet!

๐Ÿงœ๐Ÿป‍♀️ Happy MerMay Creative Friends ๐Ÿงœ๐Ÿป‍♀️
 
It's Tutorial Tuesday with Leigh time and today I'm going to show you how I made a FINtastic birthday card featuring Digi Stamps and SVG Cutz from my brand new FantaSea Collection๐Ÿงœ๐Ÿป‍♀️


Check out the new FantaSea Collection of Digi Stamps and SVG Cutz launch post!
 
 
The FantaSea Collection and all my Mermaid themed collections are on sale for the entire month of MerMay!  Sale ends at midnight pacific on May 31st!
 
"Mermaid Scales"
Layered Circle SVG Cutz Card
with Anubis FantaSea Pet
by Leigh
 
 My round birthday card today features Anubis DogFish FantaSea Pet and the FINtastic senti included in the set plus the “Mermaid Scales” Layered Circle SVG Cutz set from my brand new FantaSea Collection๐Ÿงœ๐Ÿป‍♀️
 
 
My new Mermaid Scales” Layered Circle SVG Cutz is a mer-mazing 9 piece cutting file set that includes 6 mermaid scale layers and 3 mat layers.  Use this FINtastic set to create round cards, ornaments, decorate card fronts etc, plus I designed it to go perfectly with the FantaSea MERMAIDS Letter Page Circle Make-a-Book kit, use it to decorate the covers and pages for truly mermazing book making!  LeighSBDesigns SVG Cutz are for popular electronic cutting machines compatible with SVG files like Silhouette, Cricut and Scan n Cut.  All my SVG Cutz are designed in Silhouette Design Studio and include both Silhouette Studio 3 and SVG files. 
 

This Mermaid Scales” Layered Circle SVG Cutz set is designed to work with both 8.5 x 11 (A4) and 12 x 12 cutting mats so you've got lots room to play with resizing if you want to, I made this project using the size it comes in with the largest mat measuring just a hair over 5 x 5 inches.  I used 2 shades of purple from Crafter's Companion heavy weight 12 x 12 textured cardstock to create my alternating scale layers.  With scissors I cut panels from both colours and laid them out on my Silhouette Cameo 4's 12 x 12 inch cutting mat then lined up the scales on my computer screen to match.  To alternate the colours I worked left to right and started with scale #1 at the top of the light purple panel, scale #2 on the darker purple panel then back to the light shade for scale #3 and so on.  If you've got enough space on your cardstock it doesn't hurt to add additional scales as back up plus, if you're going to make 2 or more cards then cut all the scales from both colours and mix and match them! 
 
 
Next I cut the circle layers included in the set.  I used 138lb (250gsm) heavy weight white cardstock to cut 2 of the largest circle mat which I then used to make the round card base.  I used black cardstock for the middle mat layer and smallest circle from the lighter purple cardstock.  You will use the smallest mat layer as the base for the mermaid scales to adhere to.  The mat does peek out at the bottom beneath the last scale so make sure you cut it out from the alternating colour.
 
 
Do a dry fit first to get a feel for the layering and then adhere the scales in place starting with the bottom scale layer first and work upwards lining up the scale edges with the edge of the mat layer as you go for perfect overlapping scales.
 
TOP TIP:
I just applied a dab of glue to each scallop and a bit on the top edge as I worked upwards and then put a line of glue along the top edge of the last scale to make sure the mermaid scale layer was fully adhered to the base layer.
 
I then applied Waterfall Stickles glitter to the circle edge for a touch of magical mermaid sparkle and to cover the cardstock's exposed white core edges.  I also used the same glitter on the black mat...so fun how the colour of the glitter changes depending on the colour of the cardstock beneath.

 
The layered mermaid scales make a mermazing circle that you could use to decorate the cover of the MERMAIDS Letter Page Circle Make-a-Book SVG Cutz or make FINtastic ornaments or a fun round card like I did with today's make๐Ÿงœ๐Ÿป‍♀️
 
 
The recipient of this birthday card is a dog person so the star of this card is Anubis DogFish FantaSea Pet and the FINtastic senti included in the set.  I coloured this adorable puppy fish in Adobe Fresco on my ipad and printed him and senti out.  I then die cut them both out using Crafter's Companion torn edge dies and edged them with the Waterfall Stickles glitter.
 
 
 I also printed and die cut out the Happy Birthday senti included in the Coral Balleigh MerMonster and Senti set for the inside of my card and decorated it with Stickles too.  To make my folded round card base I scored a fold line near the top of the back round panel and cut off a bit off the bottom to allow the round card to stand then just glued the two circles together and added the senti inside.


For even more pretty magical shimmer I painted Anubis and all the bubbles with a Spectrum Noir clear sparkle brush glitter pen.  It's always hard to capture just how pretty the sparkle is in real life but the next pic gives you a good idea!
 
 
 I then decorated the card front with the Anubis panel applied with glue and the senti popped up with low profile pop dots for just a little bit of dimension.

 
  For my finishing touch I added self adhesive pearls in hot pink!
I hope you enjoyed today's tutorial and will give this fun mermaid scales round card a try๐Ÿงœ๐Ÿป‍♀️
 
 
MerMay is in full splash with 10 days left of our challenge for May already, come play in Challenge #5 MerMay, details and linky party are in the MAIN CHALLENGE POST๐Ÿงœ‍♀️

 
The FantaSea Collection plus all my other Mermaid themed collections are on sale for the entire month of MerMay!


  You can shop for the Waterfall Stickles glitter and more at Scrapbook.com via my affiliate link at no extra cost to you.  Thank you for supporting LeighSBDesigns Inspiration Blog while getting awesome deals on your fave products!

Happy Creating!
THE SHARPIE DOMINO QUEEN

Wednesday, August 11, 2021

Steampunk Serengeti Blog Hop 2021: Sawubona Hello Giraffe Steampunk Serengeti Xtreme Slimline Card by Leigh!

Welcome to LeighSBDesigns Steampunk Serengeti Blog Hop!
August 6 - 31
2021
 
 
๐Ÿ˜๐Ÿฆ’๐Ÿ† ๐Ÿ˜๐Ÿฆ’๐Ÿ† ๐Ÿ˜๐Ÿฆ’๐Ÿ† ๐Ÿ˜๐Ÿฆ’๐Ÿ† ๐Ÿ˜๐Ÿฆ’๐Ÿ† ๐Ÿ˜๐Ÿฆ’๐Ÿ† ๐Ÿ˜๐Ÿฆ’๐Ÿ† ๐Ÿ˜๐Ÿฆ’๐Ÿ† ๐Ÿ˜๐Ÿฆ’๐Ÿ†
 
 Our 2021 crafty festivities to help keep our spirits up during this terrible pandemic continue through August with our new Steampunk Serengeti Blog Hop in celebration of the launch of my new epic Steampunk Serengeti Collection of Digi Stamps and SVG Cutz๐ŸŽ‰
 
  Everyone is welcome to come and join the fun using any stamp company supplies and products so pack your suitcase and take a journey with us to the majestic Steampunk Serengeti where wondrous animatronic African animals roam!  
 
The Steampunk Serengeti linky party with all the details on how to play can be found on the main Steampunk Serengeti Blog Hop page!

Come and get creative with us and enjoy all the fabulous makes that will be shared all August long!
 
๐Ÿ˜๐Ÿฆ’๐Ÿ† ๐Ÿ˜๐Ÿฆ’๐Ÿ† ๐Ÿ˜๐Ÿฆ’๐Ÿ† ๐Ÿ˜๐Ÿฆ’๐Ÿ† ๐Ÿ˜๐Ÿฆ’๐Ÿ† ๐Ÿ˜๐Ÿฆ’๐Ÿ† ๐Ÿ˜๐Ÿฆ’๐Ÿ† ๐Ÿ˜๐Ÿฆ’๐Ÿ† ๐Ÿ˜๐Ÿฆ’๐Ÿ† 
 
***  STEAMPUNK SALE  ***
Check out LeighSBDesigns Etsy Boutique August Sale on now through August 31st midnight pacific!
It gives me warm fuzzies to see my designs being used so I hope you'll find lots of digi stamps and SVG Cutz to play with this month๐Ÿฅฐ
 
๐Ÿ˜๐Ÿฆ’๐Ÿ† ๐Ÿ˜๐Ÿฆ’๐Ÿ† ๐Ÿ˜๐Ÿฆ’๐Ÿ† ๐Ÿ˜๐Ÿฆ’๐Ÿ† ๐Ÿ˜๐Ÿฆ’๐Ÿ† ๐Ÿ˜๐Ÿฆ’๐Ÿ† ๐Ÿ˜๐Ÿฆ’๐Ÿ† ๐Ÿ˜๐Ÿฆ’๐Ÿ† ๐Ÿ˜๐Ÿฆ’๐Ÿ† 
 
"Sawbona - Hello"
Giraffe Steampunk Serengeti
Xtreme Slimline Card
by Leigh
 
 I'm back today with another gorgeous Xtreme Slimline card for our Steampunk Serengeti Blog Hop

 
This xtreme slimline card features the following from my epic new Steampunk Serengeti Collection of Digi Stamps and SVG Cutz:
Giraffe Steampunk Serengeti Xtreme Slimline Panel Digi Stamp
 
 
I used Distress Oxide Sprays as watercolours to paint my Giraffe Steampunk Serengeti Xtreme Slimline Panel Digi Stamp panel and metallic gel pens in copper, gold and silver to colour the stars and enhance the Steampunk elements of the design.


All the elements used to create the oversized slimline card are included in the Serengeti Leaves Layered Frame and Xtreme Slimline Card Cutz set.


To adhere the Serengeti Leaves overlay, which I cut out of 80lb black cardstock using my Silhouette Cameo 4, to the shadow layer cut from lime green cardstock I like to just use small dots of glue applied to just the largest areas on the back of the overlay.  Wet glue is the most forgiving coz you've got the time to maneuver and get everything lined up nicely.  I then put dots of glue on the back of the green shadow layer and mounted it onto the deep red mat layer.  I then adhered the Giraffe panel to the card with pop dots.
 
 
I cut the Xtreme Slimline Card base from heavy weight black cardstock and the 2nd mat layer included in the set from the same vintage patterned paper I used to make the matching Xtreme Slimline Envelope.
 
 
I then used the grunge senti "Sawubona Hello" from the Essential Sentiments Steampunk Serengeti Digi Stamps Set to complete this card.  I opened the digi stamp sentiment in Silhouette Studio and did a Print and Cut job to print the design with my home printer and then cut it out with an offset border using my Silhouette Cameo 4.   I then pounced Spectrum Noir Midas Gold pigment ink to the edges and mounted the sentiment to the card with pop dots.
 
 
Here's a look at the 2 Xtreme Slimline Cards I've shared so far, they're so dramatic together!
Check out my Cheetah post for more info on how I made that card!


 Shop the Steampunk Serengeti Collection used today in LeighSBDesigns Steampunk Sale on now through August 31st midnight pacific!
 

Check out the release video to see the entire
Steampunk Serengeti Collection of Digi Stamps and SVG Cutz!


 Thanks for stopping by to see today's Steampunk Serengeti inspiration!
Happy Hopping!
THE SHARPIE DOMINO QUEEN