July CREATivities
The Summer BUZZ Collection
Re-Release Sale-bration thru July 19!
The Gilded Raven Release!
"Rocky Mountain Christmas"
Winter 2025 Collection
Adopt all the Loveleigh Kitties, they're PURRfect for every occasion!
Showing posts with label Perfect Layers Rulers. Show all posts

Tuesday, September 1, 2015

"Marie Antoinette" for Forever Dark Challenge #4!

Howzit Everyone!
It's time for a new challenge over at Forever Dark Challenges!
#4 has begun and as always it's anything goes as long as it is "DARK"!
But now, please don't let that 'word' put you off because just like art is subjective, so is the definition of dark which really can be anything from just plain odd, creepy cute, eerie, spooky, scary, sinister or downright horrifying!  We welcome it all so stop by and join in the fun....if you dare bwahahahaha ;0)


Our fabulous sponsor this month is
Jade Dragonne
Did you know that she allows you to use her images for free as long as you credit her and link to her Deviant Art page?  Her digi images are to die for so pop on over and grab some and enter your makes in our challenge!

Here's my DT share for September!
I could not resist "Marie Antoinette" and she did not let me down, what a fabulous image she proved to be.  I'm going to enjoy doing a million different colour schemes with her!  


Even though she's definitely got a dark and twisty vibe I decided to side step my fave dark colour palette and went for pastels!  I started out by creating the background in Photoshop CS6 with a gradient colour palette, manipulated an image of spidery lace, added Marie, worked lots of digi magic with light, shading and shadows and printed it out on Neenah solar white cardstock.  I then coloured her with Copics, added metallic gold details with a gel pen and embellished with Magic Transparent White details with a Vive Pearl 3D pen...which you can see on her buttons, the little bugs and in the dots on spider web corners. 


I completed my card by matting her on pastel pink cardstock and cut the narrow border with my Perfect Layers tools and added the panel to a sheet of black cardstock folded in half to make a card.
Click HERE to order your Perfect Layers tools and use coupon code LBrunton to get 10% off your entire order!

I'm entering this one in the following Challenges:
Dream in Darkness

Happy Stamping!
 THE SHARPIE DOMINO QUEEN
I design for Smeared Ink * Lost Coast Designs * Forever Dark * Altered Eclectic Challenges *About Art Accents

Saturday, April 19, 2014

"Hoppy Easter" Zentangle Vampire Bunny #2

Happy Easter Saturday Everyone!
I decided to share my 2nd Zentangle Bunny creation today instead of Sunday :0)


I used Smeared Ink's Vampire Bunny digi image again with a lot more Zentangle action this time!
Click here to check out "Little Miss Rose Toes" I shared yesterday!


I used my favourite matting tools of all time to cut the black and white mats - Perfect Paper Craftings newest Mini Perfect Layers tools and Perfect Cutting Mat.

https://www.perfectpapercrafting.com/brand-ambassador-leigh-brunton/

Challenges entered:
Smudgy Antics Anything Goes at the Smeared and Smudged Forum

Have a eggtastic Easter weekend!
Happy Stamping!
 THE SHARPIE DOMINO QUEEN
I design for Smeared Ink * Lost Coast Designs * About Art Accents

Thursday, April 17, 2014

"Little Miss Rose Toes" Zentangle Vampire Bunny #1

Woohoo, the Easter Bunny will soon be here with lots of chocolatey goodness and I'm celebrating in true Smeared Ink style and Zentangled up a storm with some Vampire Bunnies!

Say hello to Little Miss Rose Toes, isn't she the cutest Bunny you ever did see ;0)
I used Smeared Ink's Vampire Bunny digi image.
Stop by Easter Sunday to see my 2nd Zentangled bunny too!


I used my favourite matting tools of all time to cut the black and white mats - Perfect Paper Craftings newest Mini Perfect Layers tools and Perfect Cutting Mat.

https://www.perfectpapercrafting.com/brand-ambassador-leigh-brunton/

 I'm taking a little break from the Smeared Ink design team until I've got all my surgeries behind me but I'll still be sharing my Smeared Ink creations until I'm back!

Challenges entered:
Smudgy Antics Anything Goes at the Smeared and Smudged Forum

Have a eggtastic Easter weekend!
Happy Stamping!
 THE SHARPIE DOMINO QUEEN
I design for Smeared Ink * Lost Coast Designs * About Art Accents

Monday, March 31, 2014

Perfect Papers Crafting Blog Hop & Smeared Ink DT project: Perfect Layers Mini Tools Introduction!

Howzit Everyone!
As a Perfect Paper Crafting Brand Embassador I'm excited to be participating in this blog hop introducing our newest tools the Perfect Layers Mini Border Tool set and Perfect Cutting Mat! 

The hop takes place today and is open for commenting from 9am PST, but you've got until April 4 midnight PST to hop your way through the blogs and comment on ALL of them to be in the running for some awesome prizes!  We are giving away a $50 gift certificate to our online store and Wendy Ramlakhan of SugarPea Designs is giving away a $25 gift certificate to her new online stamp store too.  Her stamps are super cute so be sure to check them out!!! We will announce the winner Sunday, April 6!
 
https://www.perfectpapercrafting.com/brand-ambassador-leigh-brunton/

 If you're not familiar with these awesome tools you're going to want to hop with us and see what you've been missing out on!  You can now say goodbye to buying personal paper cutters and wasting your paper and cardstock to wonky cuts!  First Perfect Papers Layers tools blew our minds with how easy it is it to cut perfect sized mats time and time again without the need to measure and now we've got the new Minis which are the perfect travel companion too!  It's now easier than ever to take your favourite tools to a crop or a friends house to create!


 Perfect Paper Crafting also has a cutting mat too.  It's a nice workable size that works perfectly with the original Paper Layers and the Minis!  Have I said the word "perfect" enough yet, LOL!  Check out my project to see just how PERFECT these tools really are ;0)  Click the picture below to visit my Ambassador page and use my special coupon code Leigh5% to get 5% off your entire order!

https://www.perfectpapercrafting.com/brand-ambassador-leigh-brunton/
NEW Mini Perfect Layers tools and Cutting Mat
The blog roll is below my project if you need to start the hop from the beginning or if you get lost along the way :0)

My project today is also my Smeared Ink design team project for this week!  I've created a bound loose page "Intellectual Musings" Journal and I hope you like it :0)

showing the front and back of the covers and pages
 I'm recovering from surgery at the moment that effects my right arm and I'm right handed so I started out my project by colouring 6 of Smeared Ink's Septem Liberalis digi images in Photoshop CS6.  I printed two out in full colour for the covers and then lightened all 6 images to create the pages of my journal.  The lightened ones are now perfect for writing on.  I cut all the images out with scissors and distressed the edges with Tim's Tonic Paper Distresser tool.  I used a Marvy punch to decorate all 4 corners of all the images and applied Black Soot Distress Ink to all the roughened edges.

please click to enlarge - sorry about the size!
I adhered all the images to black cardstock with Scotch Quick Dry Adhesive and used my Perfect Layers Mini tool to cut the 1/16" black mats.  The way these tools work is there's a a lip on the tool that corresponds to each border measurement.  The lip butts up to the edge of the stamped panel or photo and the stainless steal edge on the tool lets you cut with a craft knife perfectly every time.  There are 4 different size border measurements on each mini tool that allow you to create mats/borders for your projects ranging from 1/16 to 5/8 of an inch!  The original Perfect Layers tools start at 1/16 but go up 1 inch!  Now you can decide which tool set is best suited to your needs!


I then adhered the cover panels to DCWV Heirloom Stack decorative paper and cut 5/8" borders and did the same to all the pages.  I punched each corner with the Marvy punch again before adhering them all to black cardstock and cut 1/16" borders.  I punched a 1/16" hole with a punch into the cover and added a tiny brass Bead Landing Found Objects ruler charm with a tiny black brad before adhering the cover back to back with the first page.  All the remaining pages and back cover where adhered back to back to form the loose journal pages.

back and side view of the bound journal
 I then stacked them and bound them together with black cord tied in a bow.  I do plan to further decorate the cover with assorted embellishments but I need to wait a while until I can operate my Cuttlebug ;0)  Thank you for visiting with me today!  Now off you hop to Nancy!

BLOG ROLL
   Perfect Paper Crafting and Laura Lynn
   Wendy Ramlakhan
   Pam Sparks
   Roxie Glaza
   Jenny Gropp
  Susie Moore
   Kim O'Connell
Jeanie Witmer
Heather Hudson
Lori Brown
Kat Ancheta
Dana Joy
Kristie Maynard
Kim Bush
Diane Bove
Patti Gilliam
Linda Kaiser
Cathie Rigby
Linda McClain
Leigh Brunton -YOU ARE HERE!
Nancy Baier
Jenn Cocran
Lezlye Lauterbach
Faith Abigail Prado

  Happy Stamping!
 THE SHARPIE DOMINO QUEEN
I design for Smeared Ink * Lost Coast Designs * About Art Accents

Wednesday, September 25, 2013

Operation Write Home + Perfect Paper Crafting Blog Hop

Howzit Friends!
 Today is Operation Write Home's 2013 Birthday Bash and we, the Perfect Paper Crafting Brand Ambassadors, are helping them celebrate in style with a fabulous blog hop!  This is truly an amazing opportunity for us to give back to the men and women of our Armed Forces.


If you're hopping along with us then you should have arrived here from Allison's blog.  If you just happened to stop by my blog today and would like to start the OWH hop from the beginning then go to Stars & Stamps.

I created two Christmas themed cards based on two OWH's sketches and used my Perfect Square and Perfect Layers tools to create all the wonderful mat layering.  

Happy Holiday Elves
click on the photos and sketches to enlarge them

Rubber Stamps:  Elves - Magenta and Happy Holidays - Recollections
Perfect Square and Perfect Layers #2 tools
Tuxedo Black Memento ink
Fired Brick Distress Ink
Copic Markers
White Gelly pen
Derwent crimson pastel pencil  + Dove Blender Pen
DCWV Christmas Mat Stack
Inkssentials Matte Accents
Tonic Paper Distresser
Scotch Quick Dry Adhesive
A2 white card blank + envelope

Jolly Snowman

Rubber Stamps:  Jolly Snowman - Stampendous and Snowflakes - Inkadinkado
Perfect Square and Perfect Layers #1 and #2 tools
Tuxedo Black Memento ink
Tumbled Glass Distress Ink
Copic Markers
White Gelly pen
DCWV Christmas and Winter Mat Stack
Viva Pearl Pen Magic Transparent White
Narrow Red Ribbon
Scotch Quick Dry Adhesive
A2 white card blank + envelope

The next stop on the hop is Patti's blog.
 ...blogger is being buggy and isn't publishing the hyper link properly so if it stops working again here's the whole link to use.
http://www.cherisheachpreciousday.blogspot.com/2013/09/operation-write-home-perfect-paper.html
A complete link list of all the blogs is below too!

 There's a $50 gift certificate from Perfect Paper Crafting for one lucky person who leaves a comment on all the blogs and PPC will accept comments until Sunday, September 29!

If you would like to get involved in helping our heroes stay in touch with their loved omes then here's some helpful links to use!
Card Guidelines
OWH Sketches to use for your designs   

The range of Perfect Paper Crafting tools are so versatile and you'll never need a paper trimmer or cut wonky mats ever again.  Stop by my Perfect Paper Crafting Brand Ambassador page for more deets and use my coupon code Leigh5% to get 5% off your entire purchase ;0)

Thanks for hopping with us and have a fabulous day!

Blog Hop List
1. OWH Stars & Stamps
2. Perfect Paper Crafting
3. Linda
4. Pam
5. Sandy
6. Jenny
7. Samantha
8. Jeanie
9. Kim
10. Paula
11. Diane
12. Wendy
13. Dixie
14. Heather
15. Roxie
16. Allison
17. Leigh - YOU ARE HERE!
18. Patti
19. Marianne
20. Lezlye
21. Nancy
22. Susanna
23. Eva
24. Julie
25. OWHtv

Happy Stamping!
 THE SHARPIE DOMINO QUEEN
I design for Smeared Ink * Lost Coast Designs * Third Coast Rubber Stamps *  About Art Accents

Thursday, February 7, 2013

"Sea of Ink" Painting Backgrounds with Perfect Pearls

Hello Friends!

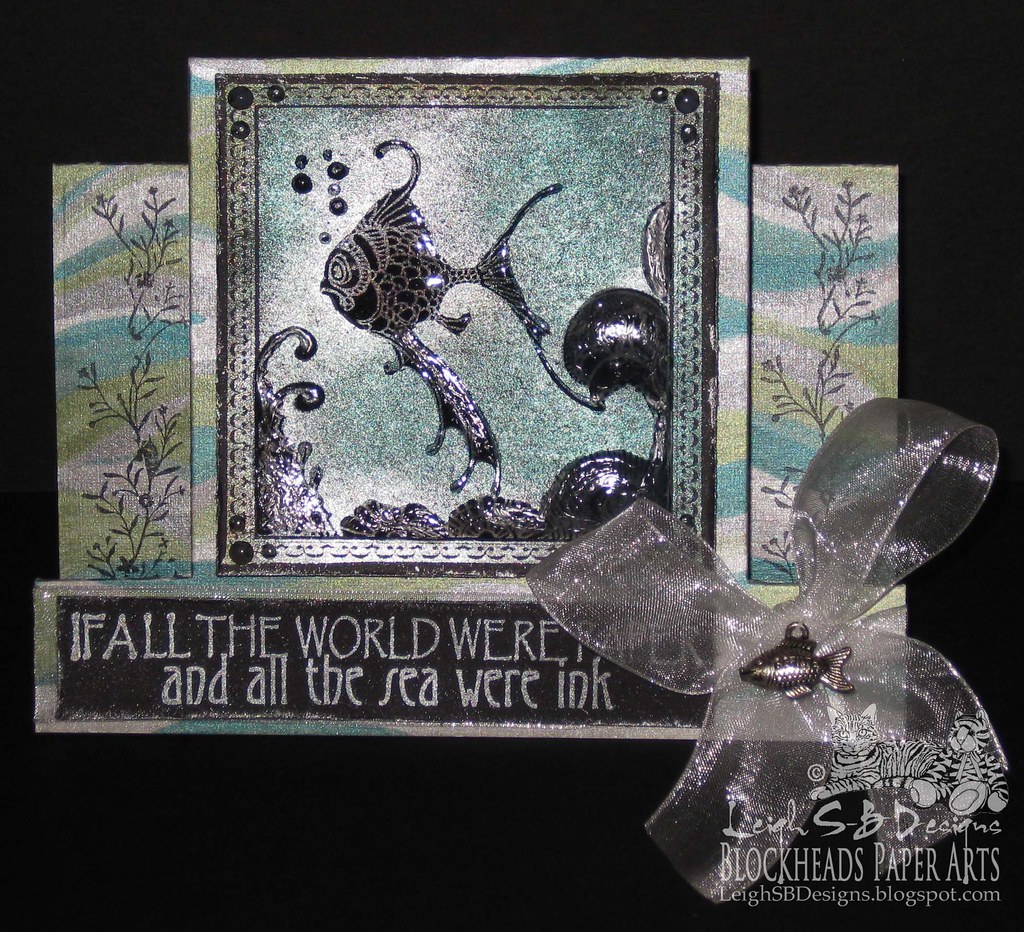
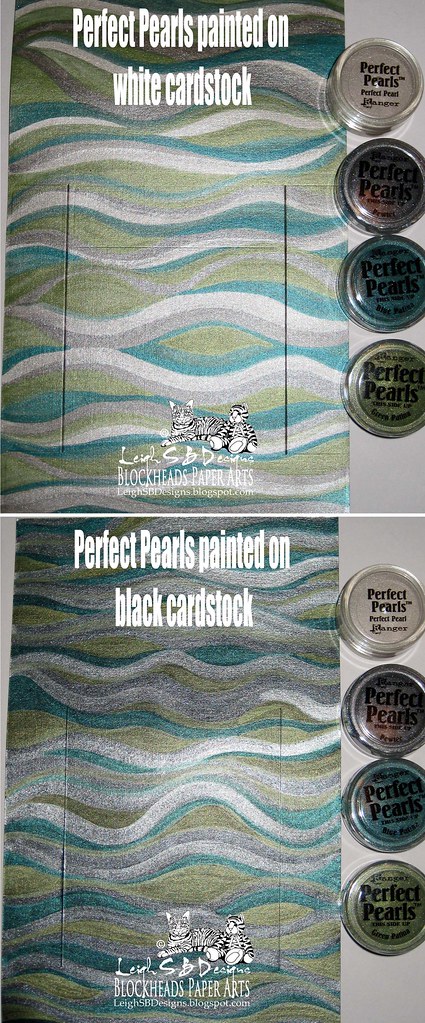
For February the Blockheads Paper Arts design team are featuring Ranger's Perfect Pearls and today I'm sharing two of my favourite PP techniques, painting with them and applying the dry powders to a stamped image.


In the photo above I created a seascape background for my card.  I used the Perfect Pearls Patina set as well as white Perfect Pearl from the Metallics set on double-sided cardstock that is black on one side and white on the other.  You can see that the black cardstock produces a darker effect and the colours are brighter and much lighter when painted on white cardstock.  You can also use Pearl Ex Powders too if you only have those!  To paint with Perfect Pearls just use a few drops of water, add the dry powder and mix together.  You can play with how thick you want the consistency by either adding less or more of either the water or the powder.  A very small amount goes a long way.

Thursday, January 24, 2013

"Painted Butterflies" Oversized Postage Stamp Card for Blockheads

Hello Everyone!


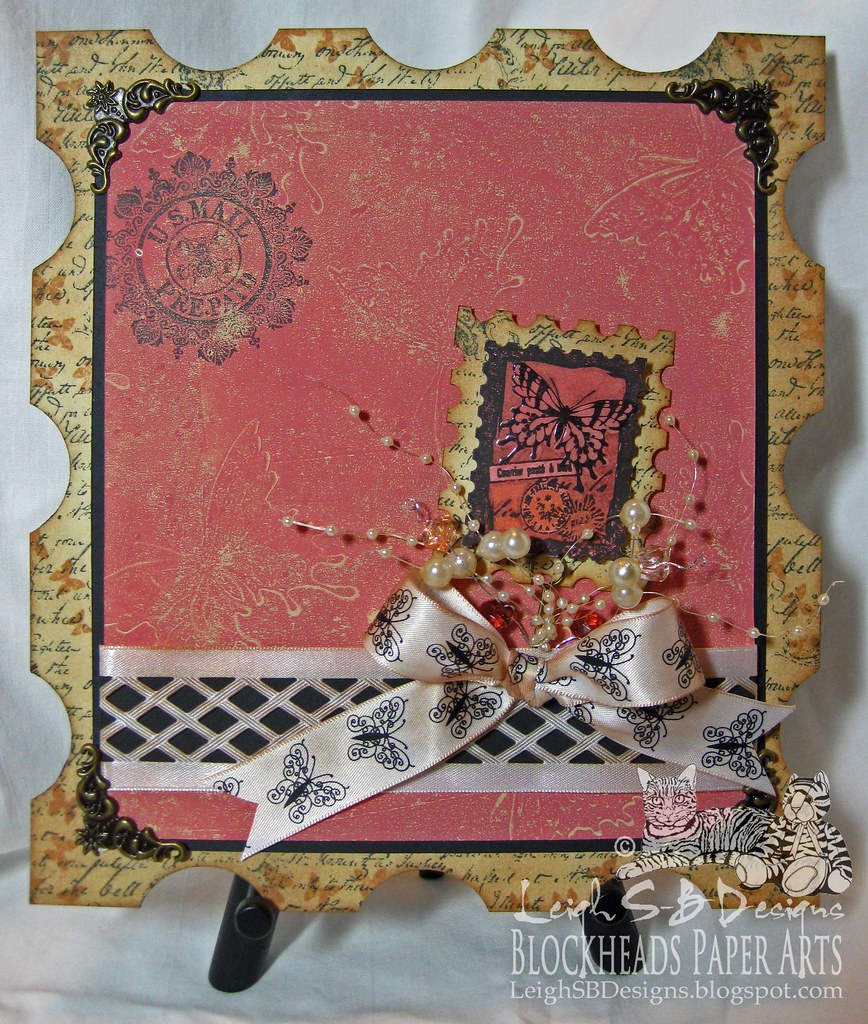
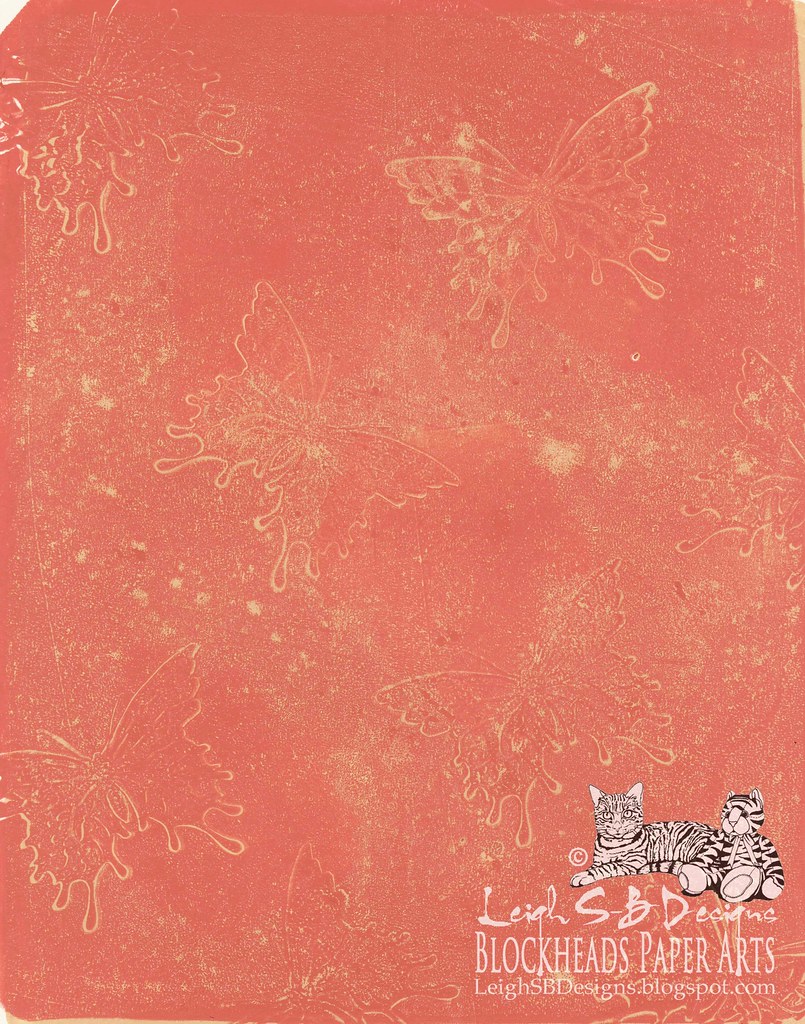
The Blockheads design team are featuring Butterfly projects this month and here's another one of my creations.  I had a ball playing with my new 8 x 10 Gelli Arts Printing Plate and created the print below by using up some old acrylic paints destined for the trash and Blockheads Paper Arts large Butterfly stamp from their exclusive Painted Butterflies stamp set.


Sunday, December 23, 2012

Day 12: Finale of 12 Days of Creepmas with Smeared & Smudged!

Season's Greetings!

Wow, can't believe it's the finale of 12 Days of Creepmas already!  I thoroughly enjoyed embracing my darker side this year and will definitely be participating in Smeared and Smudged forum's annual 12 Days of Creepmas blog hop from now on ;0)  I didn't hop and comment as much as I intended to, sorry guys, but I will still be visiting you all and leaving love coz I definitely want to see what you all did!!!!!  Thank you for taking the time to visit me, I appreciate all the wonderful comments I received and will be replying to them all too, I promise ;0)

Upcycled Creepmas Gift Bag

Friday, December 21, 2012

Day 11: 12 Days of Creepmas with Smeared & Smudged!

Season's Greetings and I sure hope it's not the Mayan end of the world where you live ;0)

I'm embracing my darker side this year and participating in Smeared and Smudged forum's annual 12 Days of Creepmas blog hop as a Jolly Blogger!  I decided I wanted to create a really beautiful Creepmas card for today and I think the digi stamp called Skull Christmas Corner by Delicious Doodles was all this card needed!

A Poinsettia Creepmas

I printed out the image onto Neenah Solar White cardstock, trimmed down the panel and coloured with the following Copic Sketch markers:  R32, 35, 39, Y38, YG11, G21, 24, 28 and added effects with the Colourless Blender. 


 I finally had chance to play with one of my new favourite toys...my snazzy Perfect Layers Rulers!  I'm also pleased to also announce that I'm an ambassador for Perfect Paper Crafting and if you want to get your hands on these rulers and their other fab tools then enter my special coupon code Leigh5% at checkout and get 5% off your order ;0)

These rulers are fantastic because you can mat your heart out and get them perfect every time!  If you get all three rulers you will be able to cut mats from 1/16 of an inch right up to 1 inch!  I love these coz my paper trimmer has been driving me nuts lately coz it's not cutting straight any more...grrrr!  Visit my ambassador page and check out the video demo to see them in action :0)

Back to my card...I used Perfect Layers ruler #1 so I could cut a mat from deep red cardstock with a 1/8 of inch border for my image.  If you want a clean cut edge you'd adhere your image panel or photo to the cardstock and then cut your mat.  But here's a tip if you like to distress the edges of your mats!  Stick the image panel to the cardstock with removable tape or poster tack putty and then cut the mat, remove the image panel and distress the edges like you normally would with Tim's paper distresser tool.  I then adhered everything to a square folded card made from white cardstock.  I completed my card by adding dimensional pearls to all the little dots in the image with a Magic Transparent White Viva Pearl Pen.  The tiny shimmery pearls are ever so pretty!


I'm entering these challenges:
Simon Says Stamps - Merry Christmas
Forever Night Creepy Challenges - Anything Goes
Copic Marker Europe - A Christmas Card (as a UK entry)
 Fashionista Challenge #10 Winter

Thanks for stopping by, hopefully we're all still here tomorrow for more Creepmas;0)
Enjoy the rest of your hop!


Happy Stamping!
 THE SHARPIE DOMINO QUEEN
I design for Blockheads Paper Arts * Third Coast Rubber Stamps * About Art Accents