Happy Christmas in July to you All🎄
I'm elbow deep in completely re-organizing my studio and melting in the process here in SoCal. In fact, the whole of the northern hemisphere is experiencing extremely high temperatures so some wintery inspiration is definitely a welcome relief right now❄️
LeighSBDesigner Val has the perfect Christmas themed Tutorial Tuesday project to share with you today🎄 Plus, to help you get a head start on your Christmas card making all the Christmas themed digis are now on SALE! Enjoy 25% off thru July 31st, sale ends at midnight PT😋
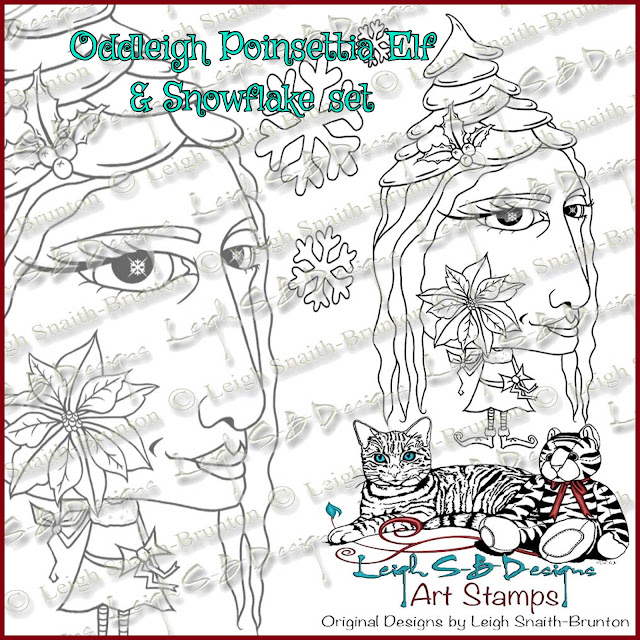
Hi, Val here today with my Post-it Note Booklet featuring our whimsically quirky Oddleigh Poinsettia Elf and Snowflake set and the Oddleigh Lizard Boy Elf and Snowflake set.

To make the booklet cover cut two pieces of white heavy weight textured cardstock measuring 4" x 5.5" and score fold lines at 1 3/4" on the middle edge of both panels to create the spine.

The Post-It note pad I used for my project measures 3" x 5" but you can use any size and create your cover to fit.

Fold along the score lines then lay the pad onto the back panel and line it up with the fold. Adhere the pad in place with double-side tape and your favourite glue to ensure it stays well and truly stuck.

Attach the front panel to the booklet with glue just along the spine. The front panel spine overlaps the back panel spine to make it nice and sturdy. Now to decorate the booklet!


Print out the Oddleigh Elves onto Neenah white cardstock and trim the images panel to fit the booklet covers.

Add a stary background to both panels using a star stencil mask inked with Stormy Sky and Faded Jeans Distress Ink. I applied the inks through the mask with a smoothie foam ink applicator.

Edge and add corners to both panels with a black Sharpie marker.

Colour the images with Spectrum Noir Colourista pens and Hobby Art watercolour pens.


Materials used:
LeighSBDesigner Val has the perfect Christmas themed Tutorial Tuesday project to share with you today🎄 Plus, to help you get a head start on your Christmas card making all the Christmas themed digis are now on SALE! Enjoy 25% off thru July 31st, sale ends at midnight PT😋
Hi, Val here today with my Post-it Note Booklet featuring our whimsically quirky Oddleigh Poinsettia Elf and Snowflake set and the Oddleigh Lizard Boy Elf and Snowflake set.

To make the booklet cover cut two pieces of white heavy weight textured cardstock measuring 4" x 5.5" and score fold lines at 1 3/4" on the middle edge of both panels to create the spine.

The Post-It note pad I used for my project measures 3" x 5" but you can use any size and create your cover to fit.

Fold along the score lines then lay the pad onto the back panel and line it up with the fold. Adhere the pad in place with double-side tape and your favourite glue to ensure it stays well and truly stuck.

Attach the front panel to the booklet with glue just along the spine. The front panel spine overlaps the back panel spine to make it nice and sturdy. Now to decorate the booklet!


Print out the Oddleigh Elves onto Neenah white cardstock and trim the images panel to fit the booklet covers.

Add a stary background to both panels using a star stencil mask inked with Stormy Sky and Faded Jeans Distress Ink. I applied the inks through the mask with a smoothie foam ink applicator.

Edge and add corners to both panels with a black Sharpie marker.

Colour the images with Spectrum Noir Colourista pens and Hobby Art watercolour pens.


For some fabulous icy texture I applied clear Versamark ink by tapping the ink pad directly onto the panels and covered them with clear embossing powder.

Paint the outside of the booklet with black gesso then, once dry, adhere the image panels to the front and back covers with a combination of double-sided tape and glue to complete the booklet.
I love these two images so it was hard to chose but I decided to put lil miss Oddleigh Poinsettia Elf on the front cover and Oddleigh Lizard Boy Elf is up to mischief on the back so you better keep an eye on him, LOL!
I hope you enjoyed my tutorial today! These Post-It Note Booklets are fun stocking stuffers so hide indoors from the heat, shop the LeighSBDesigns Christmas in July sale, and have fun making some for your friends and family❄️
White textured heavy weight cardstock
Neenah white cardstock
Spectrum Noir Colourista pens:
Leaf Green, Sandstone, Gold and Cerulean
Hobby Art Watercolour pens:
Wine Red, Natural Beige, Beige, Mid Green and Yellow Green
Black Sharpie marker
Black gesso
Versamark ink pad
Clear embossing powder
Sky Blue and Faded Jeans Distress Inks


Thank you Leigh for showcasing my booklet! x
ReplyDeleteWhat a clever idea! Love you coloring on the cuties! xx
ReplyDeleteThank you Nan x
DeleteThis comment has been removed by the author.
ReplyDeleteGreat project. A lovely craft project to try. I would like to invite you to join our challenge at Creativ Fusion Arts & Crafts Blog. Enter any type of craft project for a chance to win free images / badges. The theme is always anything goes with the option of theme for the month. Angela DT https://creativfusion.blogspot.com/2018/07/challenge-2-inspiration-photo.html
ReplyDeleteThank you Angela x
Delete