


Howzit Stamping Friends!
I'm excited to launch our new weekly segment today called Tutorial Tuesdays!

I'm kicking off today with my Sunshine in Her Hair 3D paper art🌞
This project consists of multiple fussy cut elements that are manipulated and layered to create a 3 dimensional art piece perfect for framing. I love creating 3D paper art, it's a great way to take your paper art to a whole new level!

You saw my coloured version of Sunshine in Her Hair when I released the digi art stamp last week and now I'm going to show what I created with her.....let's start at the beginning.
I printed Sunshine in Her Hair onto Neenah Solar White cardstock and coloured her up with Copic Sketch markers.
Join my LeighSBDesigners and I every Tuesday and be inspired by our fun projects packed with tips and tricks.

I'm kicking off today with my Sunshine in Her Hair 3D paper art🌞
This project consists of multiple fussy cut elements that are manipulated and layered to create a 3 dimensional art piece perfect for framing. I love creating 3D paper art, it's a great way to take your paper art to a whole new level!

I printed Sunshine in Her Hair onto Neenah Solar White cardstock and coloured her up with Copic Sketch markers.

I started out by colouring her hair in shades of yellow. I always lay down my lightest colour first and decide at this point if I'll be leaving any areas white for extra highlights. I decided to only have a few white areas and laid in Y11 using the feathering technique. I worked on sections of the hair in stages to determine which areas will be the lightest and which would be the darkest. Continuing with the feathering technique I built up the colours going from light to dark, Y11 to Y38. Once I was happy with all the highlights and shadow areas I feathered and blended more by going back over everything again but this time working from dark to light.

Next I worked on her skin and facial features. I wanted her face to be very fresh and bright and left quite a bit of white. I started out by feathering in the lightest colour, E000, and built up the shading and contouring of her face with E00 and E01 and a splash of Y13 beneath her nose and along the bridge of her nose on the left side of her face (her right side) where the shadows are darkest. Next I blushed her cheeks and added eyeshadow with E02. I then applied R20 and R32 to her eyelids and lips. I worked back and forth from light to dark and dark to light until I was happy with the blending and shading of everything.

I kept the colours of her eyes very light because she's radiating sunlight so I chose YG00 and YG03 for her irises and used B00 to tint the whites of her eyes. I then added hightlights to her eyes, lips, nose and hair with a white Dylusions paint pen.

Now for the next stage of my project! Many of you might find this next step a bit too scary to do to the actual coloured image after working so hard on it so here's a tip, you don't need to worry! Before going any further scan your coloured image and print it out twice and keep your original coloured image intact. At this point you can decide if you'd prefer to go a bit bigger because there's going to be some fiddly fussy cutting involved so print out to the size you're comfortable with.
Or, tip #2, just simply print out another copy of the digi at the same size and colour it up. The two don't have to be identical but you can use your first version as a guide and then you've got the chance to alter anything you may not have been 100% happy with.
Or, tip #3, colour the two images simultaneously. Doing both together can make the process go a bit faster and you can alter things from image to image as you're colouring and decide when you're finished which of the two you prefer to use as your top layer.

Ok, back to why this next step is about to get a bit scary! I created a speckled coloured background by sprinkling Nuance Powders directly onto the entire image! The effect is serendipitous and oh so much fun!

Simply sprinkle the yellows, oranges and red onto the cardstock. You can either be completely random or put a bit of thought into the colour placement which I did by concentrating the darker orange and red on the lower right side. The Nuance Powders are a vibrant water-based pigment powder and the tiniest sprinkle packs a powerful punch.
 |
| you could stop at this point if you wanted to...this is a fun art piece just as it is! |
Activate the powder by spritzing with water. The amount of water you add will determine how much the powder moves around and blends with neighbouring colours. Add lots of water for lots of blending action or lightly to achieve the more speckled effect.

I gave mine two spritz of water and ended with a light spritz of pearl Smooch Spritz to add lots of magical shimmer which you can see in these photos.

Dry the cardstock by zapping it with a heat tool.
I bet you've noticed that there's some extra colours in there that I did not use! Yep, a bit of blue and green creeped in. That's just something that can randomly happen with the Nuance Powders, a speck of another colour can creep in to a bottle during the manufacturing process. It makes creating with them rather exciting and luckily the blue/green picked up on her eye colour.

You'll notice that some of the lines blurred from getting wet and that's perfectly okay. You can leave as is or you can draw some of the lines back in again with a black fineliner.

Next apply Galaxy Gold Brilliance ink directly to the edges of the cardstock by dragging the ink pad along the edges.

Now for the fussy cutting fun! I enjoy creating 3D art with feminine imagery with lots of hair that can be cut out and layered to create dimensional cascading curls. I cut up two coloured images to get the sections shown in the photo below.

Manipulate the fussy cut pieces by curving and curling them over the handle of a paint brush.

Add magical shimmer to her eye shadow, lips and the hair sections with clear Wink of Stella.

Manipulate the fussy cut pieces by curving and curling them over the handle of a paint brush.

Add magical shimmer to her eye shadow, lips and the hair sections with clear Wink of Stella.

For extra sparkle I applied a yellow tinted glitter glue to the sun.

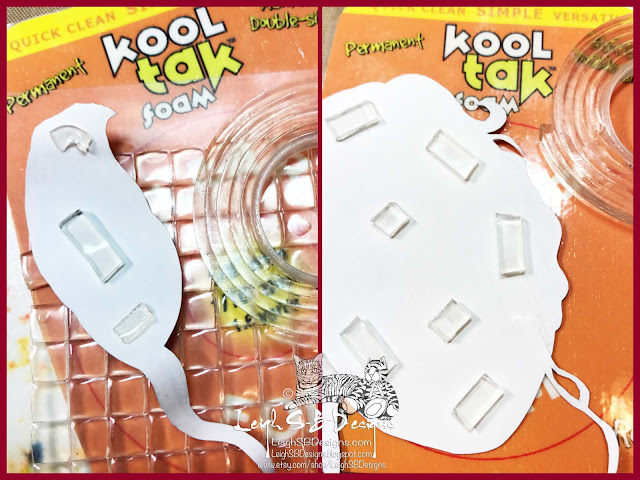
Once everything is dry apply clear double sided sticky foam to the fussy cut sections and start building up the layers by adhering each piece to the base image. I like to use a combination of thin squares with the thicker strips to achieve a variation in the level of each layer.
I completed my design by fussy cutting up two more suns and adhering them to all four corners.

Complete the art piece by adhering the panel to 3 mats cut from black and dark yellow cardstocks. It's now ready to frame in a shallow shadowbox type frame.

Here's a look at the finished piece from various angles.


Once everything is dry apply clear double sided sticky foam to the fussy cut sections and start building up the layers by adhering each piece to the base image. I like to use a combination of thin squares with the thicker strips to achieve a variation in the level of each layer.

I completed my design by fussy cutting up two more suns and adhering them to all four corners.

Complete the art piece by adhering the panel to 3 mats cut from black and dark yellow cardstocks. It's now ready to frame in a shallow shadowbox type frame.

Here's a look at the finished piece from various angles.


I'm very pleased with how it turned out and my kitty enjoyed checking it out too😀

Thanks for stopping by to see my project today, I hope I've inspired you to try your hand at creating some 3D paper art😀
Sunshine in Her Hair is on flash sale today over at my Esty Boutique!
You can get the supplies I used via my affiliate links with Joggles and Blick Art Materials,
thank you so much for your support!
Happy Stamping!
 THE SHARPIE DOMINO QUEEN
Leigh, this is gorgeous. I love the 3D effect and how you have added part of the sun design to the corners. Your colouring is lovely and your background really shows her off. Great image, wonderful design, and tutorial! I always learn from you so thanks!
ReplyDeleteThank you so much Bonnie!
DeleteThis is stunning Leigh....I love how you do the 3D paper art and the fabulous background you created!
ReplyDeleteThank you so much Val!
DeleteOMGoodness - this is just AWESOME !! I love the colours and the fabulous 3D effects - I love doing that myself. Very scary with the scattering powders over it... I would freak at this point :-) Beautiful work Leigh xxxxxxxxxx
ReplyDelete