


Hello Friends!

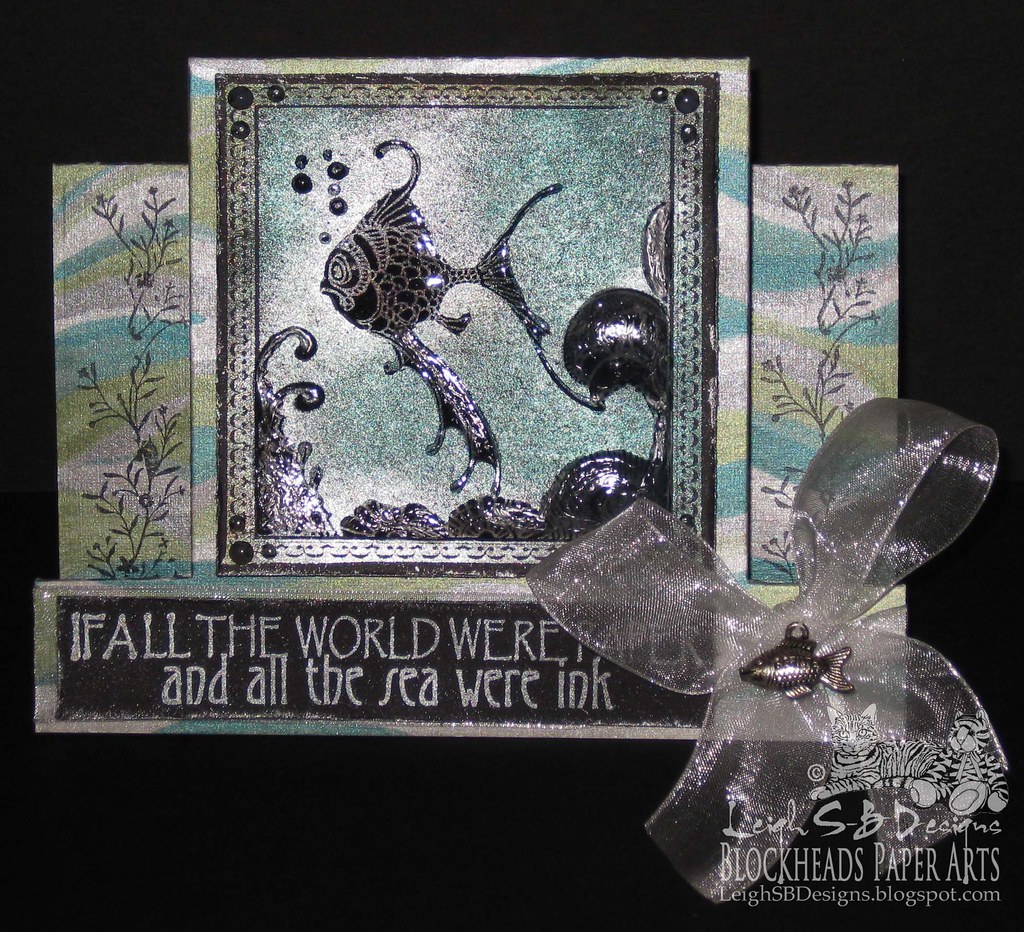
For February the Blockheads Paper Arts design team are featuring Ranger's Perfect Pearls and today I'm sharing two of my favourite PP techniques, painting with them and applying the dry powders to a stamped image.
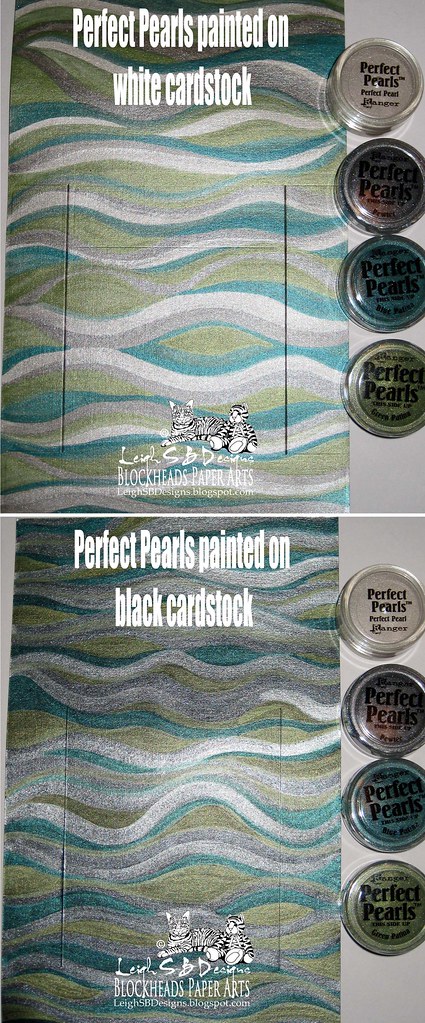
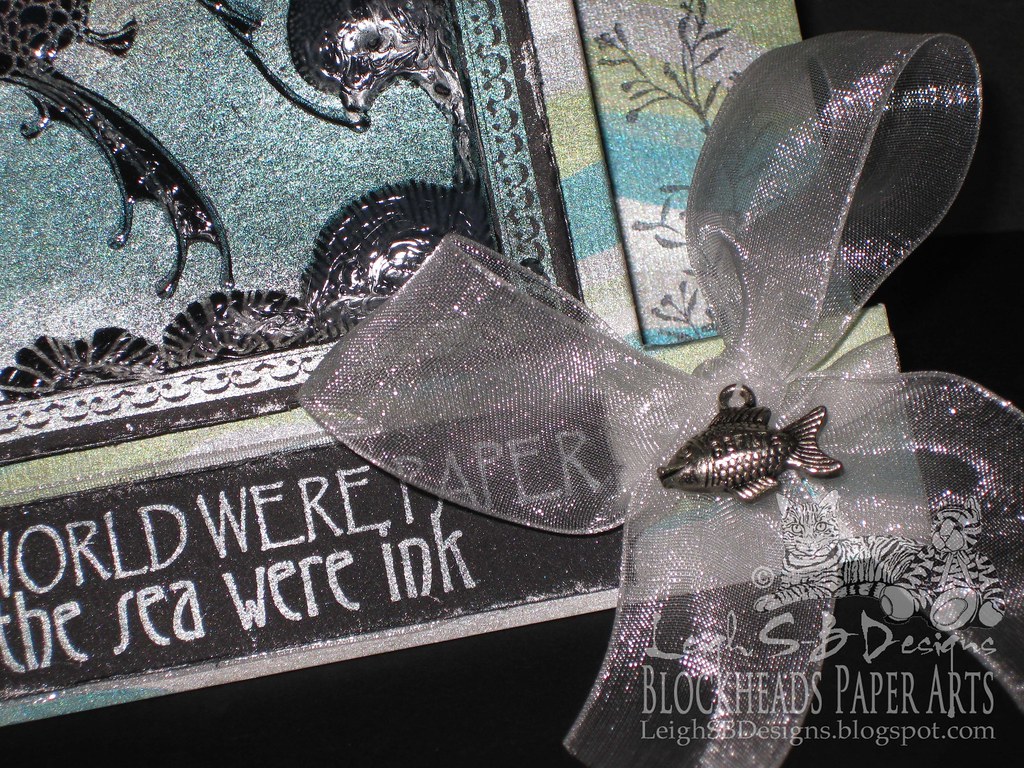
In the photo above I created a seascape background for my card. I used the Perfect Pearls Patina set as well as white Perfect Pearl from the Metallics set on double-sided cardstock that is black on one side and white on the other. You can see that the black cardstock produces a darker effect and the colours are brighter and much lighter when painted on white cardstock. You can also use Pearl Ex Powders too if you only have those! To paint with Perfect Pearls just use a few drops of water, add the dry powder and mix together. You can play with how thick you want the consistency by either adding less or more of either the water or the powder. A very small amount goes a long way.

I decided to go with the white side of the cardstock to make my step card so that I would have a nice contrast with the stamped panel. The fish tile (Seascape - Fishes set) and the sentiment (Verses Full Sheet set) were both stamped on black cardstock with Perfect Pearls Medium, you can also use a Versamark Watermark ink pad to achieve the same result. I dusted Perfect Pearl and Blue Patina onto the main image and Green Patina onto the frame border with a small soft bristle brush then dusted off the excess powder with a larger brush. The sentiment was stamped in the same way but this time I just dusted on Perfect Pearl. Spritz both with a fine mist of water to make the powders permanent. I like to use Ranger's Mini Mister bottle for this application.

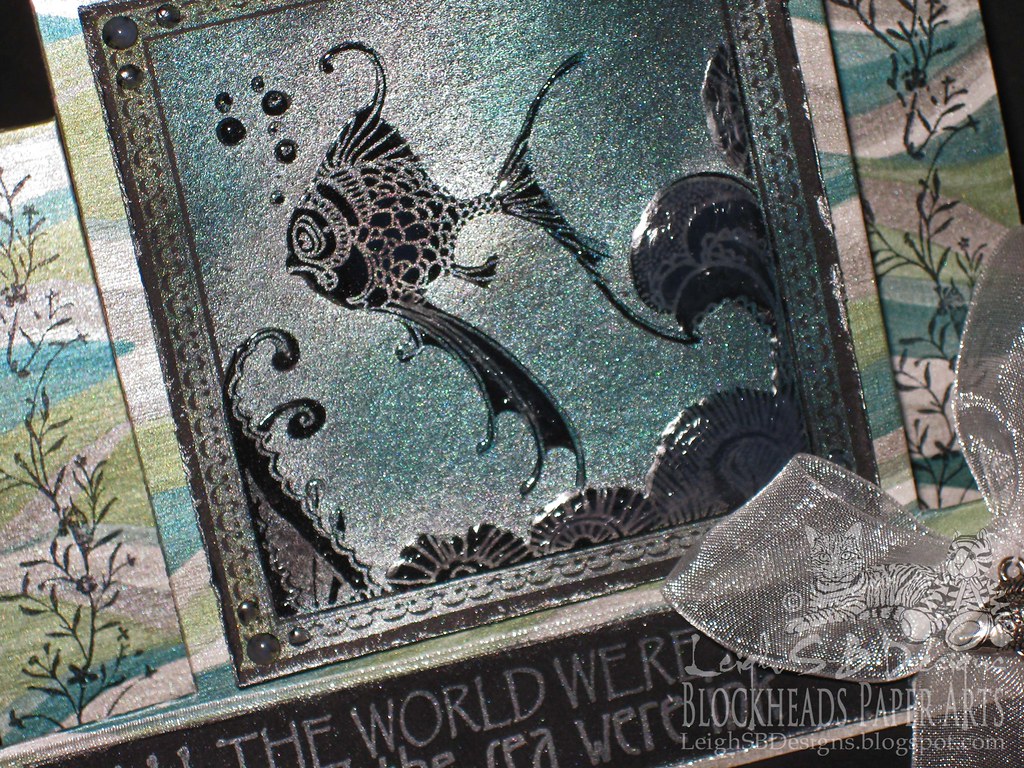
I used my Perfect Layers #2 tool to cut a 1/16" black border around the fish tile and eyeballed the cutting out of the sentiment. I then tattered up the edges on both with Tim's Paper Distresser tool by Tonic and applied Brushed Pewter Metallic Distress Stain to highlight the edges. Add dimension to the fish tile by applying Inkssentials Matte Accents to just the fish and seascape areas. I then added 3 water droplets on all 4 corners too and put it aside to dry.

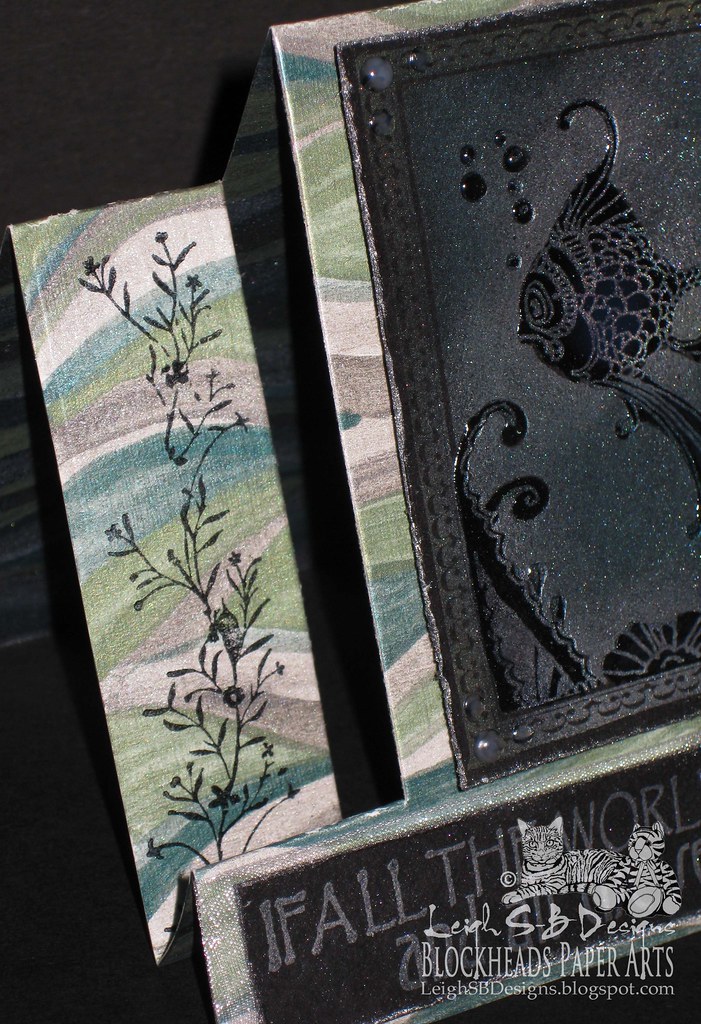
Die cut the card with a Center Step Card die by The Stamp Doctor. Stamp the floral flourish image from Blockheads' Grunge It Up set on the two narrow side panels with Jet Black StazOn ink. I like that stamp coz it looks like seaweed! Wrap the lower panel with a length of sheer white ribbon and tie a bow. Sew a silver fish charm to the bow with white cotton. Secure the ribbon in place with a bit of double sided tape and adhere the sentiment panel with double sided tape as well. Adhere the fish tile to the center of the step card with black pop dots or transparent Kool Tak tape.

Thanks for visiting with me today and if you want to see more Perfect Pearls techniques then pop on over to the Blockheads' Blog to see what my fellow team mates are creating! Don't forget to pop by my Perfect Paper Crafting ambassador page too for more info on their fabulous tools and use my special coupon code Leigh5% to get 5% off your entire order!
Challenges entered:
Anything Challenge #85 - Monochrome
Crafty Ribbons #38 - Anything Goes with Ribbon
Die cut the card with a Center Step Card die by The Stamp Doctor. Stamp the floral flourish image from Blockheads' Grunge It Up set on the two narrow side panels with Jet Black StazOn ink. I like that stamp coz it looks like seaweed! Wrap the lower panel with a length of sheer white ribbon and tie a bow. Sew a silver fish charm to the bow with white cotton. Secure the ribbon in place with a bit of double sided tape and adhere the sentiment panel with double sided tape as well. Adhere the fish tile to the center of the step card with black pop dots or transparent Kool Tak tape.
Thanks for visiting with me today and if you want to see more Perfect Pearls techniques then pop on over to the Blockheads' Blog to see what my fellow team mates are creating! Don't forget to pop by my Perfect Paper Crafting ambassador page too for more info on their fabulous tools and use my special coupon code Leigh5% to get 5% off your entire order!
Challenges entered:
Anything Challenge #85 - Monochrome
Crafty Ribbons #38 - Anything Goes with Ribbon
Happy Stamping!

THE SHARPIE DOMINO QUEEN
Wow your experiments are great to see and your card is stunning, beautifully done, yhanks for sharing..
ReplyDeleteOoh, I like this!! I love it when you project and think I must try that some time!
ReplyDeleteThanks for playing at Crafty Ribbons this fortnight,
Laura
:)
Beautiful card. Thanks for joining us at Crafty Ribbons. Good luck and hope to see you again soon.
ReplyDeletehugs Anke
Your step card is simply stunning! A great tutorial too. I love the colours. Thanks for joining us at Anything Goes.
ReplyDeleteHugs, Janine xx
Wow wow amazing card. The background is awesome. Thank you for joining us at Anything Goes Challenge Blog :-) Kezzy xx
ReplyDeleteWOW!!! This is amazing! THANK YOU for showing us how you made the watery paper. Lovely!
ReplyDeleteThank you for participating in the Craft Us Crazy Challenge!
Oh this card is wonderful, love the colours!
ReplyDeleteLove this card! Time to get out those perfect pearls again. Thanks for the inspiration!
ReplyDelete