News
The Summer BUZZ Collection
Re-Release Sale-bration thru July 19!
The Gilded Raven Release!
"Rocky Mountain Christmas"
Winter 2025 Collection
Adopt all the Loveleigh Kitties, they're PURRfect for every occasion!

Sunday, November 15, 2015

Day of the Dead tea light luminary - Lost Coast Designs DT project

Howzit Everyone!
We are now on Day 7 and the finale of our Day of the Dead Celebrations over at Lost Coast Portal to Creativity where Lost Coast Designs and Carmen's Veranda collide to bring you twice the inspiration and double the fun!  Come join us and follow our blog if you haven't already!
We have some amazing DOTD projects entered in our contest so far!  Our contest closes tonight at midnight PST so hurry in your entries for the chance to win a $15 spending spree to LCD/CV!  Add them to the linky collection on my finale post HERE!

I'm sharing 2 projects today, a fun mini tea light luminary here and an altered domino trinket box over on my DominoART blog!

Triangle Tea Light Luminary
I used the following Lost Coast Designs stamps
Black Nose Sugar Skull, White Nose Sugar Skull,  Sugar Skull With Flower
the lace border is part of the Picado Skull stamp 

so pretty in the evening with the tea light glow
it really glows in complete darkness
Here's what it looks like in daylight!


3 sided luminary
This was a fairly easy project to do and they make fun little home decor gifts.

I started out by stamping the White Nose Sugar Skull in black StazOn ink on clear acetate overlay and applied Watermelon and Sunshine Yellow Ranger Adirondack Brights Alcohol Ink with an ink applicator to the opposite side.  To make the luminary frame I started with a the front window panel and cut the window to fit the skull and stamped the lacy border from the Picado Skull stamp with Aurora - tri-colour Brilliance ink.  Then adhered the acetate to the inside with double sided tape.  I then cut a double panel to form the other two sides of the triangular shaped luminary and stamped them with the other two sugar skull stamps and the lacy border.  The panels were scored on my scoreboard and the two end flaps adhered to the inside of the front panel with double sided tape.  I completed my luminary with metallic gold applied to all the edges with a gold Promarker.

Thanks for visiting with me today!

Happy Stamping!
 THE SHARPIE DOMINO QUEEN
I design for Smeared Ink * Lost Coast Designs * Carmen's Veranda * Forever Dark * Altered Eclectic Challenges *

Friday, November 6, 2015

November Tangles

Hello Everyone!
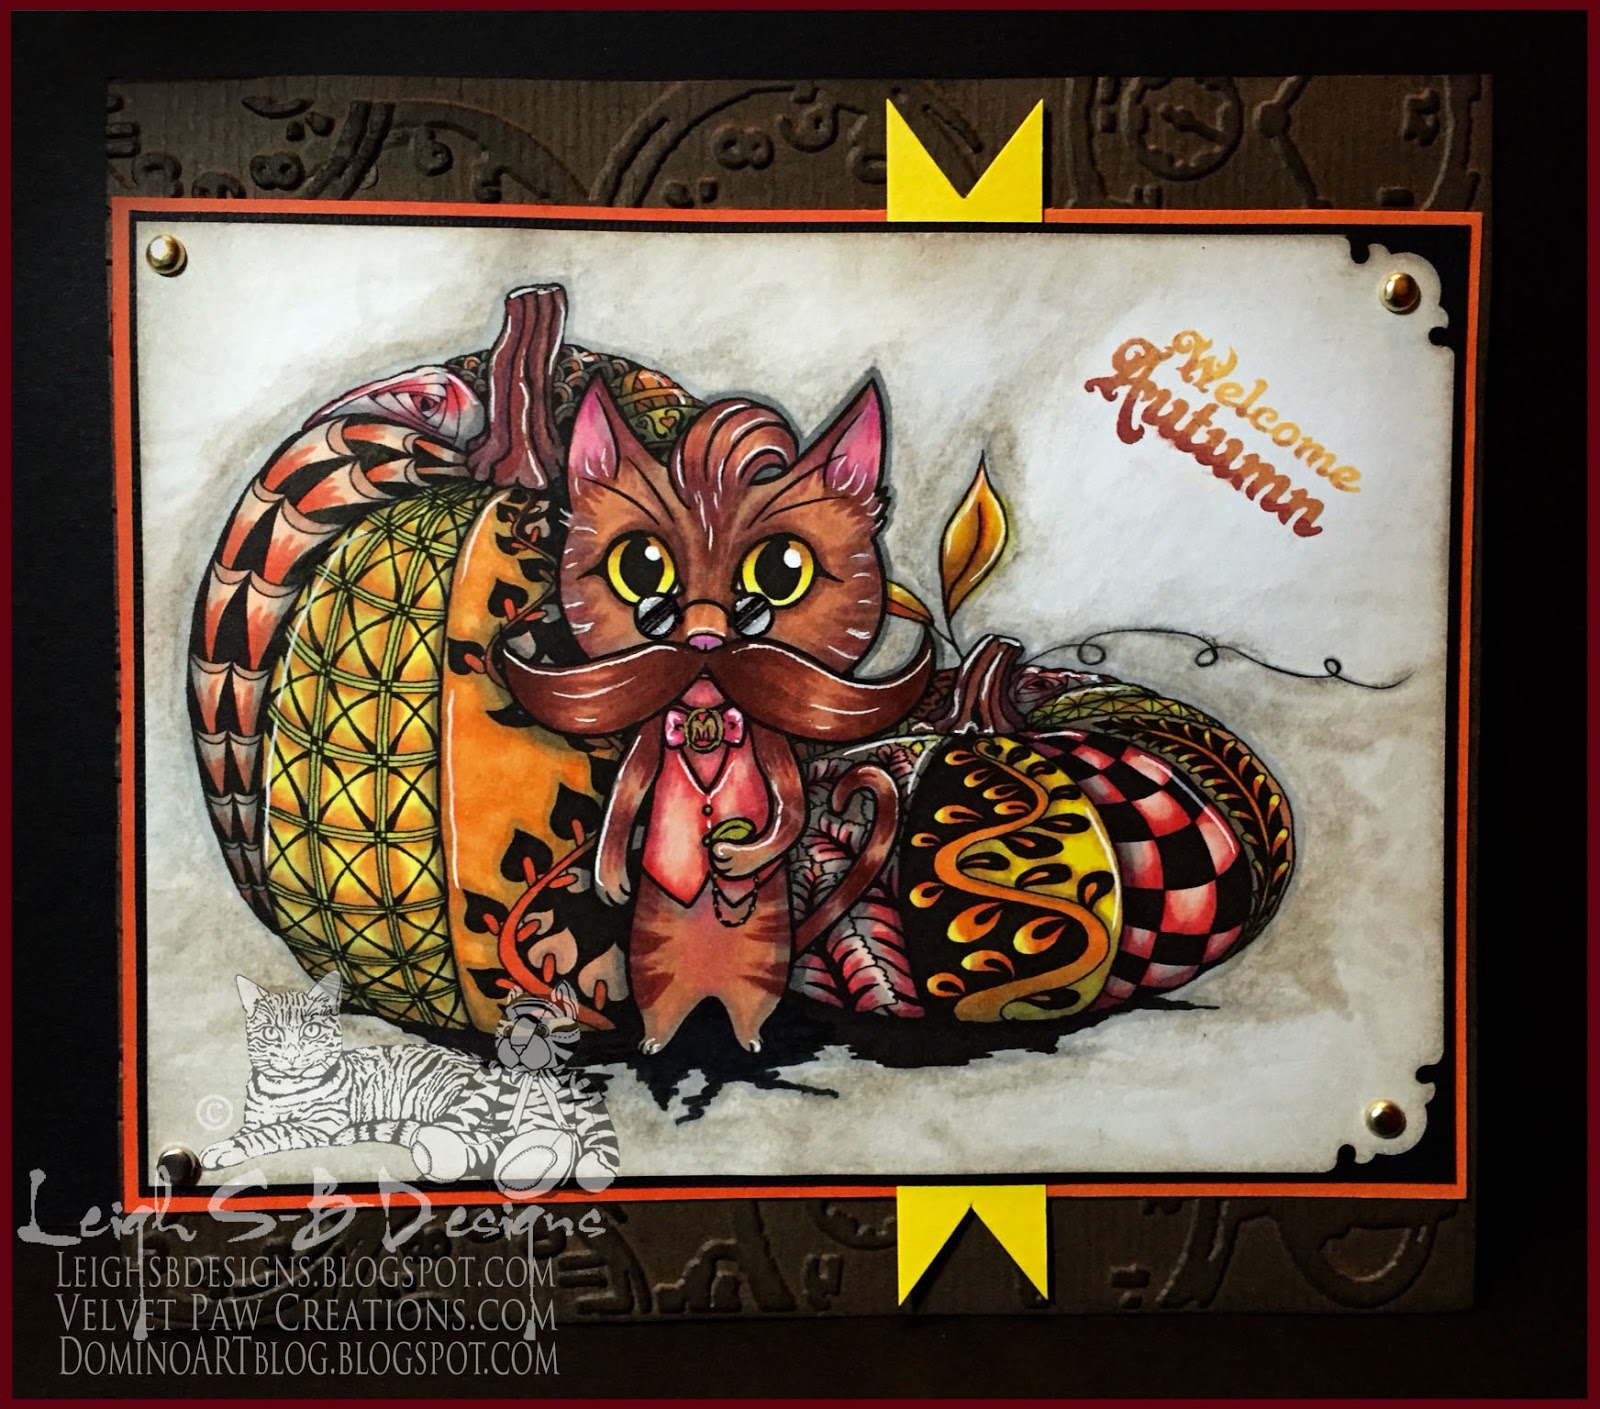
I have resisted the "moustache' craze but when I saw the Movember kitty over at East Wind for their current challenge I couldn't resist any longer LOL!  I combined the EW kitty, their November newsletter freebie, with my own hand drawn Zentangle inspired pumpkins and created this Autumn themed card.
 

Update:  I'm pleased to say this card was picked as a Designer Favourite over at The East Wind
 I coloured everything with Copics with white gel pen highlights.  The background is brown Derwent Pastel blended with Dove Blender pen.  The senti is stamped with 3 colours of VersaMagic and is from my rubber stamp version of the Zentangle inspired set called Autumn's Pencil.   Two smaller versions of my pumpkins are also part of the rubber set.  My set was originally designed exclusively for Smeared Ink and is now available through me until SI sets up their category for stamps by other artists again.  The two corners were punched with a Marvy punch and Pumice Stone Distress Ink applied to the edges of the card which was then layered onto black and orange cardstocsk.  The cardstock mats were cut with my Perfect Paper Layer tools.  The brown mat was embossed with Tim's clock Alterations embossing folder and the designed enhanced with Black Soot Distress Ink.

Get 10% of your entire Perfect Paper Crafting order by using my special coupon code "Lbrunton"


 Of course I'm entering it in East Wind's Movember challenge
and
Snarky Stampers k-is-for-kitties
Dream In Darkness
A Step in the Darkness - Create and Inspire

Thanks for stopping by and have a great weekend!
Happy Stamping!
 THE SHARPIE DOMINO QUEEN
I design for Smeared Ink * Lost Coast Designs * Carmen's Veranda * Forever Dark * Altered Eclectic Challenges *

Tuesday, November 3, 2015

Gimme Candy - Forever Dark DT project

Howzit Everyone!
 It's time for a new challenge over at Forever Dark Challenges!
As always it's anything goes as long as it is "DARK" whether it be light hearted, creepy cute or down right scary, all are welcome!


Our fabulous sponsor this month is


https://www.etsy.com/uk/shop/ShadowClocksyDigis

I had fun creating with Pop culture zombie girl!


This is another full on digital art piece created in Photoshop CS6 and Paper 53.
I started out by colouring the zombie girl on my iPad using a stylus and an awesome drawing application called Paper 53.  I had an absolute blast working on this piece although it took many many hours to complete.  Many people think it's faster and easier to create and colour digis in Photoshop but that's an incorrect assumption.  It actually takes way longer, images can take many hours and even days to colour before even getting to project assembly.  Once I was happy with my zombie I then moved over to Photoshop and completed my project with the addition of the text and background layers.

Challenges entered
Dream in Darkness
A Step in the Dark Facebook Challenge
 
Happy Stamping!
 THE SHARPIE DOMINO QUEEN
I design for Smeared Ink * Lost Coast Designs * Carmen's Veranda * Forever Dark * Altered Eclectics

Sunday, November 1, 2015

Winter is Coming! - Smeared Ink - Smudgy Antics DT

Howzit Everyone!
Can you believe it's November already, October flew by in the blink of an eye!
It's now time for a new challenge over at Smudgy Antics!  Our challenges are always anything goes with an additional twist, but they must always be on the dark side and you must use Smeared Ink digis or rubber stamps!

Here's my 1st inspiration project for November featuring Smeared Ink's new digi called Steed!
The twist this month is Metal Madness.  I decided to just add touches of metallic silver for the metal elements in my project. 

Winter is Coming! 

My project began in Photoshop CS6 where I added Smeared Ink's Void digi paper to the background inside the frame and then printed out the digi onto Neenah solar white cardstock.  I then coloured the image with Copics in shades of blue, green-blue, cool greys and the colourless blender with touches of metallic silver - I used a metallic silver Promarker and a gel pen.  I then trimmed and distressed the edges of the panel and applied Tumbled Glass Distress Ink with a sponge applicator.  I layered the panel onto teal shimmery cardstock and dark blue cardstock and added silver lines to the blue mat.  To complete my project I layered everything onto white cardstock folded to form a card, embellished with pastel blue pearls and added shimmer to the wings, butterflies, hanging crystals and the base of the antlers with Viva Pearl Magic Transparent White.

Here's a closer look at all the details


Thanks for stopping by to see my project today :0)

Challenges entered:
Dream in Darkness

Happy Stamping!
 THE SHARPIE DOMINO QUEEN
I design for Smeared Ink * Lost Coast Designs * Carmen's Veranda * Forever Dark * Altered Eclectic Challenges *

Friday, October 30, 2015

Haunted House Luminary card

Happy Halloween Eve!
Yesterday I shared my 2nd luminary card and now here's my 3rd one which I made for my nephew using Bugaboo's dig stamp, Halloween Silhouette.


 For this card I made the card window frame to fit the size of the digi transparency and decorated it with decorative paper (Target $$$ bins) and border stickers (Martha Stewart).  I dove tailed the Trick or Treat border and edged it with crystal Stickles glitter glue as well as the window frame edge and  I used blues, purples, red and yellow Alcohol Inks on the transparency.  The photo above shows the true colours but then the magic happens in the evening when you turn on the flameless tea light hidden inside the card. 

In the photos below you can see how the card transforms in different lighting, from daylight to darkness and also a closer look at the glittery details and also a view of the inside of the card.  I used different decorative pumpkin paper for the inside of this card which was also stamped with a scene by PSX and the word BOO (can't remember who made this foam stamp set..possibly All Night Media) in black Versafine ink.


I'm entering this one in the following challenges:
Left of Center

Happy Stamping!
 THE SHARPIE DOMINO QUEEN
I design for Smeared Ink * Lost Coast Designs * Carmen's Veranda * Forever Dark * Altered Eclectic Challenges *

Thursday, October 29, 2015

Happy Halloween Luminary card #2

YAY!  Only 2 more sleeps 'til Halloween!

Yesterday I shared my 1st luminary card and here's my 2nd.  This one I made for my sister using Bugaboo's dig stamp, Happy Halloween Circle Silhouette.

in daylight you can see the pretty vibrant colours
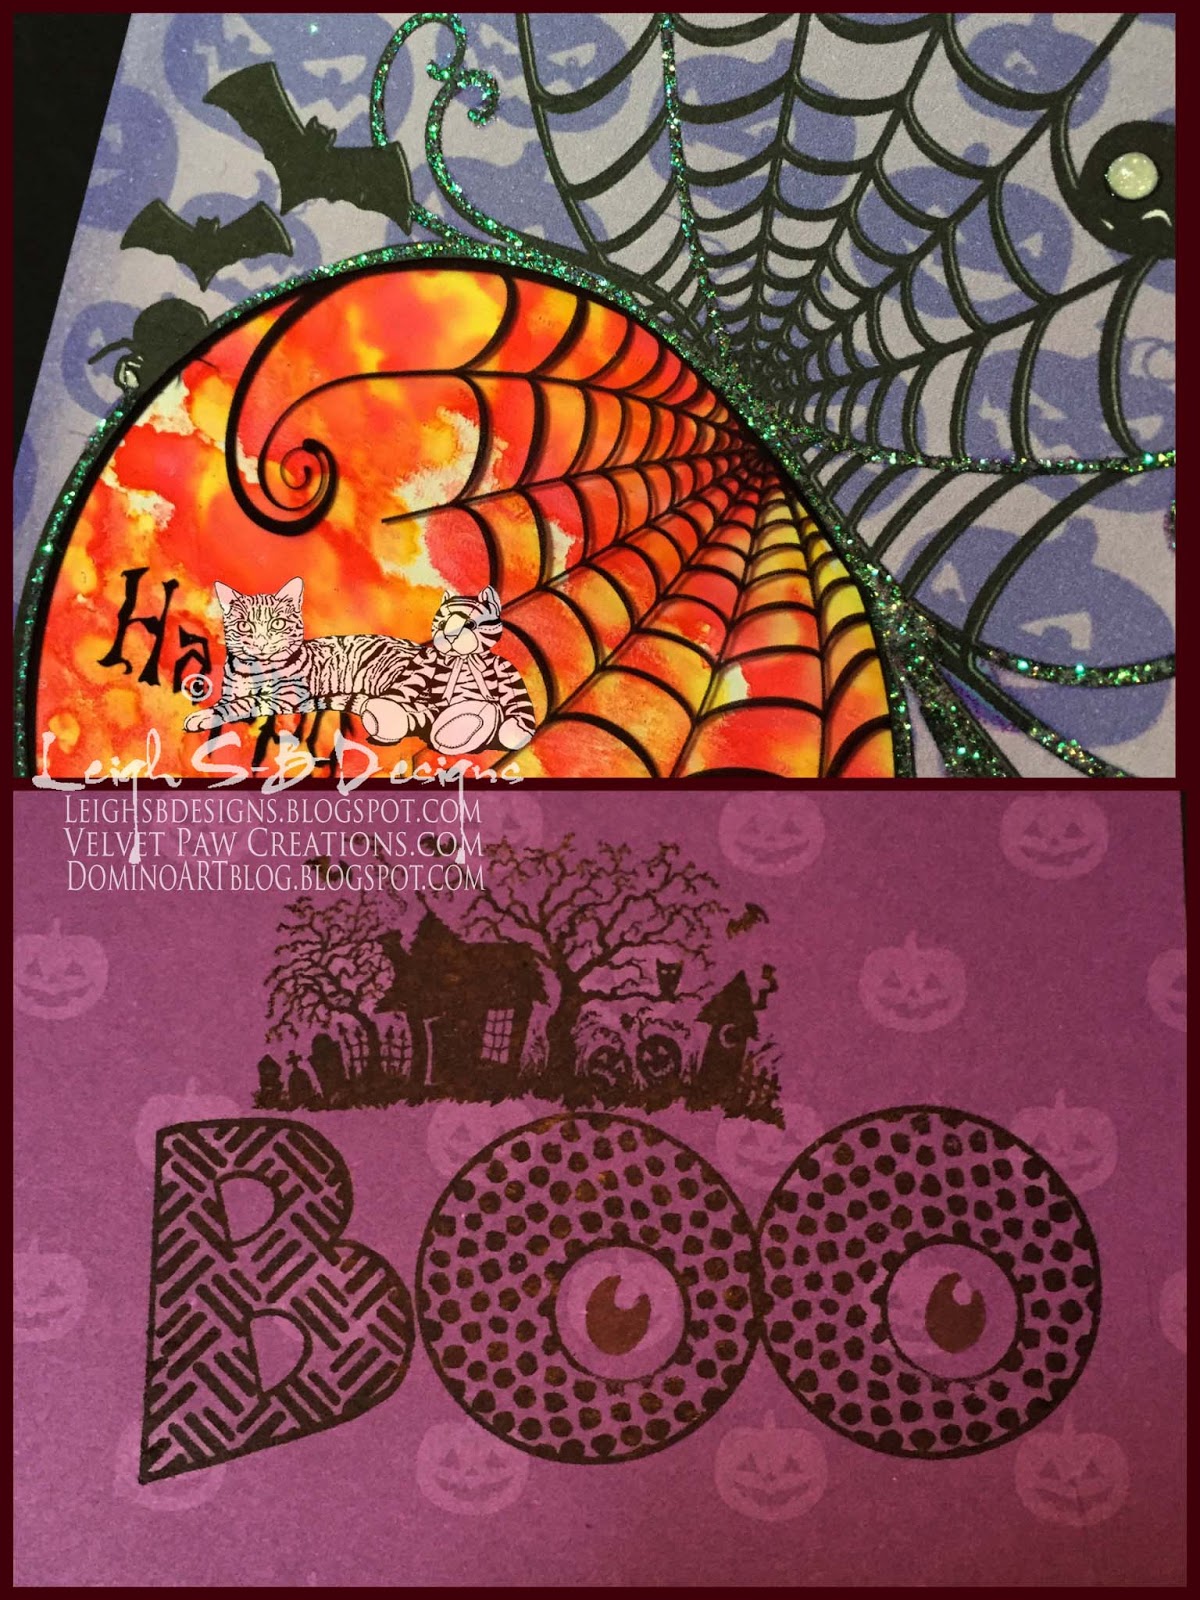
 I pretty much made this one the same way I made the luminary card I shared yesterday.  For this one though I altered the colour of the orange decorative pumpkin paper I scanned and used on my other card and made this one purple and I used red and yellow Alcohol Inks on the transparency.  I completed the front of the card with Shaded Lilac Distress Ink applied to the outer edges and applied Crystal Stickles glitter glue around the circle and the flourishy parts of the web.  I also added Viva Pearl Transparent Magic White dimensional dots all the critters eyes and on all 4 corners of the card.
The card above shows the true colours but then the magic happens in the evening when you turn on the flameless tea light hidden inside the card.

so pretty in the evening with the glow and the sparkle on the web
In the photos below you can see how the card transforms in different lighting, from daylight to darkness.


Here's a closer look at the sparkly web and also a view of the inside of the card.  I used different decorative pumpkin paper for the inside of this card which was also stamped with a scene by PSX and the word BOO (can't remember who made this foam stamp set..possibly All Night Media) in black Versafine ink.


I'm entering this one in the following challenges:
Dream in Darkness 
Creative Moments
Catch the Bug Blog
Left of Center

Happy Stamping!
 THE SHARPIE DOMINO QUEEN
I design for Smeared Ink * Lost Coast Designs * Carmen's Veranda * Forever Dark * Altered Eclectic Challenges *

Wednesday, October 28, 2015

Happy Halloween - Cat Luminary card

YAY!  Only 3 more sleeps 'til Halloween!

Over the next 3 days I'm going to share some luminary cards I've been making as we count down to Halloween.  I made this one for my Mom using Bugaboo's dig stamp, Happy Halloween Cat Silhouette.


First I scanned a sheet of decorative pumpkin paper and added the digi stamp in Photoshop CS6 before printing it out onto white cardstock.  I then printed out just the digi stamp on a printer transparency sheet.  I applied Alcohol inks in blues and purples onto the reverse side of the transparency and cut out the circle.  I then removed the circle from the cardstock print to create the luminary window and adhered the transparency inside with tape.  I then adhered a white cardstock panel to the inside, covering the transparency.  I completed the front of the card with Dried Marigold Distress Ink applied to the outer edges, applied Crystal Stickles glitter glue around the circle and on the flourish and then Viva Pearl Transparent Magic White dimensional dots added to all 4 corners.

 The photo above shows the card in daylight.  You see how vibrant and pretty the blues and purples are but then the magic happens in the evening when you turn on the flameless tea light inside the card.  The last photo below shows how dramatic it is in darkness too!  Ooooh aaaaah, so pretty!


The real pumpkin paper was added to the inside and stamped with a scene by PSX and the word BOO (can't remember who made this foam stamp set..possibly All Night Media) in black Versafine ink.


 I'm entering this one in the following challenges:
Dream in Darkness 
Creative Moments
Catch the Bug Blog
Left of Center

Happy Stamping!
 THE SHARPIE DOMINO QUEEN
I design for Smeared Ink * Lost Coast Designs * Carmen's Veranda * Forever Dark * Altered Eclectic Challenges *

Friday, October 23, 2015

The Warrior - for Smeared Ink Smudgy Antics

Howzit Everyone!
It's not too late to get in your entries over at Smudgy Antics for our October challenge!
Here's my 2nd inspiration project!


This gorgeous image is one of Smeared Ink's new ones called Jude!  This project started out in Photoshop CS6 where I added the digi image to one of Smeared Ink's digi papers from the Poe set - their digi papers will be coming to Smeared Ink website very soon!  I then printed it out and coloured Jude with Copcs and added gold detailing with a metallic gel pen.  I tore, punched and distressed the paper edges and then layered it onto red and black cardstocks.  The final red mat was stamped in black Versafine ink with a portion of one of SI Letterbox Backgrounds real rubber stamps (middle right stamp) for a lace-like effect.  I embellished my card with a strip of black burlap ribbon gold brads and twirly strips of cardstock (cut on my paper trimmer) and bound with gold cord.

Challenges entered:
Dream in Darkness

Happy Stamping!
 THE SHARPIE DOMINO QUEEN
I design for * Smeared Ink * Lost Coast Designs * Forever Dark Challenges *

Tuesday, October 20, 2015

"Nothing to Wear for Halloween" digi art for Smeared Ink DT!

Howzit Everyone!
It's not too late to get in your entries over at Smudgy Antics for our October challenge!
I've got 2 DT projects to share, here's the first one.

I went full on digital for this one in Photoshop CS6 using Smeared Ink's Rusalka digi image.  She's in quite a tizz with herself and was overheard muttering "It's nearly Halloween and I've got nothing to wear!"

See you over at Smudgy Antics where are challenges are always dark, always Anything Goes and now with the re-opening of the store...always Smeared Ink images only!

Challenges entered:
Dream in Darkness
Create and Inspire

Happy Stamping!
 THE SHARPIE DOMINO QUEEN
I design for Smeared Ink * Lost Coast Designs * Forever Dark * Altered Eclectic Challenges *About Art Accents

Monday, October 19, 2015

Vaguely Goth digi art - Forever Dark DT!

Howzit Everyone!
There's still time to enter our October challenge over at Forever Dark Challenges!
As always it's anything goes as long as it is "DARK" whether it be light hearted, creepy cute or down right sinister, all are welcome!


Our fabulous sponsor this month is
I used Ike's GOREgous Vaguely Goth girl for my digi creation!

This is another full on digital art piece but this time I did not use my precious Photoshop CS6.  I created this one on my iPad using an awesome drawing application called Paper 53.  I had an absolute blast working on this piece although it took many many hours to complete working with a stylus and a limited drawing application when compared to using Photoshop and a Wacom tablet.
Challenges entered:
Ike's World - Halloween

My project made Top 3 in Ike's Art Challenges, YAY :0)


Happy Stamping!
 THE SHARPIE DOMINO QUEEN
I design for Smeared Ink * Lost Coast Designs * Forever Dark Challenges * Altered Eclectic Challenges *About Art Accents

Halloween Luminary for Carmen's Veranda!

Howzit Everyone!
I'm a bit behind with sharing all the projects I've been making lately because it's crazy hector here in blogland with the massive month long, seventh annual, 31 Days of Halloween blog hop hosted by Smeared Ink.   It is also my other blog, DominoART's 5th annual 31 Days of Halloween Scarefest, and we participate in the hop as a Wicked Blogger, as well as Lost Coast Portal to Creativity where we, the Lost Coast Designs DT, are doing the hop for the first time this year!  That means I'm writing 2 posts per day for 31 days straight as well as hopping and commenting on 30+ blogs every day...phew, I'm exhausted just telling you about it LOL, but I'm loving every second of it ;0)


Anyway, I'll be playing catch up this week but here's today's share, my Day 19 project for Lost Coast Portal to Creativity.  I made a spooktacular Halloween Luminary featuring stamps from Carmen's Veranda, Halloween Background and Flying Skull.  

YAY!

I'm really pleased with how it turned out.  The glow is so pretty and look at the cool pattern it casts on the wall in the photo below ;0)


I love working with faux stained glass effects and this one came together nicely.  The luminary is quite large, measuring at 5.25" square and 6.75" high.  I've got a tall 3" wide flameless candle in there but you can easily create a candlescape with a few in varying sizes.  The photos above show the luminary with a white paper insert acting as a light diffuser and the last photo shows it without for more of a stained glass effect.  In the photos below you can see how pretty it is in daylight too.  I stamped 4 panels of clear artist's overlay acetate with the Carmen's Veranda Halloween image in jet black StazOn ink and applied Watermelon and Sunshine Yellow Ranger Adirondack Brights Alcohol Ink with an ink applicator.   I designed the cardstock frame to fit the stamp perfectly, cut eight window panels with an Xacto knife and stamped them all with CV's Flying Skull in Brilliance Pearlescent Purple ink.  Even in the dark the pearlescent ink glows too.  The frame folds were scored on a scoreboard and the acetate panels adhered to the inside of the four front facing windows and the remaining four were added to the inside for additional stability and to make the inside look just as gorgeous as the outside.


Besides all the fabulous prizes up for grabs in the hop with Smeared Ink you can also enter your Halloween and Day of the Dead makes in our various Halloween activities too!  We currently have 3 faBOOlous prizes you can win over at Lost Coast Portal to Creativity, all the info is below so I hope you'll come on over and join the fun!

Enter your spooktacular creations in BOO! our linky party HERE to win a $15 spending spree to LCD/CV! 
http://lostcoastportaltocreativity.blogspot.com/2015/09/boo-31-days-of-halloween-linky-party.html

You can also enter our first LCD/CV Facebook Challenge currently taking place on both of our FB Pages, Lost Coast Designs and Carmen's Veranda!  Click on over, read the pinned posts and enter Challenge #1 Something Wicked this Way Comes!


You can also enter our current monthly blog challenge #17 MONOCHROMATIC too!  Our Challenge prize is based on amount of entries received & you can enter as many times as you want so tell all your friends and come and play with us ;0)  Please make sure you read our blog event & challenge rules & our Facebook rules to ensure you qualify to win!

Thanks for visiting me today and stay tuned for more fun projects, I've been a busy bee!

Challenges entered:
Dream in Darkness
Create and Inspire
Corrosive Challenges

 Happy Stamping!
 THE SHARPIE DOMINO QUEEN
I design for Smeared Ink * Lost Coast Designs * Forever Dark Challenges*Altered Eclectic Challenges *

Thursday, October 1, 2015

31 Days of Halloween Creepy Grumpies Luminary - Altered DominoART

Howzit Friends!
I'm hosting my 5th annual DominoART Scarefest again this year and also playing as a Wicked Blogger in the massive 7th annual Smeared Ink 31 Days of Halloween again too!  September has been crazy busy preparing and now hectic October has begun with all the 31 DOH post writing, hopping, commenting, scavenger prize hunting and Halloween party celebrations!  I'm exhausted already LOL but it is always so much fun and totally worth it ;0)  So pop on over to DominoART and join us!  It's also not too late to join the fun coz I've got 4 spots left on my Wicked Players list so do come and join me!

Here's my Day 1 DominoART project - I made an altered domino luminary
I've got different photos up at DominoART plus a little video to get you in the mood!


the little guy on the lid is from the Love Grumpies rubber set
6 x standard white dominoes
1 x Lexicon game piece
hexagon glass jar
Sharpies
Black Archival Ink
Judikins Diamond Glaze
Krylon gloss sealer
Krylon Artists Workable Fixative
Tim Holtz spiderweb paper tape
black silk ribbon
orange flameless tea light

I found the hexagonal jar at Hobbycraft when I was in the UK for summer vacay and knew immediately what I wanted to make with it so came home with 2 LOL!
I stamped 6 white standard sized dominoes with the Smeared Ink Creepy Grumpies in black StazOn ink and heat set.  Also stamped the mini Love Grumpie onto a Lexicon game piece for the lid.  Each domino was coloured with Sharpies using my signature Sharpie Domino Queen technique.  I normally would seal the entire domino with a coat of Judikins Diamond Glaze but I only wanted their eyes to be super glossy and 3 dimensional so I sprayed them with Krylon Artists Workable Fixative first and then glossy sealer before adding the Diamond Glaze to their eyes.  Each domino was then adhered to the jar with Dianond Glaze.  I decorated the lid with a cut strip of Tim Hotz spiderweb paper tape and adhered the tile to the lid.  I completed my luminary with black silk ribbon and added an orange flameless tea light inside.  It looks soooooo wicked cool lit up!

See you over at DominoART and join the spooktacular fun!

Challenges entered:
Dream in Darkness

Happy Stamping!
 THE SHARPIE DOMINO QUEEN
I design for Smeared Ink * Lost Coast Designs * Altered Eclectic Challenges *Forever Dark

"Boo!" said Poe to the Raven - The Count Down to Halloween has begun!

Howzit Friends!
YAY! It's October and the countdown to Halloween has begun!
I'm hosting my 5th annual DominoART Scarefest again this year and playing as a Wicked Blogger in the massive 7th annual Smeared Ink 31 Days of Halloween too!  See my next post.

This year I also organized that we, the Lost Coast Designs DT, would also participate as a Wicked Blogger on our Lost Coast Portal to Creativity - event and challenge blog!
Pop on over and stay to play coz there's tons of prizes up for grabs!

Here's my Day 1 project
"Boo!" said Poe to the Raven
I found the wooden Boo set at Target and could not resist altering them!
I started out by painting them with black acrylic paint and while they dried I typed up the poem "The Raven" by Poe in Photoshop CS6, sized to fit the wooden shapes then printed out 3 copies.  I laid each shape onto a copy and traced the shape, cut it out and ran each piece through my Xyron to add permanent adhesive.  I then had a blast stamping up each piece.  The images are all stamped with onyx black Verafine ink with some overlapping and some masking going on.  I adhered each panel to the wooden pieces and completed them with Tea Dye and Black Soot Distress Inks applied with a Tim Holtz ink applicator.

Happy Stamping!
 THE SHARPIE DOMINO QUEEN
I design for Smeared Ink * Lost Coast Designs * Altered Eclectic Challenges *Forever Dark