News
The Summer BUZZ Collection
Re-Release Sale-bration thru July 19!
The Gilded Raven Release!
"Rocky Mountain Christmas"
Winter 2025 Collection
Adopt all the Loveleigh Kitties, they're PURRfect for every occasion!

Monday, December 1, 2014

Day 1 of 12 Days of Creepmas Blog Hop with Smeared and Smudged!

Happy December 1st Everyone and welcome to
Day 1 of our 12 Days of Creepmas Blog Hop with Smeared and Smudged!

 photo 12DaysofCreepmas2014copy_zpsa4cfcb71.jpg

Before I share my Day 1 project I want to let you know that I'm also hosting a one day mini blog hop today over on my DominoART blog too, there's just 3 blogs to visit there so I hope you'll stop by for a visit and enjoy some Christmas creations that won't scare you half to death LOL ;0)

http://dominoartblog.blogspot.com/2014/11/12-days-of-christmas-blog-hop-dominoart.html

 Now back to Creepmas....I'm a Jolly Blogger again this year and we've got lots of dark and twisty Creepmas creations to share with you!  The blog roll is below today's post as well as up in my sidebar over there on the right hand side in case you get lost along the way!  All the Jolly Bloggers are in the running for a grand prize and YOU can be in the running too by hopping and commenting on each blog every single day as a Merry Hopper!  There's more info about how to win the prize below my project ;0)

12 Days of Creepmas
Skellie Partridge in a Pear Tree

For Day 1 I'm sharing the cover of a mini chunky altered kiddies book.  The book has 6 pages including the covers totaling 12 sides, couldn't have got any more perfect for what I wanted to make ;0)  I'll be sharing a page every 2nd day and the blog hop ends on Dec 23rd.

I'm using Smeared Ink's 12 Days of Creepmas digi images which I think have been discontinued coz I couldn't find it on their website I'm afraid.


Here's the Partridge in a Pear Tree decorating the cover of my book which I started out by sanding and then covering the outside with gold Christmas gift wrap from my recycle stash.  I shrunk down the image in Photoshop CS6 and printed it out on Neenah cardstock and coloured with Copic markers.  For a bit of a Steampunk flair I hand pressed the image inside a Cuttlebug cogs and gears embossing folder and applied Distress Ink Fired Brick to the background.  I roughed up the edges with Tim's Paper Distresser tool and applied Black Soot Distress Ink to the edges.  I spritzed the entire panel with pearl Smooch spray for a touch of sparkle and then added Inkssentials Matte Accents to both the skellie bird and the pear plus some Viva Pearl Pen Magic Transparent White to give the red 'berry' areas some dimension too.  I adhered gold ribbon to the covers and then adhered the image and finished it off with green self-adhesive pearls, Christmas greenery and metal cogs and gears.  I also added the title of my book to the spine which I made with my Dymo Buddy label maker.


12 Days of Creepmas Merry Hopper
What You Have To Do: Hop through each of the 12 Days Blogs that are participating and leave a comment on each project.

The Rules: You must leave a comment on EACH participating blog every scheduled day to qualify for the prize drawing. Your comment should be about the project or something related (ie-no "Here's my comment for today" or "I'm here!"...these types of comments won't count!) and cannot be a copy/paste comment. If you miss a day or a blog, you will still qualify to receive a survival button, but will not qualify for the prize drawing.

Grand Prize Drawing
At the end of the 12 days, we will be drawing for an awesome shopping spree from Smeared Ink!
 

Don't forget to stop by my DominoART 12 Days of Christmas mini blog hop today too ;0)
See you again on Wednesday Dec 3rd for Day 2 of 12 Days of Creepmas!  You're next stop is Lisa!

 photo JollyBlogger2014_zpse7278384.jpg
Terra- Hop Hostess
Black Dragon
Maureen
Teresa
Julia
Sue The Nanny
Jane
Susan
Nan
Shell
Kim
Monique
Airless Chambers
Keren
Sarah
Leigh - U R HERE!
Lisa
Lady Brayton

 Happy Stamping!
 THE SHARPIE DOMINO QUEEN
I design for Smeared Ink * Lost Coast Designs * Altered Eclectics Challenge blog * About Art Accents

Friday, October 31, 2014

Happy Halloween!

BEST WITCHES FOR A SAFE AND 
SPOOKTACULAR HALLOWEEN!
Today is the grand finale of DominoART's 31 Days of Halloween Scarefest and mammoth blog hop with Smeared and Smudged!


 I've got 2 spooktacular projects up today for my Day 31 share so hop on over for a look see and while you're there my 31 Days of Halloween Wicked Players need your votes!

There's 31 clawesome projects to feast your eyes on so grab a cuppa, check them all out and then vote for your favourites!

Click HERE to be transported to my wicked world of altered game art!


Happy Haunting!
 THE SHARPIE DOMINO QUEEN
I design for Smeared Ink * Lost Coast Designs * About Art Accents

Saturday, October 11, 2014

A Tribute to Poe - Coffin Trinket Box & DominoART Necklace Part 2!

Hello Everyone!
As I mentioned yesterday we're into the 2nd week of my DominoART blog's 31 Days of Halloween Scarefest and blog hop with Smeared and Smudged!  39 blogs are playing this year and it's the largest month long blog hop in Smeared and Smudged history!  It's not too late to hop with us and win some awesome prizes in the daily Scavenger Hunts.  Check it all out on my Day 1 post!

My Day 10 post was a tribute to Poe coz October 7 was the anniversary of Edgar Allan Poe's mysterious death 165 years ago.  Using my new stamps designed by me, Autumn's Pencil, plus Smeared Ink's Poe I created a coffin trinket box with an altered domino necklace nestled inside.

"A Tribute to Poe"
Domino Necklace and Coffin Trinket Box
by Leigh S-B

modeled by Annabelle Lee
Yesterday I introduced you to my new rubber stamps I designed exclusively for Smeared Ink called "Autumn's Pencil"!

Autumn's Pencil by Leigh Snaith-Brunton - September 2014 Smeared Ink Rubber Club exclusive now available to the public for order in November!

Today's post is all about the Domino necklace!


I used a brand new standard size white domino straight out of the tin and stained it with 2 shades of Memento grey ink and randomly tapped the edges onto a jet black Archival ink pad then dabbed at it with a piece of scrunched up paper towel for a mottle stone effect before heat setting it.  The image of Poe was stamped onto the domino with black Archival ink and heat set again.  I then applied metallic Liquid Silver DecoColor paint pen to the bevelled edges of the domino and put it aside to dry.

I stamped the large background stamp from my Autumn's Pencil rubber stamp set, which I call the Black Rose coz of the large rose-like tangle onto white light weight cardstock with jet black Archival ink and cut two narrow strips the same width as the sides of the domino.  I added depth to the image with pencil in true Zentangle fashion and applied Black Soot Distress ink to the edges before adhering to the sides of the domino with double sided tape.
I sealed the entire domino with matte Delta Ceramcoat varnish and embellished the front with 2 black metal roses and metal alphabet embellies adhered with small drops of Judikins Diamond Glaze.  Once dry I adhered the bale/brooch combo to the back with E6000 adhesive and added a silver chain with a lobster claw clasp. 
 

 The necklace nestles nicely inside the matching coffin trinket box I made to go with it.

Happy Stamping!
 THE SHARPIE DOMINO QUEEN
I design for Smeared Ink * Lost Coast Designs * About Art Accents

Friday, October 10, 2014

A Tribute to Poe - Coffin Trinket Box & DominoART Necklace Part 1!

Hello Everyone!
We're into the 2nd week of my DominoART blog's 31 Days of Halloween Scarefest and blog hop with Smeared and Smudged!  It's not too late to hop with us and win some awesome prizes in the daily Scavenger Hunts.  Check it all out on my Day 1 post!

For today's post, Day 10, I created a tribute to Poe.
October 7, 165 years ago, Edgar Allan Poe was taken from us.  Using my new stamps, Autumn's Pencil, plus Smeared Ink's Poe I created a coffin trinket box with an altered domino necklace nestled inside.

"A Tribute to Poe"
Domino Necklace and Coffin Trinket Box
by Leigh S-B


Yesterday I introduced you to my new rubber stamps I designed exclusively for Smeared Ink called "Autumn's Pencil"!

Autumn's Pencil by Leigh Snaith-Brunton - September 2014 Smeared Ink Rubber Club exclusive now available to the public for order in November!


Today's post is going to concentrate on the Coffin Trinket Box. Stop by tomorrow for more info on how I made the Domino necklace!

The wooden coffin box is from Michaels and I stained it black with Black Soot Distress
Stain.  While it dried I stamped the large background stamp from my Autumn's Pencil rubber stamp set, which I call the Black Rose coz of the large rose-like tangle, twice onto white light weight cardstock and 4 times onto heavy weight with jet black Archival ink.  Also stamp the narrow border stamp 3 times, which I call the Bleeding Edge coz of the blood drips on both ends.  Add depth to the images with pencil in true Zentangle fashion.  Cut the Black Rose part out of 4 of them to make the layered rose on the front of the trinket box.

Remove the hardware on the box and adhere two of the narrow panels to the sides with Scotch Quick Dry adhesive.  Use a sharp blade to cute down the join so the box can open again.  Use the 3rd narrow panel for the top and bottom of the box.  Adhere the two large panels to the back and front of the box and make sure you center the rose on the front.  Trim the excess away with scissors.  Apply Black Soot Distress Ink to all the edges.

Cut the 4 rose sections slightly smaller each time and adhere them to black cardstock and cut out.  Layer them onto the front of the box with black pop dots.  For the inside of the box I scanned a page from Tales of Mystery by Edgar Allen Poe and lined the inside of the lid with it and added yellow silk fabric to the base.  Seal the entire box with matte Delta Ceramcoat varnish and put the hardware back on.  Add 6 Inkssentials black enamel dots to the front corners and embellish with 2 black metal roses and metal alphabet embellies adhered with small drops of Judikins Diamond Glaze.

Don't forget to stop by again tormorrow for more info on how I made my altered domino necklace!

Happy Stamping!
 THE SHARPIE DOMINO QUEEN
I design for Smeared Ink * Lost Coast Designs * About Art Accents

Thursday, October 9, 2014

"Autumn's Pencil" Smeared Ink exclusive Rubber Stamps by Leigh Snaith-Brunton!

Hello Everyone!

I'm excited to introduce you to a set of rubber stamps I designed exclusively for Smeared Ink called "Autumn's Pencil"!

Autumn's Pencil rubber stamp set by Leigh Snaith-Brunton - a Smeared Ink exclusive
 The Zentangle-Halloween-Autumn inspired themed set includes 11 images made with deeply etched red rubber and is exclusively available at Smeared Ink. There's Egyptian-styled Vampire cats, a Raven, Pumpkins, a Witch's Hat, a large background plus a narrow border stamp too! Look closely at all the details coz there's dripping blood, eyeballs and human teeth mixed in there too, oh my, Bwahahahahahaha!

My stamps are perfect for your Halloween and Fall projects as well as being quite versatile for cards and altered projects all year long too. You can add depth and dimension with pencil shading in true Zentangle style as well as colour them for any theme and any occasion! The possibilities are endless!

Autumn's Pencil was September's Rubber Club featured set and now it's available to everyone to order in November as well as all the Rubber Club's past sets! So you no longer need to be a member of the SI Rubber Club to buy their stamps but you get cool discounts if you do join the club ;0)

Here's a peek at two projects I've made using my stamps which will be posted here in two parts, Friday and Saturday, and is also my featured Day 10 project tomorrow for DominoART's 31 Days of Halloween scarefest and blog hop with Smeared and Smudged!

Annabelle Lee, my Bleeding Edge goth doll is modeling
Happy Stamping!
 THE SHARPIE DOMINO QUEEN
I design for Smeared Ink * Lost Coast Designs * About Art Accents

Tuesday, September 23, 2014

DominoART's 31 Days of Halloween Blog Hop with Smeared & Smudged! Come & Play!

 Something Wicked is coming to DominoART!


Helloooo Everyone!  I'm BACK after a year of surgeries from my failed mastectomy reconstruction in 2012 and I'm finally ready to get inky again!

My DominoART blog celebrates for the entire month of October with a our annual 
31 Days of Halloween Scarefest
in conjuction with the  


It's going to be a SPOOKTACUALR October!  

The Scarefest starts Oct 1st on DominoART but if you want to do the entire Smeared & Smudged blog hop you will start it on Terra's blog (link will be provided)!

I am looking for stampers/artists to join my Wicked Players and I will feature your altered game art through out October!  

All you have to do is pick a date in October or more and email me your Days in order of preference to sign up then create a Halloween inspired altered game piece (all game pieces can be used) and include at least one rubber stamped or digital stamped element.

Then email me one photo or a collaged photo of multiple images at least 1 week before your schedule Day(s) and provide a materials list then YOUR creations will be featured on DominoART for 31 days straight!!!  If you have a blog then please post your project on the same day and I will link to it, but you don't have to have a blog to play!  All levels of stamp artists are welcome to participate!

Sponsored Prizes still to be determined and will be based on how many of you come and play with me ;0)  If DominoART wins the grand Smeared & Smudged blog hop prize then I'll be sharing it with DominoART's winner(s) too!
 
Check out our previous events to get a better idea of what its all about.  Then check my Wicked Players schedule in the left side bar to see which Days are still available and then 
SIGN UP!!!  

It's going to be frightfully good fun so come and play with us...if you DARE ;0)  
Two events in one place makes it twice as exciting with prizes galore!  Don't miss it!

Happy Stamping!
 THE SHARPIE DOMINO QUEEN
I design for Lost Coast Designs

Saturday, May 10, 2014

Happy Mother's Day to my Mommy :0)

Happy Mother's Day!

I'm sharing the card I made for my precious Mom today!
Happy Mom's Day to you Mom, I love you :0)


I used two of Free Dearie Dolls digi images which I combined in Photoshop CS6, printed out and then coloured with Copics.  The text and all the effects were done in Photoshop too.  The image was then layered on decorative paper and adhered to a white folded card blank and embellished with self-adhesive pearls.
 

 Free Dearie Doll images used:
A Girl and Her Kitty
Sunflower Girl

Happy Stamping!
 THE SHARPIE DOMINO QUEEN
I design for Smeared Ink * Lost Coast Designs * About Art Accents

Saturday, April 19, 2014

"Hoppy Easter" Zentangle Vampire Bunny #2

Happy Easter Saturday Everyone!
I decided to share my 2nd Zentangle Bunny creation today instead of Sunday :0)


I used Smeared Ink's Vampire Bunny digi image again with a lot more Zentangle action this time!
Click here to check out "Little Miss Rose Toes" I shared yesterday!


I used my favourite matting tools of all time to cut the black and white mats - Perfect Paper Craftings newest Mini Perfect Layers tools and Perfect Cutting Mat.

https://www.perfectpapercrafting.com/brand-ambassador-leigh-brunton/

Challenges entered:
Smudgy Antics Anything Goes at the Smeared and Smudged Forum

Have a eggtastic Easter weekend!
Happy Stamping!
 THE SHARPIE DOMINO QUEEN
I design for Smeared Ink * Lost Coast Designs * About Art Accents

Thursday, April 17, 2014

"Little Miss Rose Toes" Zentangle Vampire Bunny #1

Woohoo, the Easter Bunny will soon be here with lots of chocolatey goodness and I'm celebrating in true Smeared Ink style and Zentangled up a storm with some Vampire Bunnies!

Say hello to Little Miss Rose Toes, isn't she the cutest Bunny you ever did see ;0)
I used Smeared Ink's Vampire Bunny digi image.
Stop by Easter Sunday to see my 2nd Zentangled bunny too!


I used my favourite matting tools of all time to cut the black and white mats - Perfect Paper Craftings newest Mini Perfect Layers tools and Perfect Cutting Mat.

https://www.perfectpapercrafting.com/brand-ambassador-leigh-brunton/

 I'm taking a little break from the Smeared Ink design team until I've got all my surgeries behind me but I'll still be sharing my Smeared Ink creations until I'm back!

Challenges entered:
Smudgy Antics Anything Goes at the Smeared and Smudged Forum

Have a eggtastic Easter weekend!
Happy Stamping!
 THE SHARPIE DOMINO QUEEN
I design for Smeared Ink * Lost Coast Designs * About Art Accents

Monday, March 31, 2014

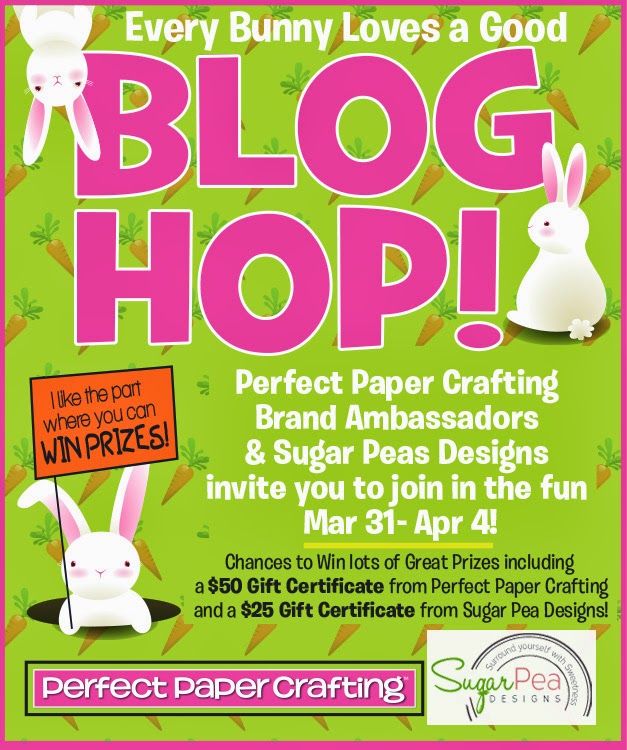
Perfect Papers Crafting Blog Hop & Smeared Ink DT project: Perfect Layers Mini Tools Introduction!

Howzit Everyone!
As a Perfect Paper Crafting Brand Embassador I'm excited to be participating in this blog hop introducing our newest tools the Perfect Layers Mini Border Tool set and Perfect Cutting Mat! 

The hop takes place today and is open for commenting from 9am PST, but you've got until April 4 midnight PST to hop your way through the blogs and comment on ALL of them to be in the running for some awesome prizes!  We are giving away a $50 gift certificate to our online store and Wendy Ramlakhan of SugarPea Designs is giving away a $25 gift certificate to her new online stamp store too.  Her stamps are super cute so be sure to check them out!!! We will announce the winner Sunday, April 6!
 
https://www.perfectpapercrafting.com/brand-ambassador-leigh-brunton/

 If you're not familiar with these awesome tools you're going to want to hop with us and see what you've been missing out on!  You can now say goodbye to buying personal paper cutters and wasting your paper and cardstock to wonky cuts!  First Perfect Papers Layers tools blew our minds with how easy it is it to cut perfect sized mats time and time again without the need to measure and now we've got the new Minis which are the perfect travel companion too!  It's now easier than ever to take your favourite tools to a crop or a friends house to create!


 Perfect Paper Crafting also has a cutting mat too.  It's a nice workable size that works perfectly with the original Paper Layers and the Minis!  Have I said the word "perfect" enough yet, LOL!  Check out my project to see just how PERFECT these tools really are ;0)  Click the picture below to visit my Ambassador page and use my special coupon code Leigh5% to get 5% off your entire order!

https://www.perfectpapercrafting.com/brand-ambassador-leigh-brunton/
NEW Mini Perfect Layers tools and Cutting Mat
The blog roll is below my project if you need to start the hop from the beginning or if you get lost along the way :0)

My project today is also my Smeared Ink design team project for this week!  I've created a bound loose page "Intellectual Musings" Journal and I hope you like it :0)

showing the front and back of the covers and pages
 I'm recovering from surgery at the moment that effects my right arm and I'm right handed so I started out my project by colouring 6 of Smeared Ink's Septem Liberalis digi images in Photoshop CS6.  I printed two out in full colour for the covers and then lightened all 6 images to create the pages of my journal.  The lightened ones are now perfect for writing on.  I cut all the images out with scissors and distressed the edges with Tim's Tonic Paper Distresser tool.  I used a Marvy punch to decorate all 4 corners of all the images and applied Black Soot Distress Ink to all the roughened edges.

please click to enlarge - sorry about the size!
I adhered all the images to black cardstock with Scotch Quick Dry Adhesive and used my Perfect Layers Mini tool to cut the 1/16" black mats.  The way these tools work is there's a a lip on the tool that corresponds to each border measurement.  The lip butts up to the edge of the stamped panel or photo and the stainless steal edge on the tool lets you cut with a craft knife perfectly every time.  There are 4 different size border measurements on each mini tool that allow you to create mats/borders for your projects ranging from 1/16 to 5/8 of an inch!  The original Perfect Layers tools start at 1/16 but go up 1 inch!  Now you can decide which tool set is best suited to your needs!


I then adhered the cover panels to DCWV Heirloom Stack decorative paper and cut 5/8" borders and did the same to all the pages.  I punched each corner with the Marvy punch again before adhering them all to black cardstock and cut 1/16" borders.  I punched a 1/16" hole with a punch into the cover and added a tiny brass Bead Landing Found Objects ruler charm with a tiny black brad before adhering the cover back to back with the first page.  All the remaining pages and back cover where adhered back to back to form the loose journal pages.

back and side view of the bound journal
 I then stacked them and bound them together with black cord tied in a bow.  I do plan to further decorate the cover with assorted embellishments but I need to wait a while until I can operate my Cuttlebug ;0)  Thank you for visiting with me today!  Now off you hop to Nancy!

BLOG ROLL
   Perfect Paper Crafting and Laura Lynn
   Wendy Ramlakhan
   Pam Sparks
   Roxie Glaza
   Jenny Gropp
  Susie Moore
   Kim O'Connell
Jeanie Witmer
Heather Hudson
Lori Brown
Kat Ancheta
Dana Joy
Kristie Maynard
Kim Bush
Diane Bove
Patti Gilliam
Linda Kaiser
Cathie Rigby
Linda McClain
Leigh Brunton -YOU ARE HERE!
Nancy Baier
Jenn Cocran
Lezlye Lauterbach
Faith Abigail Prado

  Happy Stamping!
 THE SHARPIE DOMINO QUEEN
I design for Smeared Ink * Lost Coast Designs * About Art Accents

Sunday, March 23, 2014

Lost Coast Designs + StencilGirl Blog Hop starts NOW!

Howzit Everyone!

Today you're in for a special treat coz the Lost Coast Designs DT has teamed up with the StencilGirl DT for a ONE DAY blog hop with an awesome giveaway up for grabs!

April 2 update: The Winner is PK SEWS!  Congrats :0)

You've got ONE WEEK to hop to each blog and leave us some love to be eligible for the prize!  The more blogs you visit and leave comments on the better your chances are at winning it!  One lucky winner will receive Two 9" x 12" stencils from StencilGirl and a $25 gift certificate to Lost Coast Designs!  The giveaway will close on Sunday March 30 at 11:59pm Central Time so you've got plenty of time to join the fun ;0)  The winner will be announced soon after so stay tuned!

You should have arrived here from StencilGirl Talk and your next stop on the hop is Mary but don't worry if you get lost along the way coz the complete blog roll is below and will be included in all the posts along the way too!

UPDATE:  Thank you everyone for visiting and leaving me such wonderful comments, I truly appreciate them all :0)

I'm sharing 3 projects with you here today featuring Lost Coast Designs rubber stamps and StencilGirl stencils.  I'll be blogging each project in more detail over the next 2 weeks on the Lost Coaster's Review blog so please stop by if you'd like to find out more deets on each project ;0)

BEWARE THE GUARD CAT!

For this card I used 2 of Lost Coast Designs newest stamps - CityScape and the Devil in Disguise kitty makes the perfect guard cat don't you think ;0)  To give you the impression that the entire city is protected by a whole army of guard cats I used the 6 x 6 StencilGirl Cat stencil to create the cat shadow background and I hand wrote the sentiment with a black Micron marker.

INKY BIRD

For this card I used 2 of Lost Coast Designs new stamps - Feather Bird and Feathers for the background.  I also made my own decorative mat by using StencilGirl's 6 x 6 Feathers 6 stencil to create the feathery abstract pattern.

CATS ARE ENIGMAS

For more deets on this card please visit Lost Coaster's Review blog March 26, click HERE!

  For this card I used Lost Coast Designs Devil in Disguise kitty again and had a ball creating the three dimensional jigsaw puzzle background with StencilGirl's 6 x 6 Jigsaw Puzzle stencil with glue and Perfect Pearls :0)  The sentiment I designed myself and will be part of my new digi stamp line I'm going to launch this year once I'm recovered from the few surgeries I have to have done!  Yep, this is the first I'm mentioning that I've got a digi line in the works and I'm super excited ;0)

I also had the pleasure of using some awesome new tools to create the perfect mats for these projects!  Come back next Monday for our Perfect Paper Crafting Blog Hop for the scoop on the new Perfect Layers Minis!  In the meanwhile click the pic for tutorials and use my special code to get 5% off your entire order!

https://www.perfectpapercrafting.com/brand-ambassador-leigh-brunton

Thanks for visiting with me today!  I hope you've been inspired by what I did with stamps and stencils but I'm not done coz I've also got another treat for you on my DominoART blog later in the hop too :0)  Have a fabulous day and now off you hop to Mary!


Happy Stamping!
 THE SHARPIE DOMINO QUEEN
I design for Smeared Ink * Lost Coast Designs * About Art Accents

Monday, March 17, 2014

"MAMA" movie inspired digi creation for Smeared Ink!

Happy St. Patrick's Day Everyone!

Today I'm sharing a Smeared Ink Design Team digi creation which I also designed for the current Smeared and Smudged Forum "Oh the Horror" challenge.  This month is "Clean Grunge" inspired by the movie trailer for "Mama".  That's one spooky looking movie and I hope you like what I came up with ;0)


For this one I used Smeared Ink's "Specimen Jar Man" for the background and one of the butterlies for my "moth" and the girl is "Beyond".
All the colouring and digi designing was done in Photoshop CS6.

Come and join the fun over at the Smeared and Smudged Forum, membership is free and there's lots of things to do and see and prizes to win :0)
 
Happy Stamping!
 THE SHARPIE DOMINO QUEEN
I design for Smeared Ink * Lost Coast Designs * About Art Accents