Join us for our Christmas countdown to Dec 25!
 Play in our big end-of-year Challenge+Hop!
December's Special Release Digi Stamp!
Festive Felines 2024 Christmas Release!

Thursday, March 19, 2015

Alice in Wonderland MADNESS Blog Hop - "Cheshire Cat" Wind-chime

Howzit Everyone!
Welcome to our March Smeared and Smudged members blog hop
"Alice in Wonderland - MADNESS"

I'm a huge Alice fan and couldn't wait for this hop to start!  I created a Cheshire Kitty diorama wind-chime featuring Smeared Ink's Cheshire Cat and the mushroom from the Alice digi.  If you're hopping with us then you arrived via Sarah but if you started here and would like to hop from the beginning then the blog hop roll is below my project!


Here's a little video so you can see it in action!
If the video doesn't open then click HERE

 My Ever After High doll and American McGee kitties think it's most Wonderlandful ;0)


 I love upcycling cardboard inner tubes from duct tapes and sellotapes and couldn't resist using this  large one I've had in my stash that came from some kind of packaging.  I painted it with Black Soot Distress Stain and while it dried I got to work on my images.  I printed out the Cheshire Cat digi image three times and the mushroom from the Alice digi twice, coloured the areas I needed with Copic markers and then fussy cut out all the components of the diorama.  When I made my Down the Rabbit Hole ATC I removed the Cheshire Cat from the original image in Photoshop CS6 and used that for my background.  I printed it out, creased it and applied Spun Sugar and Shaded Lilac Distress Inks with a sponge applicator tool and some metallic silver highlights to the swirls.   Before assembling the diorama I poked holes into the tube and added the hanging loop and hung the 3 wind-chimes from a variegated metallic fiber.  The diorama components where all adhered in place with little flaps cut from black cardstock and glued with Scotch Quick Dry adhesive.  The background was added last and then covered with black cardstock.  For the outside I used the same Cat-less background image, elongated it, added a purple gradient background and printed it out twice and adhered the panels to the outsides of the tube.  All the tube edges were finished off with a black broad point Prismacolor marker.  For a touch of sparkle and magic I applied Vive Pearl Transparent Magic White dimensional paint to the kitty's tail, hair, the mushroom spots and the "We're All Mad Here" text.
 

Thank you for visiting with me today!  Your next stop on the hop is Susan S!
I'm entering this one into the following challenges:
Haunted House Designs - The Naughty Corner 
 Addicted to Stamps - Anything Goes 
Ike's World Challenges - Coloured Hair
Ike

Happy Stamping!
 THE SHARPIE DOMINO QUEEN
I design for Smeared Ink * Lost Coast Designs * Altered Eclectic Challenges *About Art Accents

Tuesday, March 17, 2015

Down The Rabbit Hole ATC - DT Smudgy Antics!

Howzit Everyone!
It's my turn again to share some DT inspiration on Wednesday on our Smudgy Antics Challenge blog!   I'm getting my project up a bit earlier coz I'm also playing in the Smeared and Smudge monthly member blog hop "Alice in Wonderland - Madness" on Thursday.  Lots going on so let's get started!

"Down the Rabbit Hole"
My American McGee White Rabbit keeping an on things
 Smeared Ink hosted a one for one ATC swap on our Smeared and Smudge Facebook group and the theme was Down the Rabbit Hole and you all know I love Alice so yep, I played ;0)

I used Smeared Ink's Cheshire Cat and White Rabbit digis from the Wonderland set and on the back I stamped the ATC Info stamp from the Letterbox Backgrounds rubber set.

Clocks have 4 hands in Wonderland, no one has a clue what time it is!
I performed some Wonderlandian magic in Photoshop CS6 and made the Cheshire Cat disappear from the background image, filled in the design, added a purple gradient sky and altered the shape from round to ATC sized.  I also removed parts of the design on the White Rabbit image and overlaid the Rabbit and a portion of the clock onto the background before printing it out on white cardstock.  I then printed out just the rabbit.  I coloured everything with Copics and fussy cut out the Rabbit and layered her onto the ATC with dimensional silicone glue.

a closer look at the details
 I added metallic gold detail to the clock text and another set of metal clock hands attached with a tiny brass brad.  I hand wrote the "down the Rabbit hole" text with a black fineliner Copic marker and distressed the edges of the ATC with Tim's Tonic tool and edged it in metallic gold.  For the finishing touch I added some sparkle with a Vive Pearl Transparent Magic White dimensional pen on the Rabbit's tail, hair, the arrow on the sign and some dots in the corners.  The ATC Info image was stamped with black Archival Ink onto another ATC and I adhered it to the back with Scotch Quick Dry adhesive.

 
Don't forget to come back on Thursday March 19 for our "Alice in Wonderland - Madness" member blog hop, I can't wait to share my project so here's a sneaky peek ;0)

There's also still lots of time to play in our Smudgy Antics "Always Anything Goes" challenge this month AND don't forget about the Lost Coast Designs "50 Shades of GREEN" readers progressive blog hop I'm hosting this month!  Hop all the blogs already up, get inspired and join the hop yourself for the chance to win a $20 gift certificate to spend at Lost Coast Designs!  Click the banner below for all the details on how to play and win!

http://lost-coasters-review.blogspot.com/2015/03/50-shades-of-green-readers-blog-hop.html

Happy Stamping!
 THE SHARPIE DOMINO QUEEN
I design for Smeared Ink * Lost Coast Designs * Altered Eclectic Challenges *About Art Accents

Wednesday, March 11, 2015

Shades of Green ATCs - "50 Shades of GREEN" Lost Coast Designs Readers Blog Hop Giveaway!

I'm super excited to be hosting
Lost Coast Designs very first
Readers Progressive Blog Hop Giveaway!
the
"50 Shades of GREEN"
blog hop starts today on the
Lost Coaster's Review blog and EVERYONE is invited to participate and be in the running to win a $20 gift certificate to spend at
Lost Coast Designs!

Members of the Lost Coast Design Team kick off the hop today at 11am PST so pop on over, hop all the blogs in the Blog Hop roll Inlinkz collection, which is below my projects, get inspired and join the fun!

Link up your own Shades of GREEN projects from today through to March 30 and keep the blog hop rolling!

 Visit the Lost Coaster’s Review blog for all the info and rules on how YOU can play and win!

The hop will close at NOON PST on March 30th and the winner announced on March 31st and some Honourable Mention blog badges
are up for grabs too!


 I'm sharing 3 ATCs here today to get you in the mood and inspire you to join the fun ;0)  Plus another project which is over on my DominoART blog too!
All ATCs feature Lost Coast Designs rubber stamps only!
 All 3 ATCs were designed using watercolour paper cut to size (Artist Trading Cards must be 2.5 x 3.5 inches or 64 x 89 mm) and I used the Distress Ink Watercolour technique to blend and achieve depth and various shades of green with a watercolour brush pen directly from the stamped image and from the ink pad itself.  I used Peeled Paint and Forest Moss Distress Inks on them all to achieve the various effects. 

3D water droplets enhance her head piece and the background
Lily was stamped with Forest Moss and Peeled Paint Distress Inks, watercoloured and extra details added with a Peeled Paint Distress Marker.  3D water droplets were added with a Vive Pearl Magic Transparent White pen.  Peeled Paint DI and Stickles Crystal glitter with a green tinge was applied to the edges of the white paper roses and the detail on Lily's dress.

click to enlarge
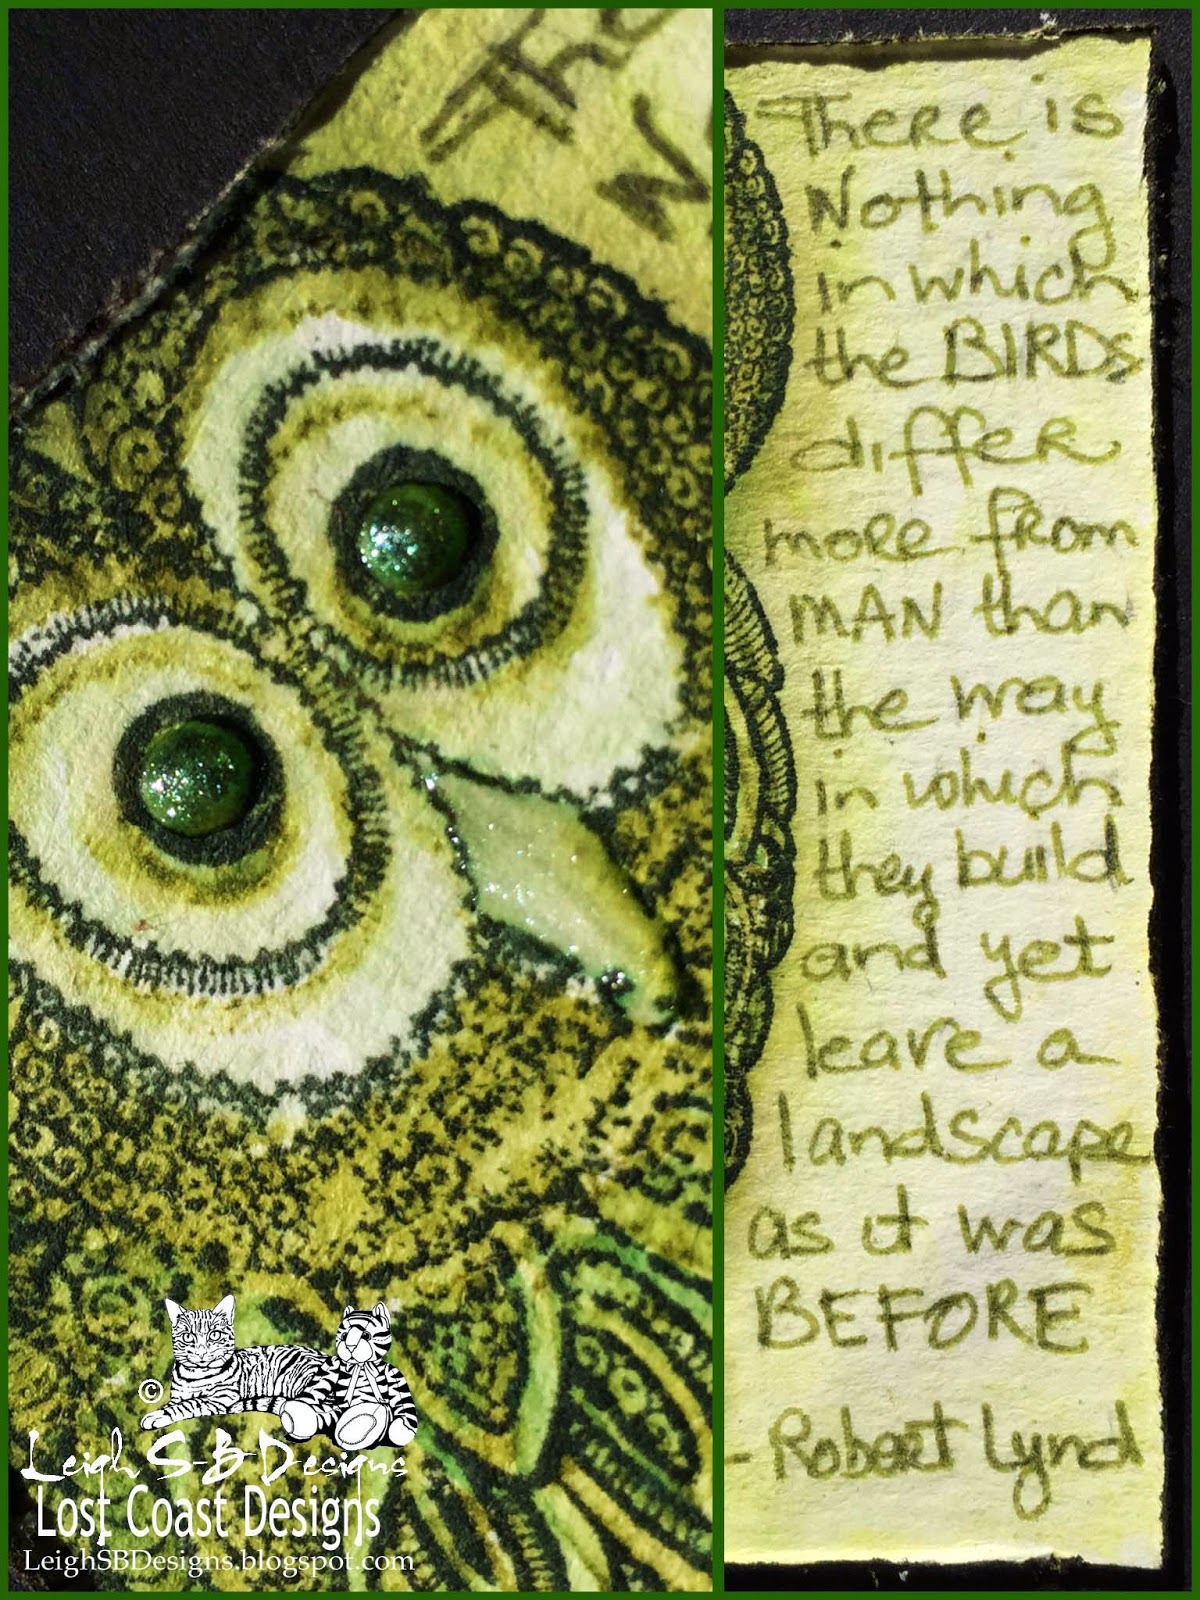
For this ATC I stamped the large owl from the Owl Set in Forest Moss using a stamp positioner.  The image was watercoloured with Forest Moss and Peeled Paint DI.  The owl image was then over stamped (using the stamp positioner tool) in black Archival Ink to make the image pop.  Dimension was added to the eyes and beak with a Vive Pearl Magic Transparent White pen.  This 3D paint truly is magic because it has a whitish shimmer to it and it takes on whatever colour you apply it to which you can see here...the eyes look dark green and the beak is a pale greenish-white.  I hand wrote the Bird quote in Peeled Paint Distress Marker.


I used the Feathered Bird and Feathers stamps for my last ATC.  The Feathered Bird was stamped with Forest Moss DI and watercolour blended to enhance it's inky style.  The Feathers image was overstamped with Peeled Paint DI with some minimal blending.  The silver Peace bead was attached with green floral wire and tied at the back after I punched tiny holes into the ATC.  I distressed all 3 ATCs with Tim's Tonic Paper Distresser tool and the rough edges stained with Forest Moss DI.

Thank you for hopping with me today!  I hope I've inspired you to get out all your green supplies and join the fun by participating in our blog hop!  The blog hop roll Inlinkz collection is below!  So off you hop and see what fabulous Shades of Green projects await you!


This hop is going to be so much fun,
are you excited to get stamping?

May the luck of the Leprechauns be with you!
Challenges Entered:
Eclectic Ellapu

Happy Stamping!
 THE SHARPIE DOMINO QUEEN
I design for Smeared Ink * Lost Coast Designs * Altered Eclectic Challenges *About Art Accents

Monday, March 2, 2015

Winter Raven - a Smeared Ink DT card

Happy Monday to you all!
It's a new week of a new month with a new Smudgy Antics challenge so here's my Smeared Ink DT inspiration for you!  Smudgy Antics challenges are always Anything Goes and the darker and twistier the better but we do welcome all sorts so come and play with us!

Winter Raven
A card featuring the Raven and portions of the tall and narrow border image from my Zentangled inspired exclusive Smeared Ink rubber stamp set, Autumn's Pencil.


I stamped the Raven twice onto Neenah Solar White cardstock in Tuxedo Black Memento ink and used Copic markers to colour them in shades of blue-green and touches of warm grey to add some shadows and his eye is yellow to enhance his piercing gaze.  I then fussy cut out the whole Raven and just the wings from the 2nd.  I left a narrow border around the Raven and coloured just that portion with brown Derwent Pastel pencil and blended with a Dove Blender pen.


I used a blank white folded card and ran just the front of the card through my Cuttlebug to emboss it with the floral design.  The embossing folder left a narrow border on the top and bottom so I stamped portions of the tall and narrow border stamp and coloured with the same Copic colours.  I then added a touch of Pumice Stone Distress Ink to enhance the embossed design.  I distressed the edges of the Raven, wings and the card and applied Black Soot Distress Ink to all the edges.  The Raven was adhered to the card with Scotch Quick Dry adhesive and the wings were first gently folded in the middle and adhered with dimensional silicone glue to give the impression the Raven is fluttering his wings.  I embellished the card with 3 smokey-grey self-adhesive pearls as my finishing touch.

Showing the fussy cut out Raven and layered 3D wings!
Thank you for visiting me today and before you go, just in case you didn't know, our Smeared and Smudged Forum has a new home on Facebook so stop by and join our new group where you can play in lots of themed challenges, swaps and blog hops galore too!

Have a great week and
Happy Stamping!
 THE SHARPIE DOMINO QUEEN
I design for Smeared Ink * Lost Coast Designs * Altered Eclectic Challenges *About Art Accents